MVC + Code-First + Azure Part 1: Local Development
The information in this post is out of date.
Visit msdn.com/data/ef for the latest information on current and past releases of EF.
This entry will guide you through the process of creating a simple workout tracker application using ASP.NET MVC and the Code First development approach. MVC stands for Model View Controller you can find more information on MVC here. The application will reside in Windows Azure, and it will be backed by a SQL Azure database. By the end of the article, we hope you understand how to use Code First with MVC, and how to test and deploy an application using MVC, Code First, SQL Azure, and Windows Azure.
Here is an overview of what we will cover:
· How to develop an MVC application using Code First
· Seeing some of the Code First basics at work
· How to seamlessly use a SQL Azure database
· Testing the application locally using the Windows Azure Tools for Visual Studio
· Deploying the app to a Windows Azure staging Deployment using Visual Studio
· Moving the application to a Production Deployment through the Azure Portal
Each topic will not be covered in depth in this article. However, you will find links wherever further explanation is required. Also, be aware that the MVC application we are building is for demonstration purposes only so we have taken the liberty to break conventions for the sake of brevity. We hope you find this post useful, and encourage you to leave any questions or comments at the bottom of the post!
Entity Framework and Azure
Entity Framework 4.1 and Azure work quite nicely together, as long as the configuration settings are correct. Here are some of the key things to have in mind while deploying a CF app to Azure. If any of this is not clear to you, please continue reading, as each bullet is explained in the appropriate context below:
· Add PersitSecurityInfo=true to the connection string to allow Code First to create the database in SQL Azure. Make sure to remove PersistSecurityInfo from the connection string after the database is created.
· Ensure that any assembly referenced in your project that is newer than .NET 4.0 has Copy Local = true
· Make sure all third-party assemblies are signed
· Uploading the security certificate is key for Visual Studio to communicate with Windows Azure
· Make sure to set CustomErrors on Web.Config to the RemoteOnly so that errors are only shown on remove clients.
· Use the ‘Upgrade’ option on the Windows Azure Management portal whenever you make changes to the application. It is faster than re-deploying the app from visual studio
· System.Transactions transactions cannot be used with SQL Azure. Please see this article for General SQL Azure Guidelines and Limitations
· You may run into connection retry issues. Check out this blog post for troubleshooting options.
Pre-Requirements
To complete this exercise, you must:
1. Download and Install the Windows Azure SDK and Windows Azure Tools for Microsoft Visual Studio.
2. Download and install the latest version of the NuGet Package Manager.
3. Steps 1 and 2 will allow you to create and deploy a Windows Azure app locally. To deploy the application to the cloud, you must obtain a Windows Azure account. Click here to sign up for Windows Azure or here to obtain a free trial (free trial is only available through June 30th, 2011).
4. Create a SQL Azure account. For that, you can follow the steps here.
Getting Started: Creating a Windows Azure Project
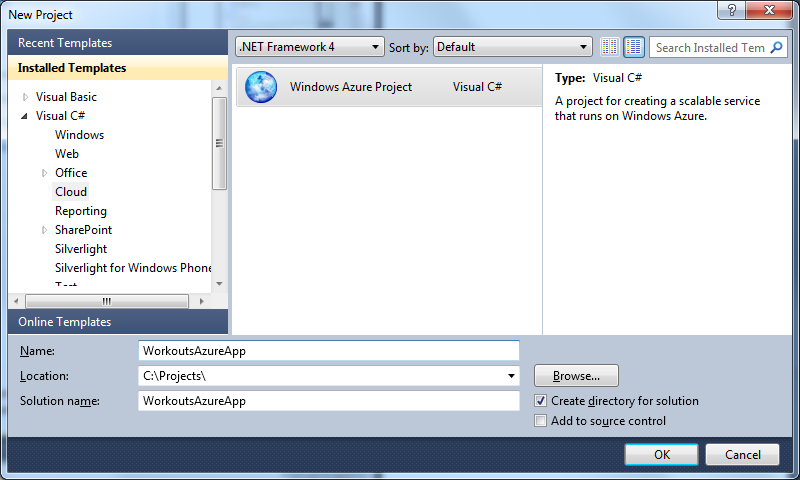
After fulfilling the list above, we can get started with development. The first step is to create a new Windows Azure Project in Visual Studio. To do so, press Ctrl + Shift + N and on the New Project window, click on Cloud under the Visual C# node, then select Windows Azure Project. Name your project WorkoutsAzureApp, and click OK.
A window called New Windows Azure Project will come up. We will use the window to add the MVC Role to our application. Double-click on ASP.NET MVC 2 Web Role, then click OK. Note that we can also use MVC3, however, we are using MVC2 since it is the latest version offered through the ‘New Windows Azure Project’ dialog at the time of writing.

A new window will come up asking you if you would like to create unit tests. Select No to skip the creation of unit tests, and then click OK. We skip creation of unit tests for the sake of simplicity, however, you should strongly consider using unit tests in your application. After these steps, we will get a project that we can immediately begin working with.
Before we can use code first, we must bring in the Entity Framework assembly. We can get it from NuGet by right clicking the references node in the Solution Explorer, and selecting Add Library Package Reference… When the window opens, select Online from the menu on the left, then select EFCodeFirst from the list, and click Install. A dialog will show up asking to accept the License terms. Click ‘I Accept’ and then close the Add Library Package Reference window.

Creating the Model
We will begin by creating the model, which is where we will have most of our interaction with code first. We will create a new model by right-clicking on the Models folder on the Solution Explorer, then going to Add, and selecting New Item… On the new screen, create a new class called WorkoutsModel.cs
We can start creating the model for our workouts. Within the namespace, we will have two classes that will represent our entities named Workout and Gear. Feel free to delete the WorkoutsModel class as we will not use it. We will also have a class named WorkoutsContext which will inherit from DBcontext, and will help us keep track of our entities. Note that it would be best practice to have your POCO classes and your context in different files. We are keeping them in the same file to keep our walkthrough short.
Here is what our classes will look like:
using System; using System.Collections.Generic; using System.ComponentModel.DataAnnotations; using System.Data.Entity; using System.Data.Entity.Database; namespace MvcWebRole1.Models { public class Workout { public Workout() { Gear = new List<Gear>(); } public int Id { get; set; } [StringLength(50, MinimumLength = 3)] public string Name { get; set; } public TimeSpan? Duration { get; set; } public decimal? Distance { get; set; } public virtual ICollection<Gear> Gear { get; set; } } public class Gear { public Gear() { Workouts = new List<Workout>(); } public int Id { get; set; } public string Brand { get; set; } public string Name { get; set; } public virtual ICollection<Workout> Workouts { get; set; } } public class WorkoutsContext : DbContext { public DbSet<Workout> Workouts { get; set; } public DbSet<Gear> Gear { get; set; } protected override void OnModelCreating( System.Data.Entity.ModelConfiguration.ModelBuilder modelBuilder) { modelBuilder.Entity<Workout>().ToTable("Workouts"); modelBuilder.Entity<Gear>().ToTable("Gear"); modelBuilder.Entity<Workout>().Property(c => c.Name).IsRequired(); } } } |
The first class will be for workouts. Each workout will have an ID, name, duration, distance, and a collection of gear associated with the workout. The second class is called Gear and it will contain an Id and two strings for the brand and name respectively. Observe some of the conventions at work. For instance, Code First will use the Id property in Workouts as the primary key based on convention. Additionally, data annotations are used to shape the data. The StringLength annotation above the Workout’s Name property is an example of this.
Creating the Controller
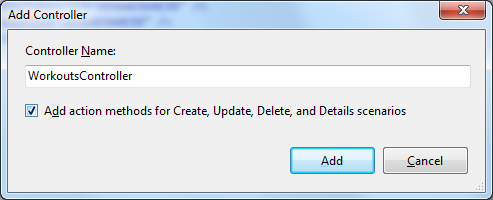
Create a controller by right clicking on the Controllers node on the solution explorer, selecting Add…, and clicking on Controller… . Enter WorkoutsController on the textbox, and select the checkbox to add action methods for all CRUD scenarios. Now, press Add.
By selecting the checkbox above, MVC scaffolding provides us with a set of methods we can fill in to complete our controller. Some of the noteworthy methods will look like the following:
using System; using System.Collections.Generic; using System.Linq; using System.Web; using System.Web.Mvc; using MvcWebRole1.Models; namespace MvcWebRole1.Controllers { public class WorkoutsController : Controller { WorkoutsContext db = new WorkoutsContext(); // // GET: /Workouts/ public ActionResult Index() { return View(db.Workouts.ToList()); } // // GET: /Workouts/Details/5 public ActionResult Details(int id) { Workout w = db.Workouts.Find(id); return View(w); } // // POST: /Workouts/Create [HttpPost] public ActionResult Create(Workout w) { try { if (ModelState.IsValid) { db.Workouts.Add(w); db.SaveChanges(); return RedirectToAction("Index"); } return View(w); } catch { return View(); } } // // GET: /Workouts/Edit/5 public ActionResult Edit(int id) { Workout w = db.Workouts.Find(id); return View(w); } // // POST: /Workouts/Edit/5 [HttpPost] public ActionResult Edit(Workout w) { try { if (ModelState.IsValid) { var workout = db.Workouts.Find(w.Id); UpdateModel(workout); db.SaveChanges(); return RedirectToAction("Index"); } return View(w); } catch { return View(); } } } } |
Note that at the top we created an instance of WorkoutsContext named db. We read from it when we query for workouts on the Index and Details methods, and we change it when we create or edit our workouts.
Creating Views
We need to build to be able to create strongly typed views from our controller methods. You can build the project by pressing Ctrl+Shift+B). We create views for each method by right clicking on the method name in the code itself, and selecting Add View. In the new dialog, select ‘Create a strongly-typed view’ and pick MvcWebRole1.Models.Workout from the View Data Class dropdown. We will use the same class for all of our views, as they will all be for workouts. The view content will be unique for each view: For the Index view, select List from the View Content dropdown. For the Details method, select the same Details. Follow this pattern for the Create and Edit methods.
We will only need to slightly alter the views. We will make sure to pass in the item keys to the ActionLink methods. Here is what they will look like:
<td> <%: Html.ActionLink("Edit", "Edit", new { id=item.Id }) %> | <%: Html.ActionLink("Details", "Details", new { id = item.Id })%> </td> |
In the above example, we have removed the ‘Delete’ action as we won’t be implementing it on this walkthrough.
Database Initializer
Code First allows us to plant seed data into our database by using a database initializer. We will add a new class to our Workouts Model for the sake of simplicity. Alternatively you could create this in a separate file under the Models folder. Here is what the initializer looks like:
public class WorkoutsInitializer : DropCreateDatabaseAlways<WorkoutsContext> { protected override void Seed(WorkoutsContext context) { Gear Bicycle = new Gear { Name = "P2", Brand = "Cervelo" }; Gear Wetsuit = new Gear { Name = "Torpedo", Brand = "TYR" }; Gear Watch = new Gear { Name = "310xt", Brand = "Garmin" }; Workout swim = new Workout { Name = "Swim", Distance = 3800, Duration = new TimeSpan(1, 10, 0), Gear = new List<Gear> { Wetsuit } }; Workout bike = new Workout { Name = "Bike Ride", Distance = 112, Duration = new TimeSpan(6, 15, 0) }; Workout run = new Workout { Name = "Run", Distance = 26, Duration = new TimeSpan(4, 20, 0) }; bike.Gear = new List<Gear> { Bicycle, Watch }; run.Gear = new List<Gear> { Watch }; context.Gear.Add(Bicycle); context.Gear.Add(Wetsuit); context.Workouts.Add(swim); context.Workouts.Add(bike); context.Workouts.Add(run); context.SaveChanges(); } } |
We can ensure the initializer gets called by adding the following setting to Web.config, within the <configuration> node:
<appSettings> <add key="DatabaseInitializerForType MvcWebRole1.Models.WorkoutsContext, MvcWebRole1" value="MvcWebRole1.Models.WorkoutsInitializer, MvcWebRole1" /> </appSettings> |
Before we move to local deployment, we must edit the Global.asax to ensure our application immediately reroutes to our Workouts page. This is done by editing routes.MapRoute() so that it uses the Workouts controller as opposed to the Home controller. The final result is:
routes.MapRoute( "Default", // Route name "{controller}/{action}/{id}", // URL with parameters new { controller = "Workouts", action = "Index", id = UrlParameter.Optional } // Parameter defaults ); |
Deploying Locally Using SQL Azure
Creating a Valid Connection String
It will only take a few more steps to deploy our workouts application locally using SQL Azure as the backend. To leverage SQL Azure, all we have to do is change the database connection string to target our SQL Azure database. A valid connection string can be obtained through the Windows Azure Portal, under the Database section. Once there, expand the subscriptions tree until you can see the ‘master’ database. Click on master on the tree on the left, and then click on View… under ‘Collection Strings’ on the Properties pane on the right. This will bring up a dialog with valid connection strings for ADO.NET, ODBC, and PHP. The string will look like the following:
Server=tcp:<YourServer>.database.windows.net,1433;Database=master;User ID=<YourUserID>;Password=myPassword;Trusted_Connection=False;Encrypt=True;
Copy this string to your clipboard and go back to Visual Studio, then open Web.config under ‘MvcRole1’. Once there, look for the <connectionStrings> node and create a new connection string named WorkoutsContext. Set the connection string equal to the one obtained in the Windows Azure Portal, then replace the placeholders with your real username, password, and desired database name.
Lastly, in order to allow CodeFirst to create the database on SQL Azure, we must append PersistSecurityInfo=True; to our connection string. The final connection string will be similar to the one immediately below:
<add name="WorkoutsContext" connectionString=" Server=tcp:<YourServer>.database.windows.net,1433;Database=WorkoutsDB;User ID=<YourUserID>;Password=myPassword;Trusted_Connection=False;Encrypt=True; PersistSecurityInfo=True;" providerName="System.Data.SqlClient" /> |
Remember to remove PersistSecurityInfo=True once the database has been created to ensure your credentials are not left in memory.
Changes To Web.config
We will make some changes to our app configuration so that it runs smoothly on Windows Azure. Remove the following nodes <system.web>:
· <authentication>
· <membership>
· <profile>
· <roleManager>
While testing locally, we will use impersonation to make sure we can create the database. This will only work if you have admin access to your computer. To use impersonation, type <identity impersonate="true" /> inside the <system.web> node.
Now, press F5 to deploy your application. Your default browser should show your application:

We can verify that CodFirst created the database using SQL Server Management studio or the Windows Portal. You can test the app by pressing ‘Create New’ and adding a new workout. Make sure to remove the identity impersonation before continuing to part 2 of the series.
Conclusion
At this point, our MVC application is running perfectly our machine thanks to the Windows Azure SDK. In the second and final part of this series you will find out how to take deploy your application to Windows Azure. Please let us know if you found this article helpful by leaving a comment below!
Pedro Ardila
Program Manager - Entity Framework