How to “TOTALLY” customize your Home Realm Discovery Page in Windows Server 2012 R2 ADFS
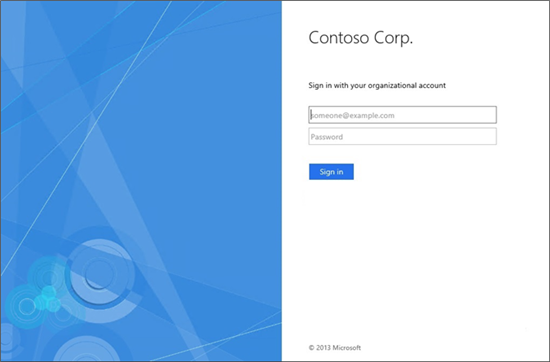
When using the latest version of ADFS, Windows Server 2012 R2 ADFS, if you have multiple identity providers configured, ADFS will display its Home Realm Discovery (HRD) page. It has too; it has to ask you which provider you want to use to login with? The page is fine.. However it’s not fitting in with my app scheme, and there are parts I don’t want, for example.. I don’t want the option to select the local AD as a provider. Here’s a look at the default page (though showing just one provider):
 https://technet.microsoft.com/en-us/library/dn280950.aspx
This page cannot be found anywhere on the file system. It’s dynamically generated (based on your identity providers) by ADFS at run time. Because of this, you can’t find the page on the file system and modify it.
Now, to be fair, Microsoft made their HRD page super easy to customize as defined in this TechNet article, titled “Customizing the AD FS Sign-in Pages”.
You can change the logo image, illustration image, description text, etc. Unfortunately, that’s not good enough for this project. We really want to make this page integrate with the feel of the overall application. Just changing logo and description enough. Luckily, Microsoft gives us the tools we need, to really do anything we want on this page.
Before I get started, I want to say that I don’t want a “hack solution”. I won’t destroy or lose any logic that the page uses already. I just want to tailor that logic into my “custom” page.
In addition to being able to set the basic properties described in the TechNet article listed above, we can also set JavaScript to be called in the page. The JavaScript is not in a function, it just drops it in a script tag in the body. This means that it will run when the page loads. You will need some basic JavaScript experience, but I’ll do most of the heavy lifting for you.
To set the JavaScript on this page use the PowerShell cmdlet:
Set-AdfsWebTheme (click for documentation)
We will use the –AdditionalFileResource flag to specify we want to load some JavaScript in the page.
Here is a sample:
Set-AdfsWebTheme -TargetName ADAM -AdditionalFileResource @{Uri=’/adfs/portal/script/onload.js’;path='C:\ZnHub PowerShell\DefaultWebTheme\script\onload.js'}
This will load my code JavaScript code located in “C:\ZnHub PowerShell\DefaultWebTheme\script\onload.js”. Ok.. great! so what.. well, we can do everything from here! Let’s take a look at some of my code.
First I want to hide (but not destroy the existing code!):
var cw = document.getElementById('contentWrapper').style.diplay = "none";
var bw = document.getElementById('brandingWrapper').style.display = "none";
var fp = document.getElementById('fullPage').style.height = 0;
I’m finding the elements that they use, and hiding them. I set the fulPage l <div> to a height of 0, because I don’t’ want any unnecessary scrollbars to pop up.
Now I want to create my page. I am going to do this by creating a new <div> tag. I’ll put all my HTML page markup code in that tag. Finally, I will add that <div> to the body element of the JavaScript DOM.
Here’s a look at some code:
var iDiv = "<nav class='navbar navbar-default'><span><a class='navbar-brand' href='https://www.microsoft.com'><img style='margin-top:-4px' title='Microsoft' src='/adfs/portal/logo/logo.png' alt='' /></a><a class='navbar-brand'>ZN Sample Services</a><span></nav></br></br></br><center><a class='btn btn-success btn-lg' onclick=\"HRD.selection('https://corp.sts.zn.com')\">Zn Employee Sign In</a> <a class='btn btn-info btn-lg' onclick=\"HRD.selection('https://vmastest.accesscontrol.windows.net/')\">Sign in with Windows Live</a></br></br></br><img class='largeIcon float' src='/adfs/portal/illustration/illustration.png' height=500/></center>";
Believe it or not, that’s my whole page! And it’s beautiful! Now some notes:
First of all, the code has to be on one line. You cannot have carriage returns when building your <div> like I do.
Second, no double quotes are allowed.
So
<a href = ”test” >
Becomes
<a href = ‘test’ >
Now there is one super catch this. When calling a function, you have use double quotes so you must escape them like this:
<a onclick=”test()”>
Becomes
<a onclick=/”test()/”>
Be careful when working on the page, do small parts and test often!
One thing you’ll notice in my HTML code, is that I am using a lot of styles. Better believe it!. there is a cmdlet that allows you to specify the CSS file you want the HRD to use:
SetAdfsWebTheme –StyleSheet
Use it just like we did to load the JavaScript. Now you have use all the styles that you use in your app, in the HRD! Very powerful.
My code above is very small. That’s because most of the content is static.. it doesn’t ever change. Instead of trying to HTML mark up all this static conent.. I just took a screenshot capture of the static content. I then use that image to display all the content. This is much easier than building all that HTML ark up in the <div> tag (though you can).
To use an image like I did, you can use the SetADFSWebTheme –Illistration cmdlet. Same syntax and use. Now you can use that image with the following source:
src='/adfs/portal/illustration/illustration.png'
Really simple… don’t forget you can also use the SetADFSWebTheme –Logo cmdlet to load images as well.
An even better solution, especially if you don't want to touch the default theme is to use, and if you have to add lots of buttons or style sheets, is to use:
Set-AdfsWebTheme-TargetNameVS-AdditionalFileResource @{Uri=’/adfs/portal/images/live.png';path='C:\HRD\live.png'}
This is really they key to adding resources. By specifying a Uri (the cmdlet function takes an array of hashtables). Now we can access the resources in our code like this:
<img source=adfs/portal/images/live.png'/>
This cmdlet takes and file type, so you can do this with anything you need to build your page.
The last part of my code is wiring up our buttons just the default HRD so they send me off to login. Remember earlier, I said that I don’t want to do anything funky, I just want to do the same thing the original page did. So let’s look at the source of the default HDR page. Here we see that what happens, when a provider is selected, we call the HRD.selection JavaScript function with the correct realm, which in turn then posts the form back to ADFS which the correct payload, and ADFS takes over from there.
Remember we didn’t clobber any original page code, so we can do EXACTLY as the original page does and call that JavaScript function:
HRD.selection('https://zntest.accesscontrol.windows.net/')
This will do exactly the same thing as their buttons do when clicked (essentially call the JavaScript HRD function and post the form back to ADFS.
To find your realms, bring the default HRD page up in a browser. In the options, view the source of the page and search for HRD.selection. This will yield you your realms as they should be used.
If you wanted the HRD page to be totally skipped, and go directly to the zntest provider for exmaple, you just put this code in the JavaScript:
HRD.selection('https://zntest.accesscontrol.windows.net");
And you’re done!.. as soon as the page loads, it will go to the zntest realm.
I use it in a button click like this:
<a onclick=\"HRD.selection('https://zntest.accesscontrol.windows.net/')\">
The last thing we have to do is add our newly created <div> tag to the body element:
document.body.innerHTML += iDiv;
Here is a look at my finished page, note I had to cut up actual images and text, but you get it:
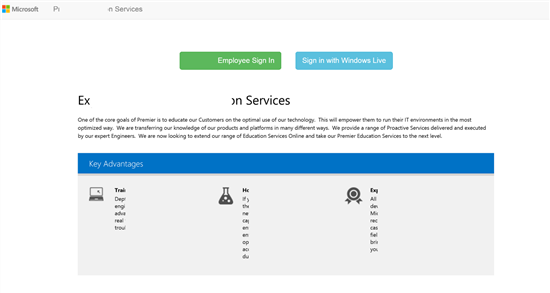
As always hope this helps!