Deploying Linked ARM Templates with VSTS
Overview
When dealing with deploying a large number of components in Azure, a single ARM template might be challenging to manage and maintain. ARM linked templates allow you to make your deployment more modular making the templates easier to manage. When dealing with large deployments, it is highly recommended to consider breaking down your deployment into a main template and multiple linked templates representing different components of your deployment.
Deploying ARM templates can be performed using a number of methods such as using PowerShell, Azure CLI and Azure Portal. A recommended approach however is to adopt one of DevOps practices, namely Continuous Deploy. VSTS is an application lifecycle management tool hosted in the cloud and offered as a service. One of the capabilities VSTS offers is Release Management.
In this blog I will detail how you can deploy linked ARM templates using Release Management feature of VSTS. In order for the linked templates to be deployed properly, they will need to be stored in a location that can be reachable by Azure Resource Manager. A location that fits the bill here is Azure Storage; so we will show how Azure Storage can be used to stage the ARM template files. I will also show some recommended practices around keeping secrets protected leveraging Azure Key Vault.
The scenario I will walk through here is to deploy VNet with a Network Security Group (NSG) structured as linked templates. We will use VSTS to show how Continuous Deployment can be setup to enable teams to continuously update Azure with new changes each time there is a modification to the template.
Creating Azure Storage Account
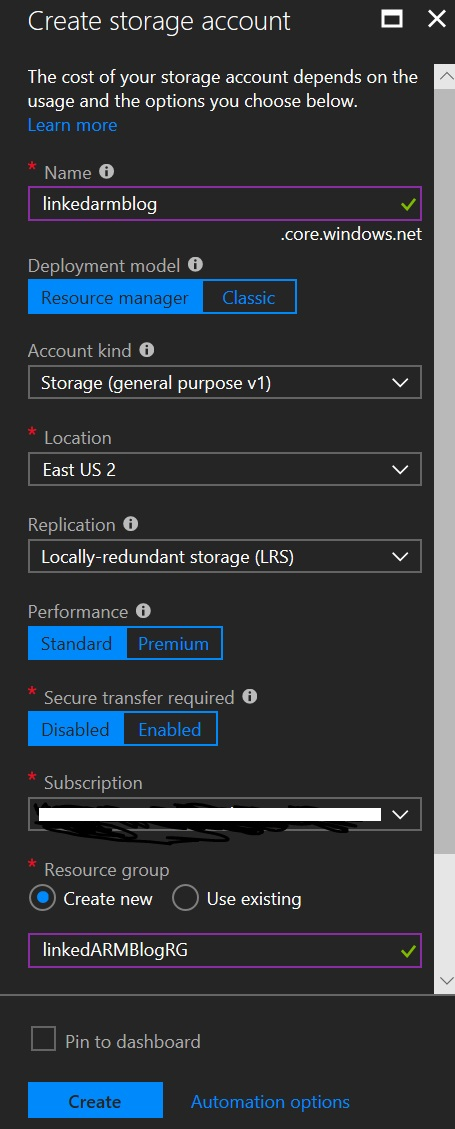
- Login to Azure portal and create an Azure Storage account following the steps documented here. Specify the parameters as shown below. Make sure the Name is unique.
- Once deployment is done, go to the storage account and click on Shared access signature then click on Generate SAS and connection string. Copy the SAS token generated and keep it handy as we will use it later
- Go to the storage account Overview page and then click on Blobs
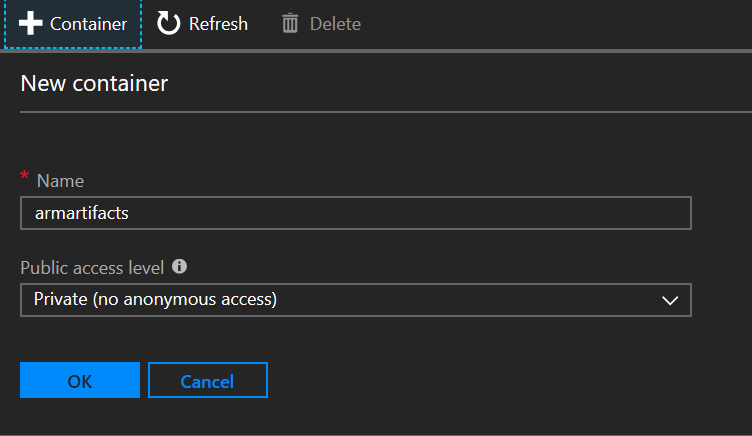
- Add a Container called “armartifacts” as shown below
- Once the container is created, click on it and go to Container properties. Copy the URL field and keep it handy. We will need it later as well
Protecting Secrets with Azure Key Vault
- In the Azure portal, create an Azure Key Vault resource
- Click on the Azure Key Vault you just created and click on Secrets
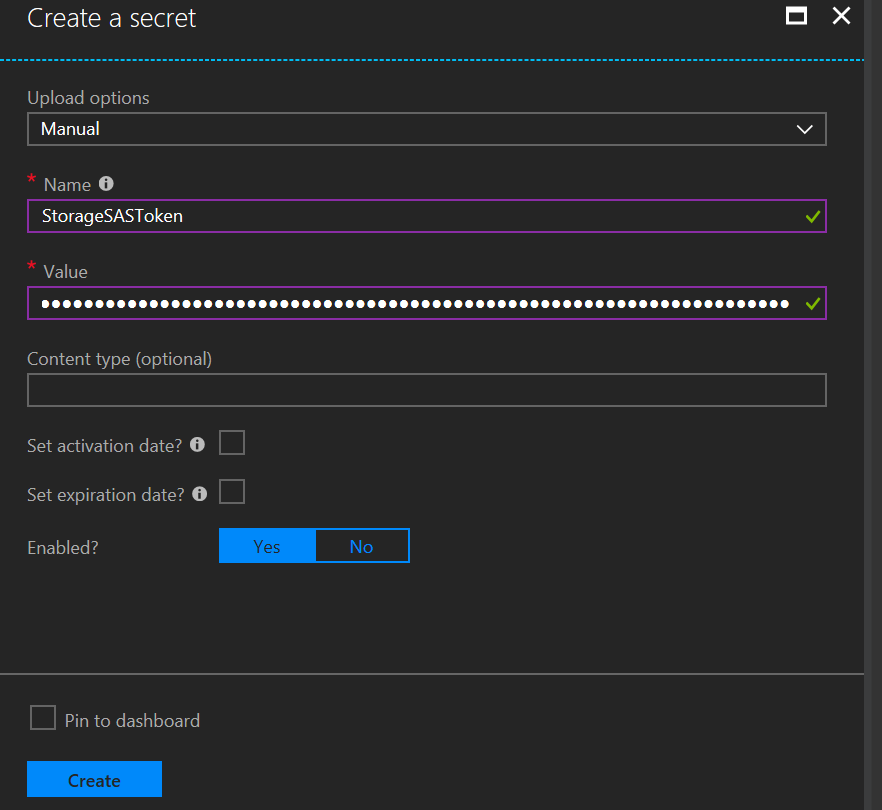
- Click on Generate/Import to add the SAS Token
- For name, enter “StorageSASToken” and enter the Azure Storage shared access signature key you copied in a previous step to the Value field
- Click Create
Linking Azure Key Vault to VSTS
- Login to your VSTS account. If you don’t have one, you can create one for free here
- Go to Build and Release hub in VSTS and click Library
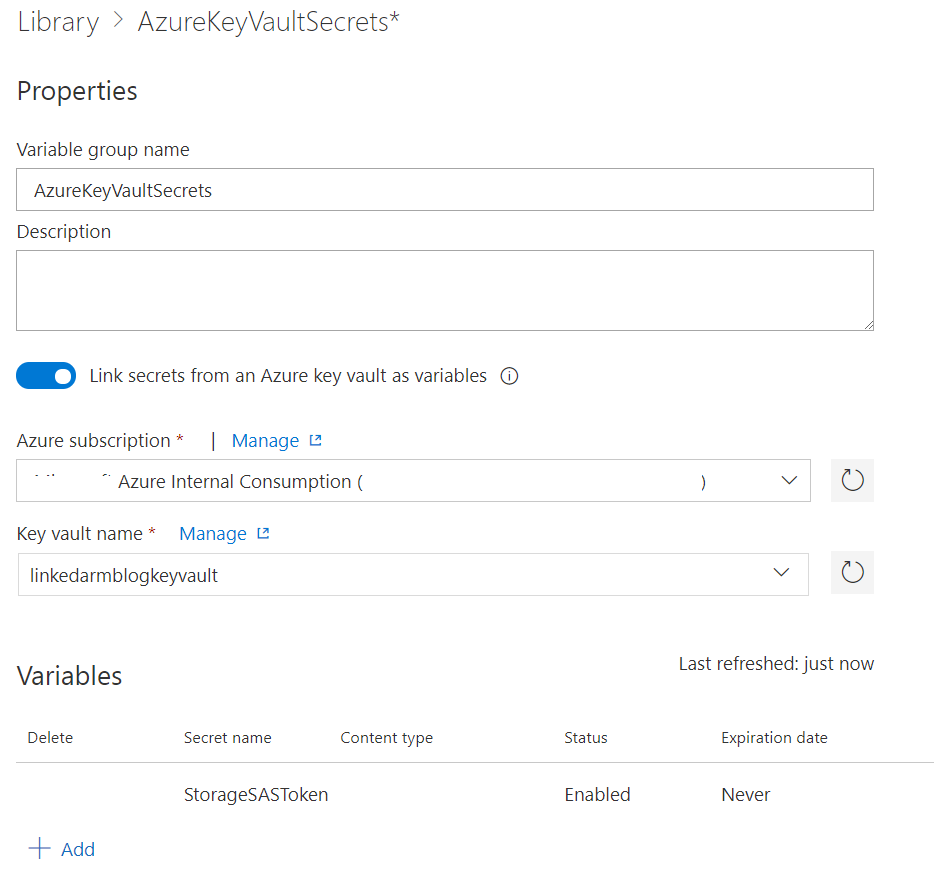
- In Variable Group name field enter “AzureKeyVaultSecrets”
- Toggle “Link secrets from an Azure key vault as variables”
- Select your Azure subscription and then the Azure key vault you created earlier and click Authorize
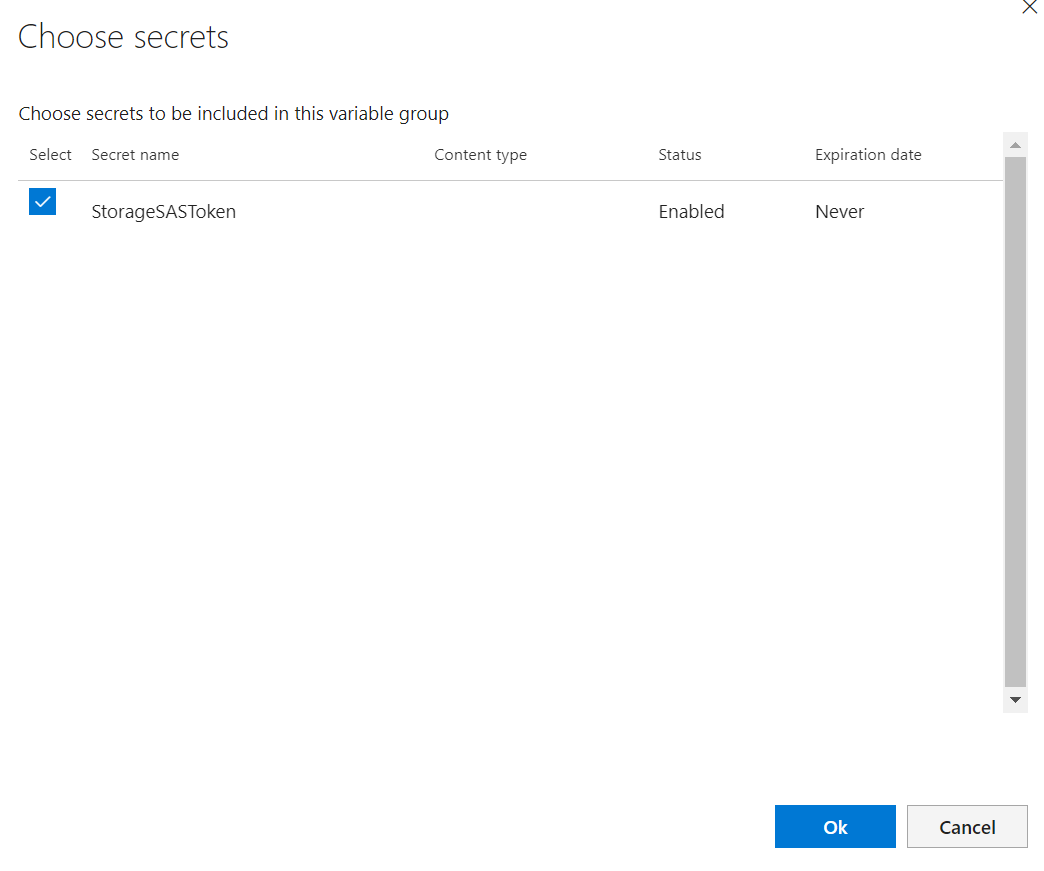
- Once authorization is successful you can add variables by clicking “Add” and you should be presented with the option to add references to the secrets in the Azure key vault. Once you added the reference to the StorageSASToken, click Save.
Set-up Continuous Deployment using VSTS
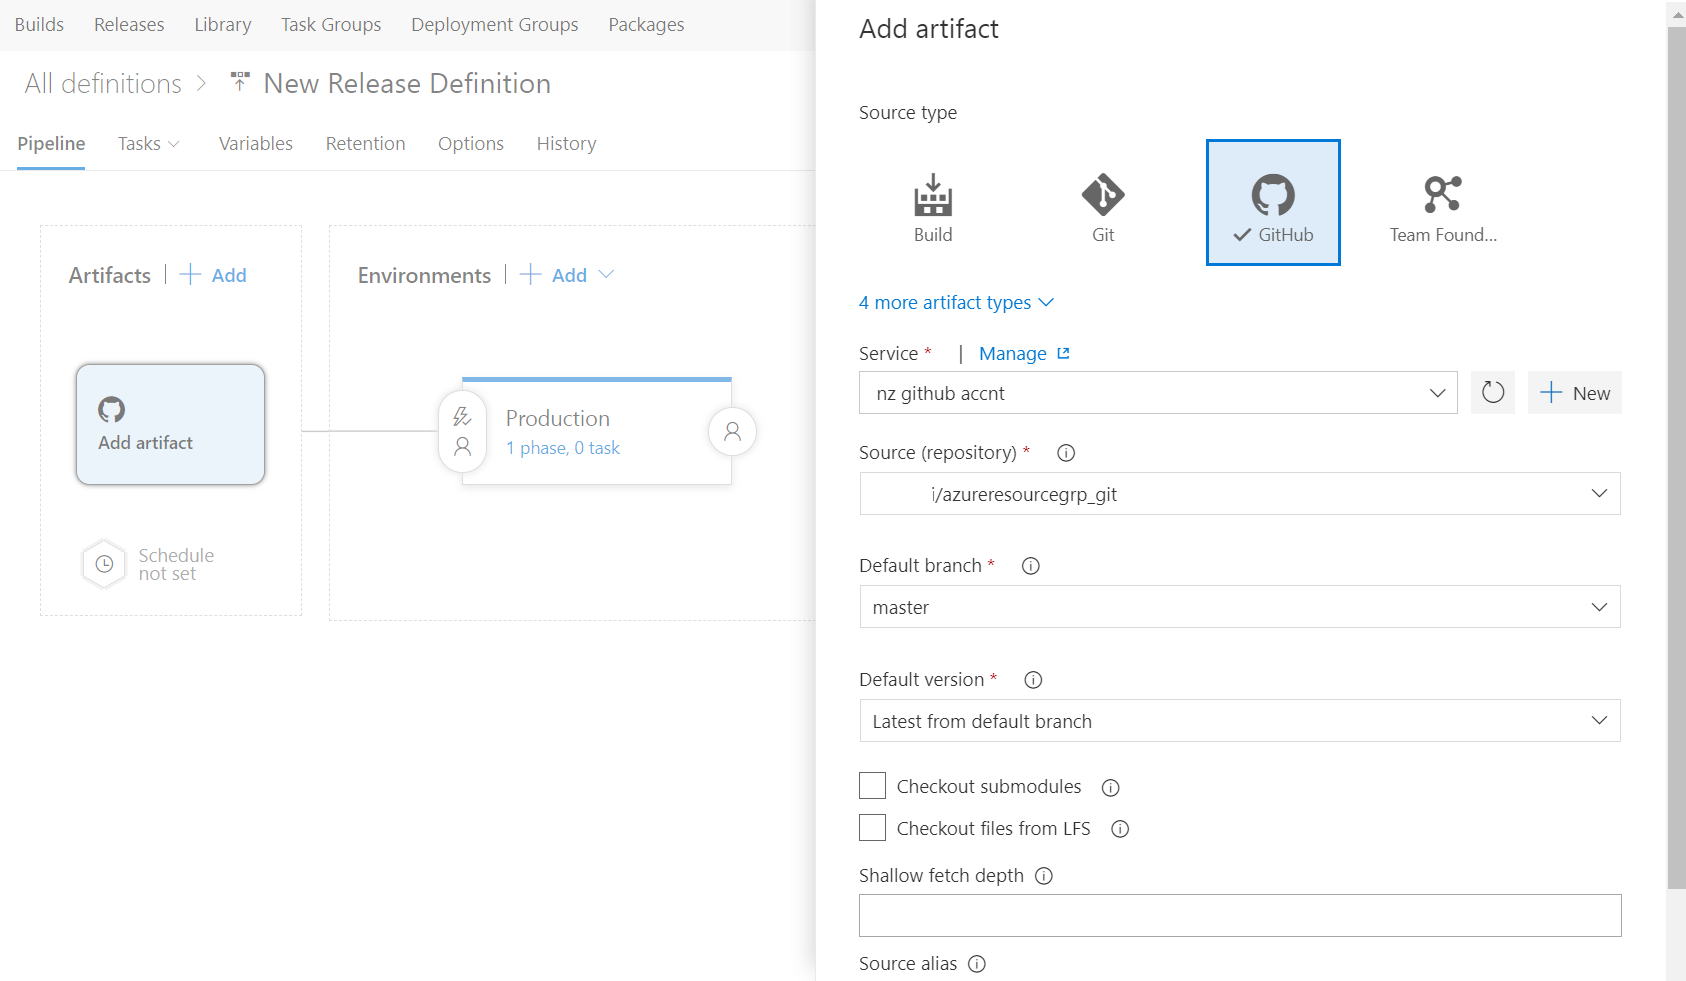
At this point we should have everything in place to deploy our linked template to Azure. To setup the deployment pipeline, login to VSTS and click on Build and Release then Releases then create a release definition. Select an empty process and name your environment Production. For artifact, point to your GitHub account
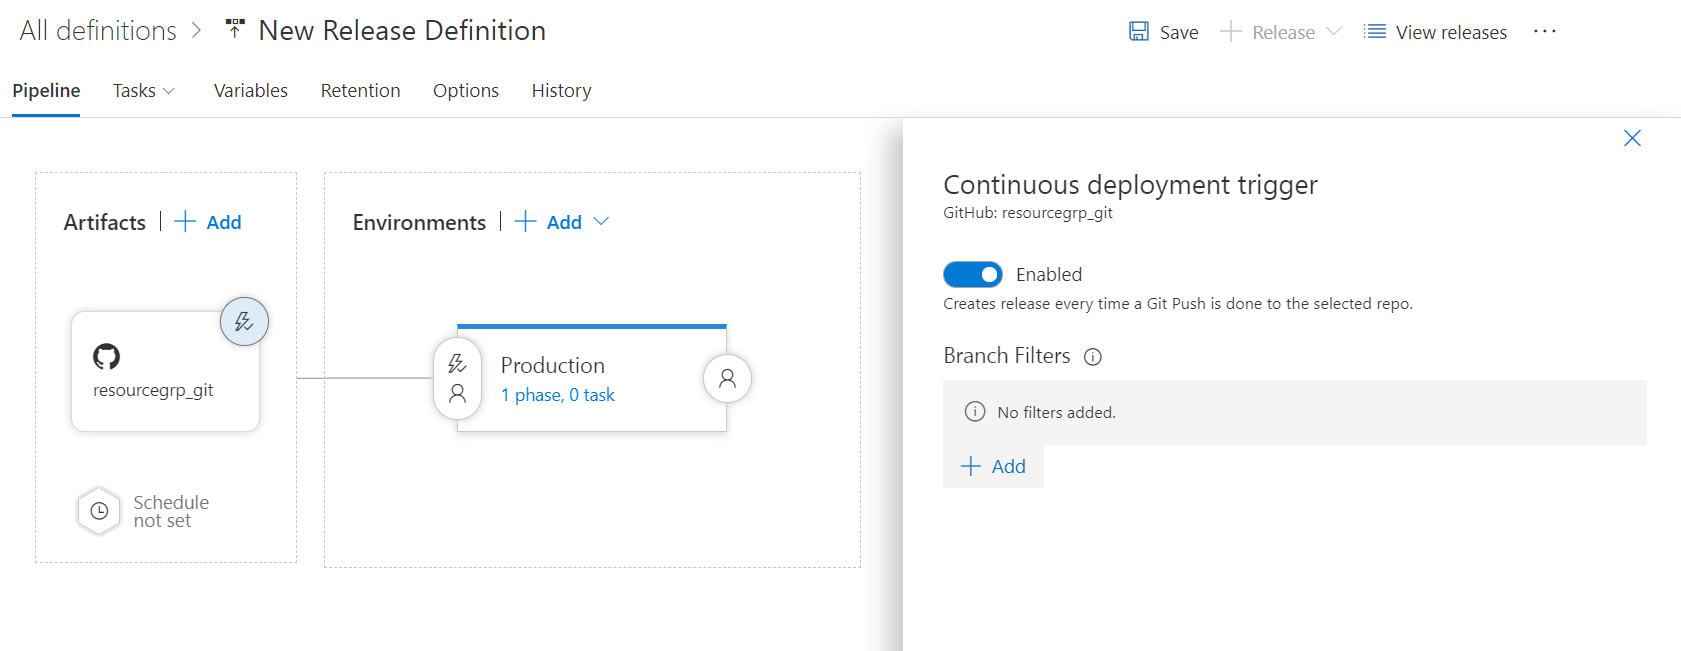
- To enable Continuous deployment, click on trigger button and toggle Continuous deployment trigger
- Click Variables then Variable groups then click on Link variable group. Select the AzureKeyVaultSecrets variable group that you created in an earlier step
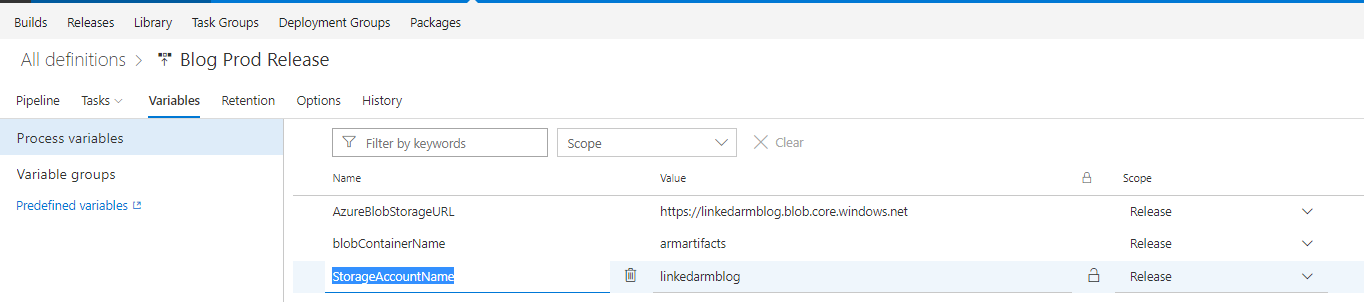
- Add a variable called AzureBlobStorageURL and paste in the value from the url you copied earlier when you created the Azure Storage account
- Add a variable called blobContainerName and put the name of your Azure blob container
- Add a variable called StorageAccountName and put the name of your Azure storage account
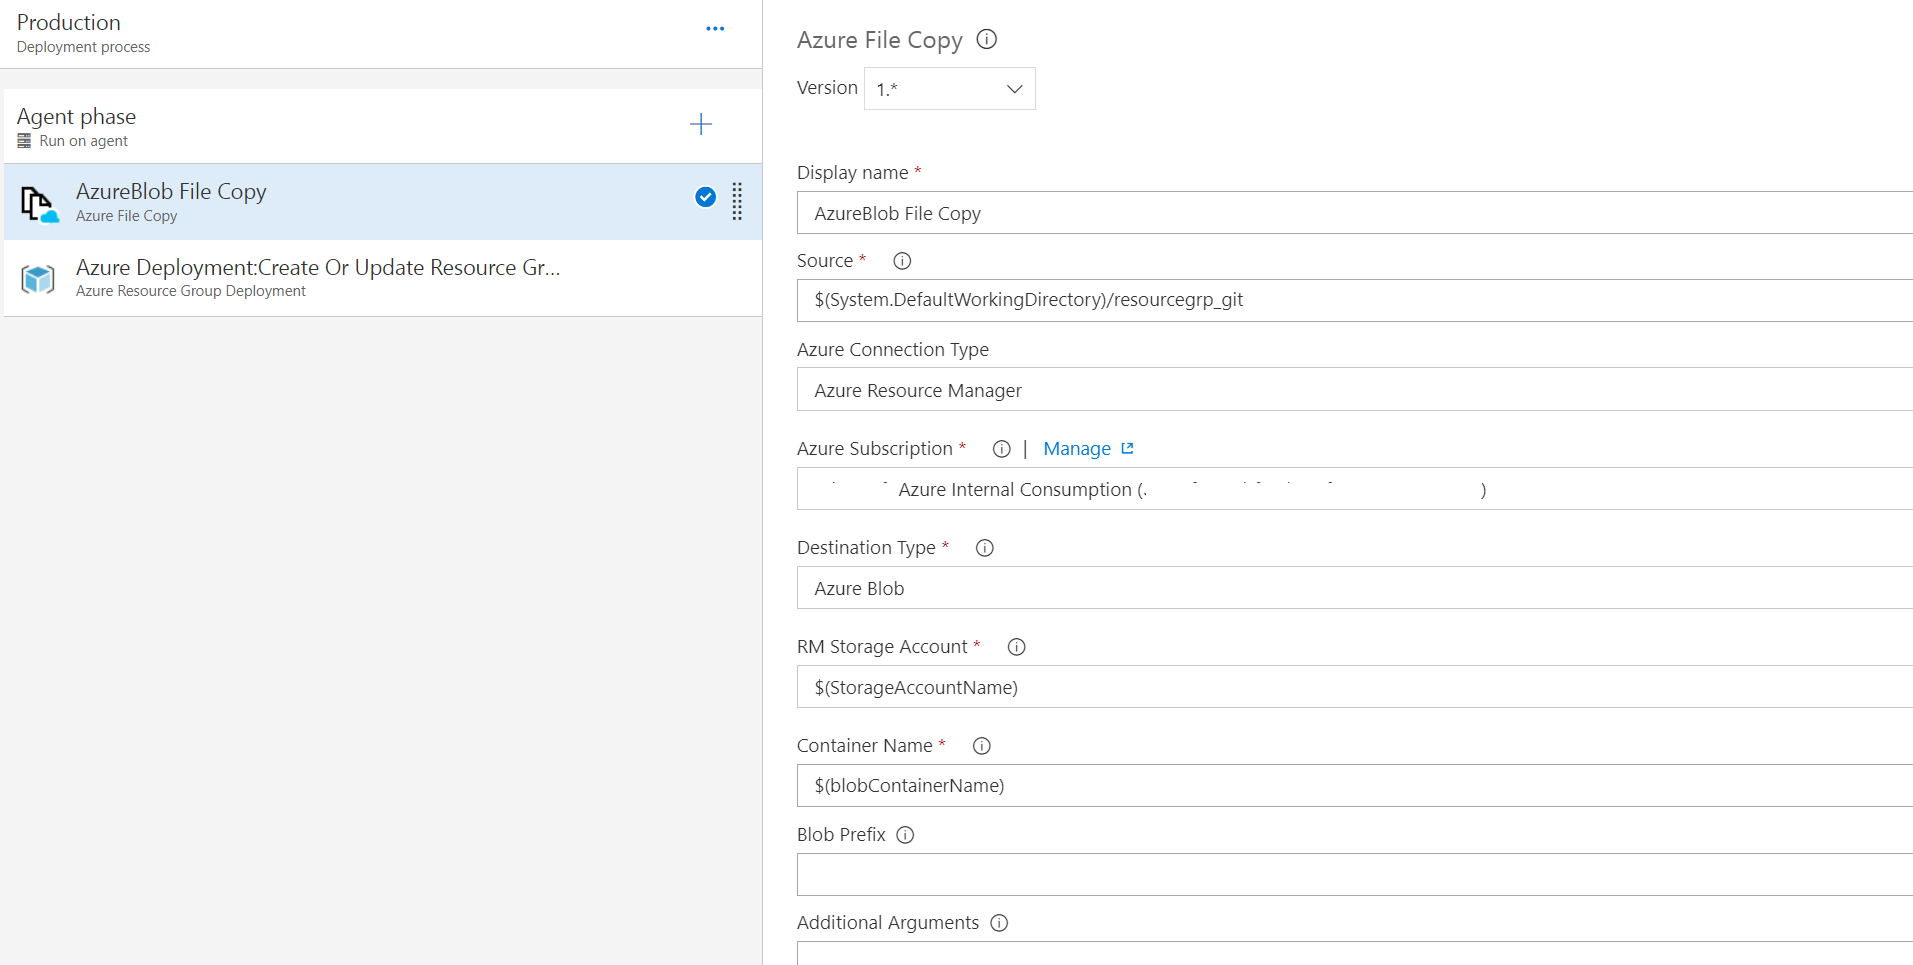
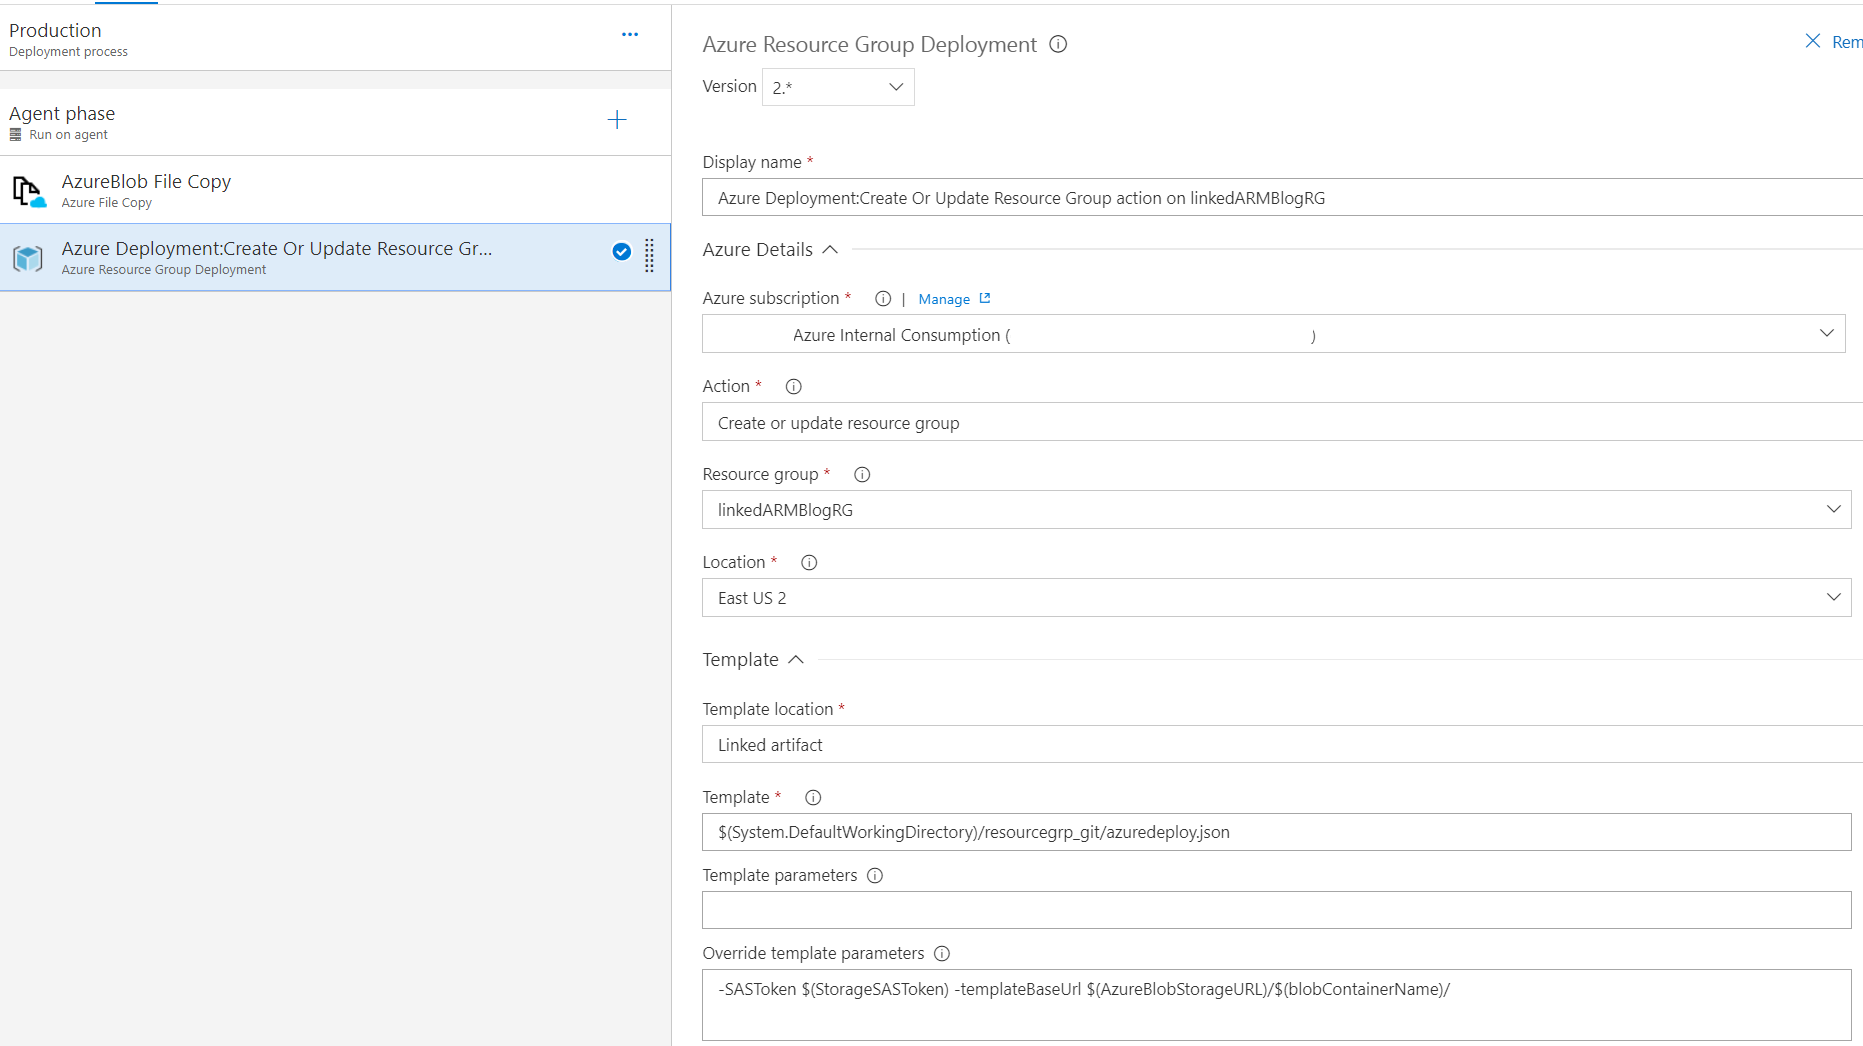
- In the release tasks, create the following steps:
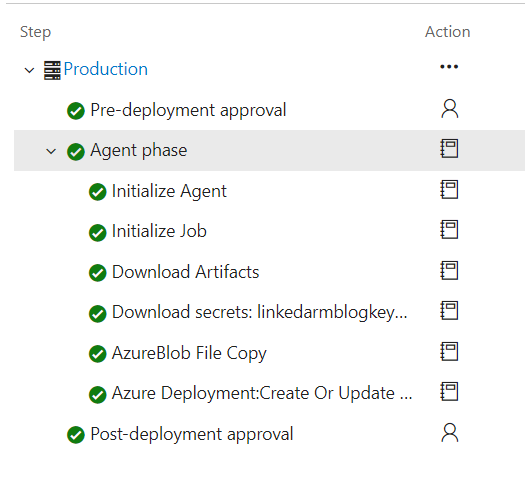
- Once steps are added, click save and kick-off a release. The release should finish successfully
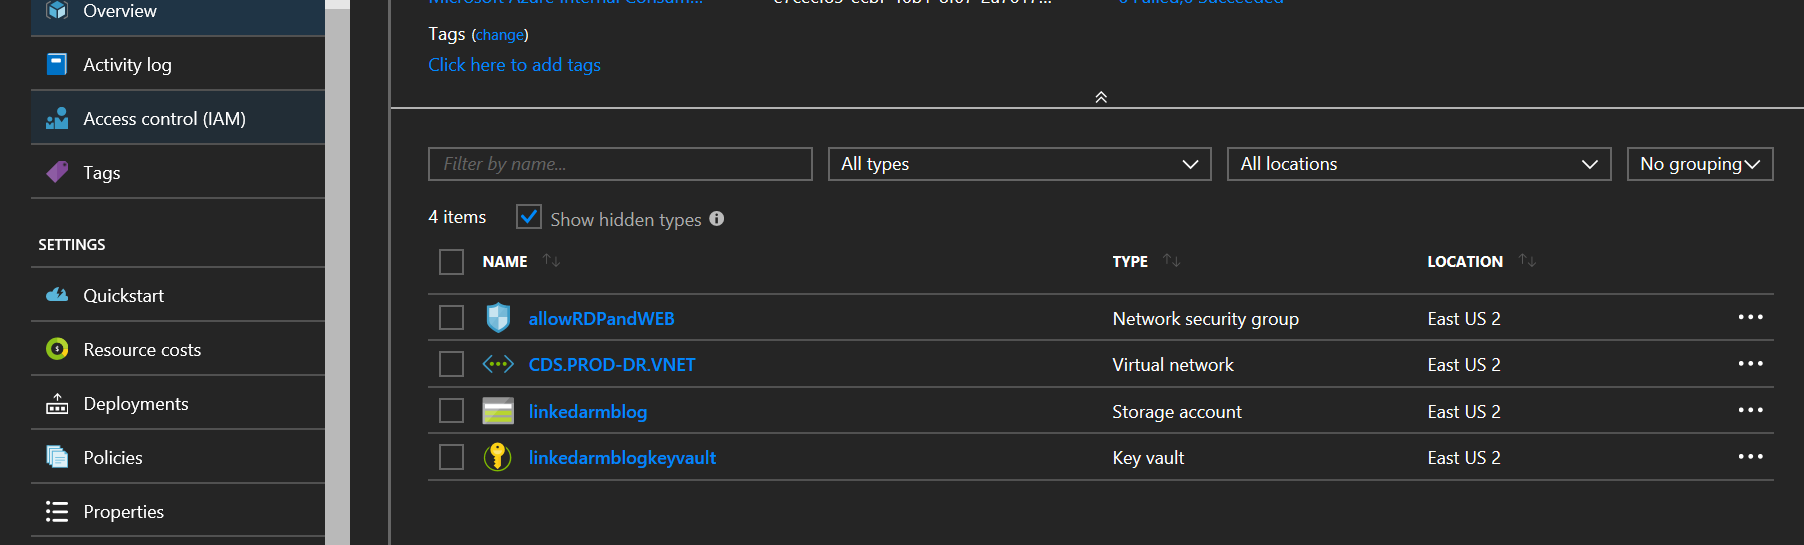
- Check Azure and you should see the VNet with NSG created
We have just showed how you can break down your ARM template and make it more modular by transforming it into Linked ARM template. We have also walked through how you can use VSTS to continuously deploy your linked template and enabling the release process to read the SAS key from Azure Key Vault while deploying the template.
I hope you found this blog useful. Please leave feedback on how this can be made better.