Granular VSTS/TFS Deployment Privileges using Service Principals
Visual Studio Team Services (VSTS) and Team Foundation Server (TFS) integrate smoothly with Azure App Services for Continuous Deployment. It is even possible to set up Continuous Deployment to an isolated App Service Environment (ASE). The easiest way to get started with this is when you log into VSTS with the same credentials as you use for your Azure subscription. However, this generally exposes access to all the resources you have access to in Azure. Another approach is to establish a service connection (using an Azure Active Directory Service Principal) to Azure. The standard dialog for establishing this connection looks like this:
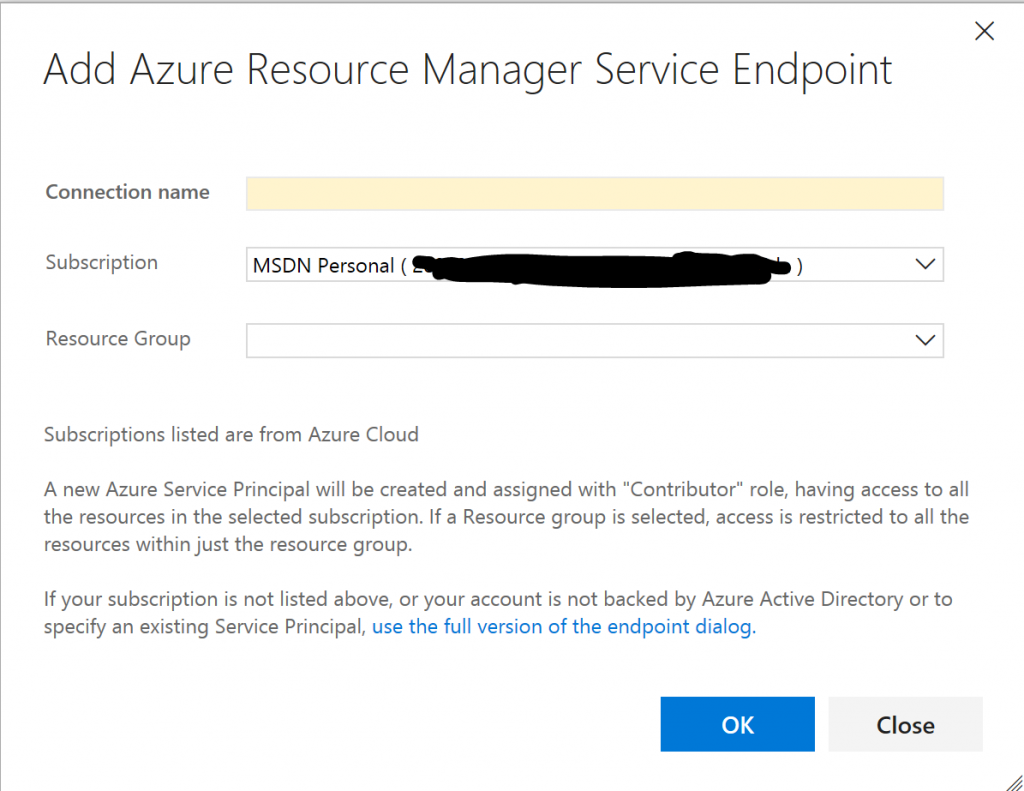
As you can see, this will establish a new service principal (an identity) with privileges on the entire subscription or a specific resource group. This may be too much access to grant and moreover, it may well be that it is not the user of VSTS/TFS responsible for access policy. In this blog, I will briefly describe how to create a service principal with no access and then granularly give it access (e.g., on a resource by resource basis).
In the example below, I will be creating a service principal in Azure Government and connecting it to a VSTS project. In the Azure portal, do the following 5 steps:
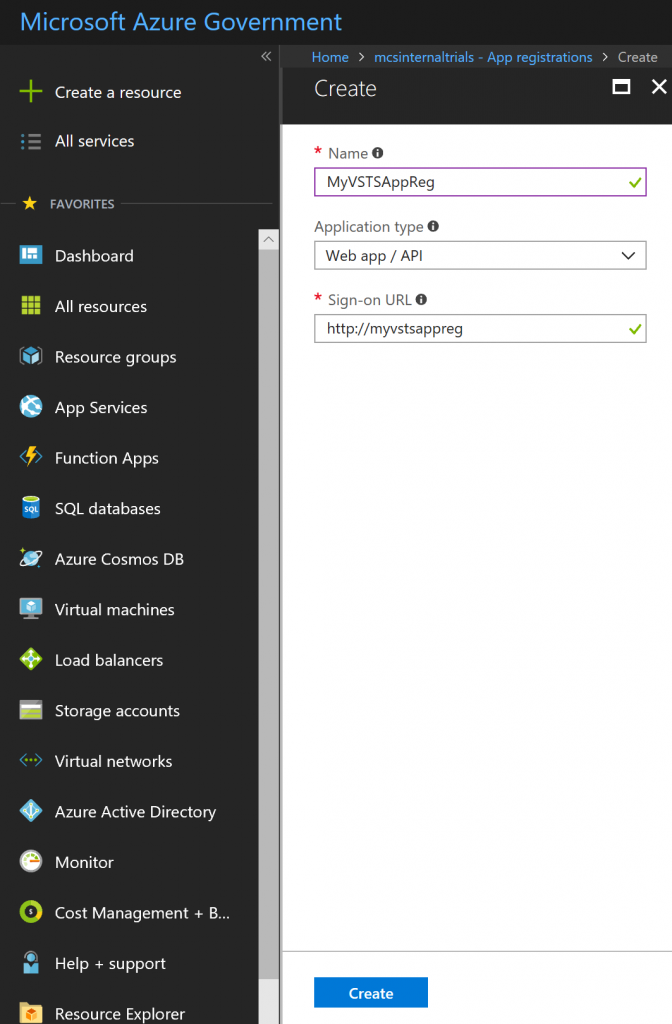
1. Create a new App Registration in Azure Active Directory: 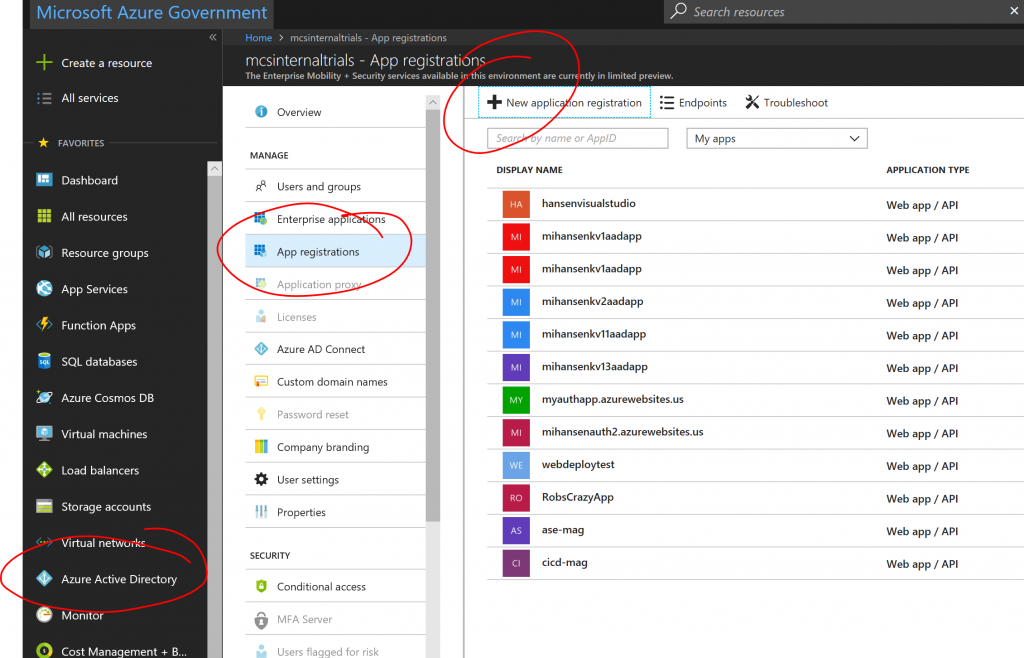
2. Make a note of the "Application ID" (a.k.a. Service Principal ID): 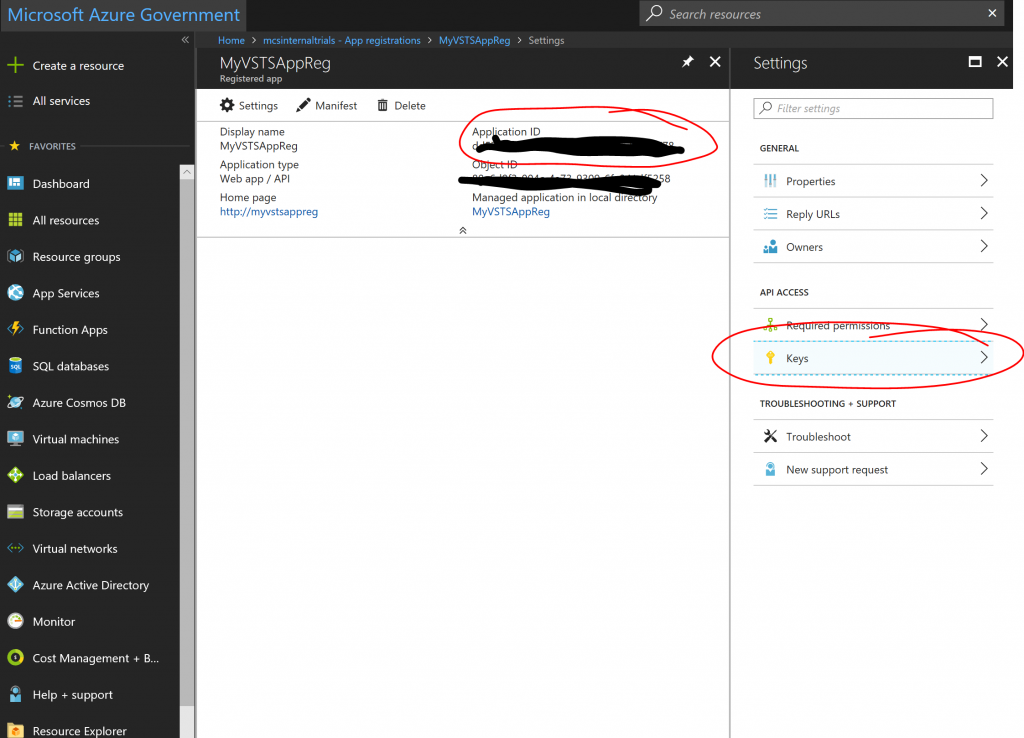
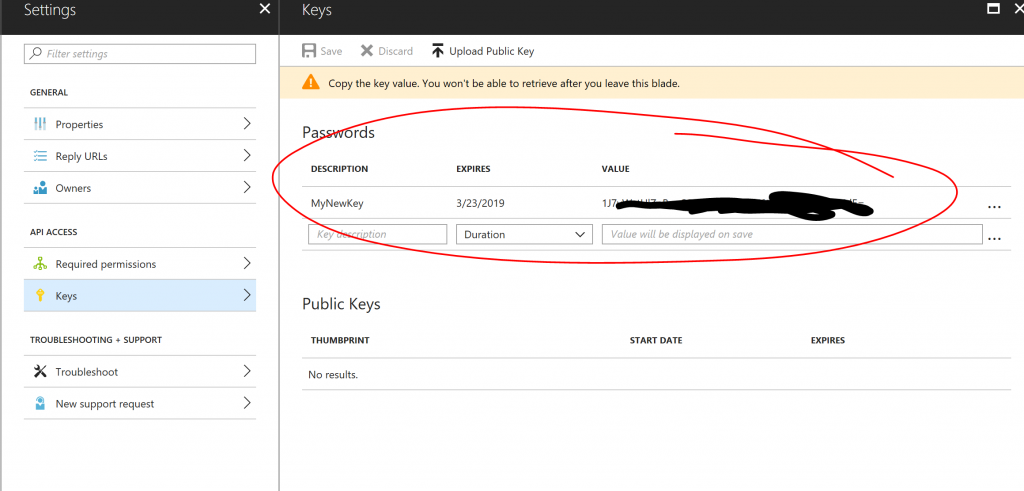
3. Click the "Keys" pane and create a new key by giving it a name and duration and clicking save.
The key will only be visible right after you click save, so make a note of it:
4. Make a note of your "Subscription ID" and "Subscription Name": 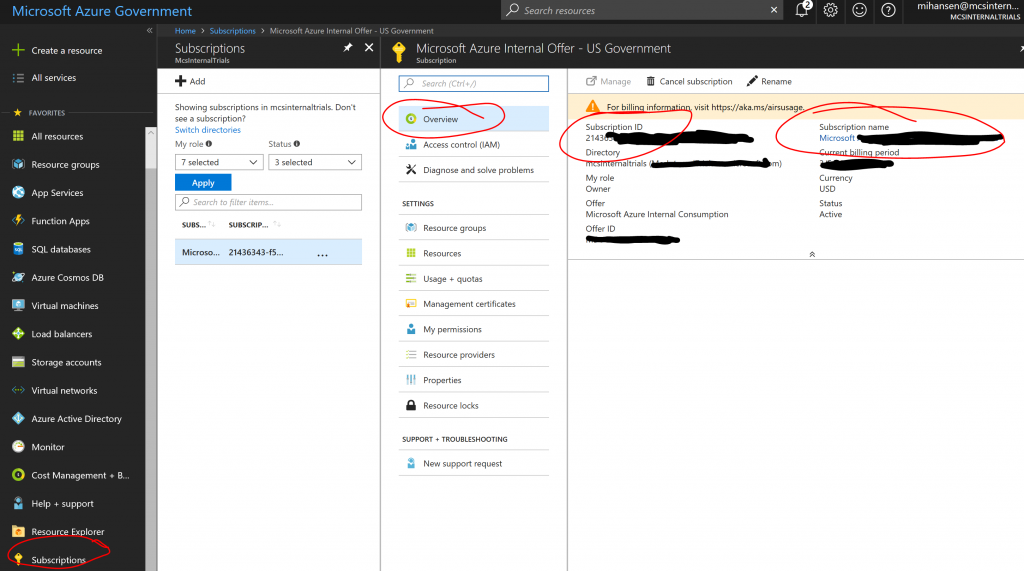
5. Finally make a note of your Azure Active Directory Tenant ID: 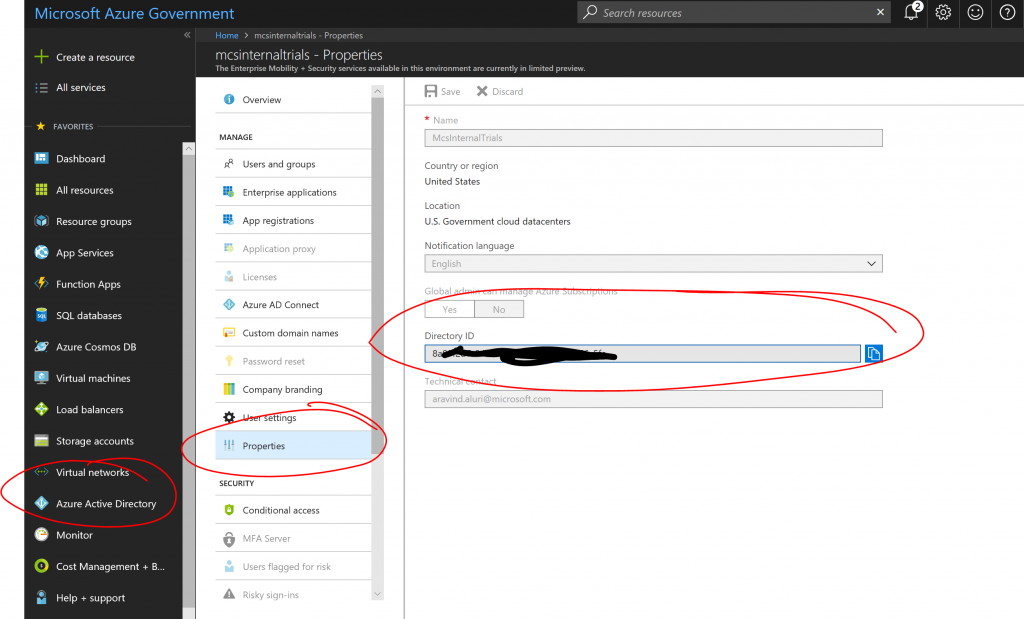
After this you should have 5 pieces of information:
[plain]
Subscription ID: SUBSCRIPTION GUID
Subscription Name: NAME OF SUBCRIPTION
Service Principal ID: SERVICE PRICIPAL GUID
Service Principal Key: SOME-LONG-KEY
Tenant ID: TENANT GUID
[/plain]
You can think of these as a set of user credentials, which currently have no privileges in your subscription. But you can now selectively add this "user" to resources where you want to grant privileges. Let's suppose we want to use this service principal to publish into one specific Web App and nothing else. Find the Web App and bring up the IAM (Identity and Access Management) pane:
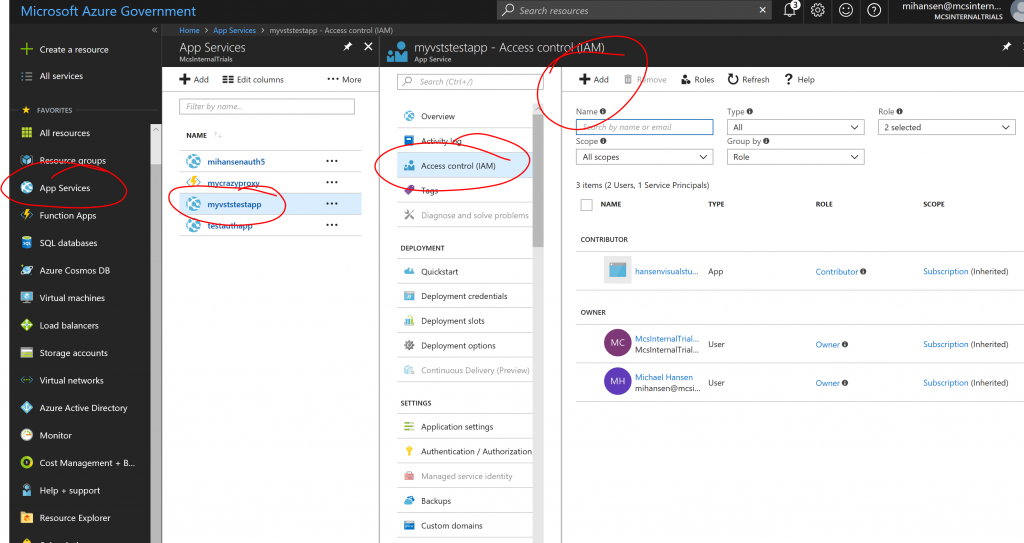
Hit "+ Add" and search for the App Registration you created. In this example we are granting it contributor rights to a single Web App:

Now let's move to VSTS and add a Service connection using the Service Principal. Instead of using the dialog above, hit the "use the full version of the endpoint dialog." link, which will take you to this dialog:
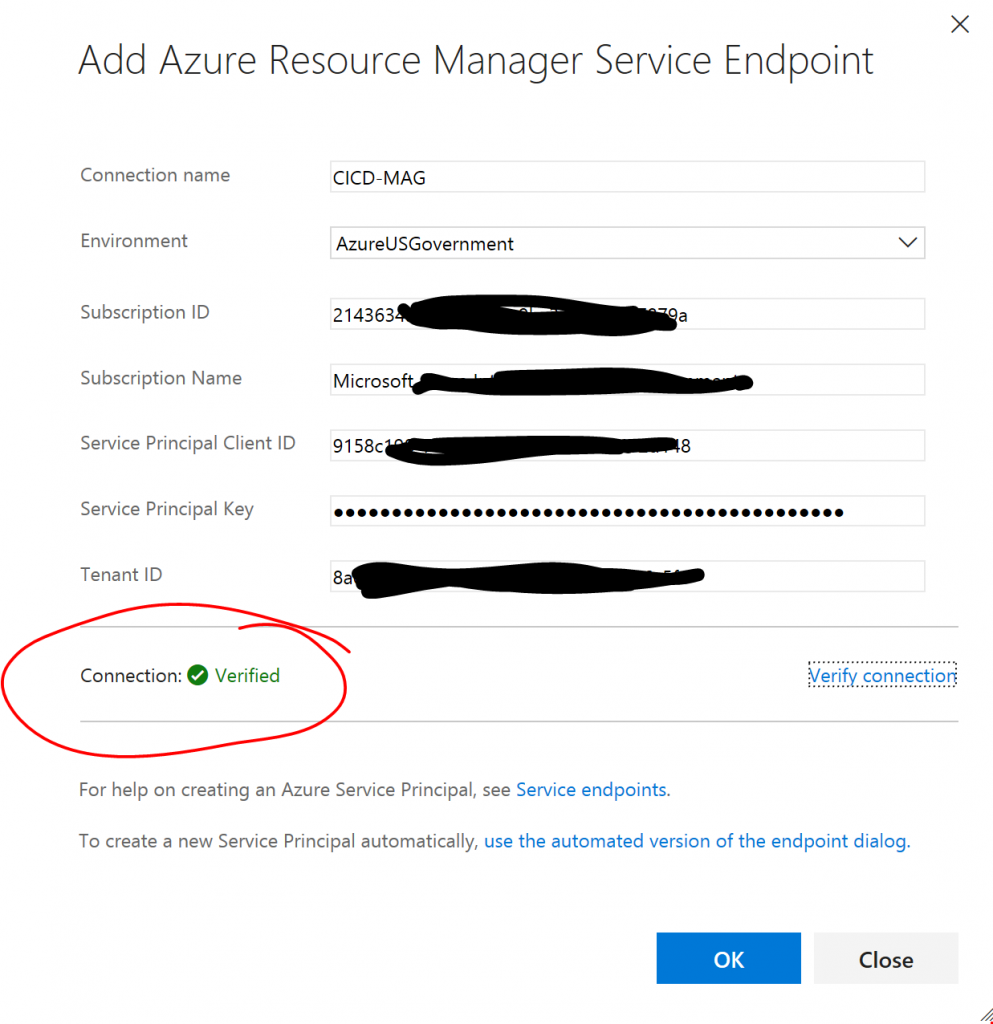
After you have filled in all the details, make sure to hit "Verify connection" and you should get a green check mark. If you do not get a green check mark, it could be because one of the fields have been filled in incorrectly, but it will also happen if you have created a Service Principal without assigning it privileges to any resources yet. Please follow the steps above.
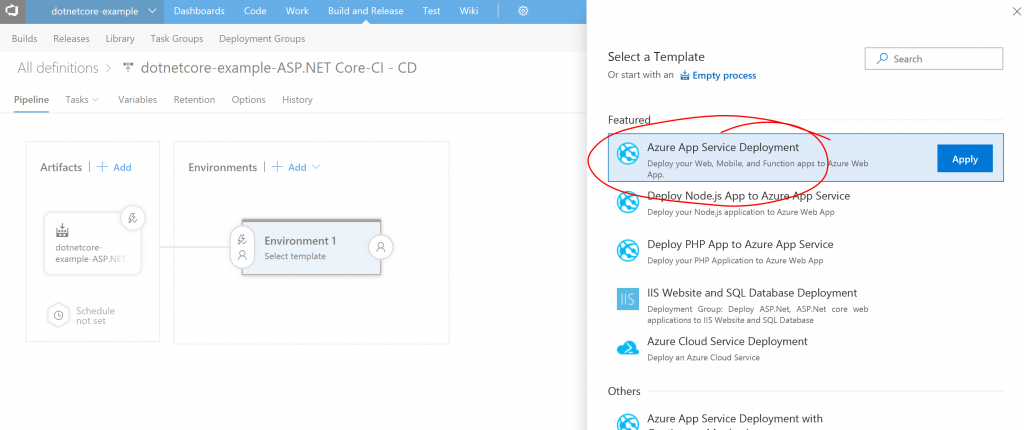
In the example above, we have named the connection "CICD-MAG" and this name will show up as a subscription when we set up deployments. For example, to deploy into a Web App:
And then choose the right "Subscription":
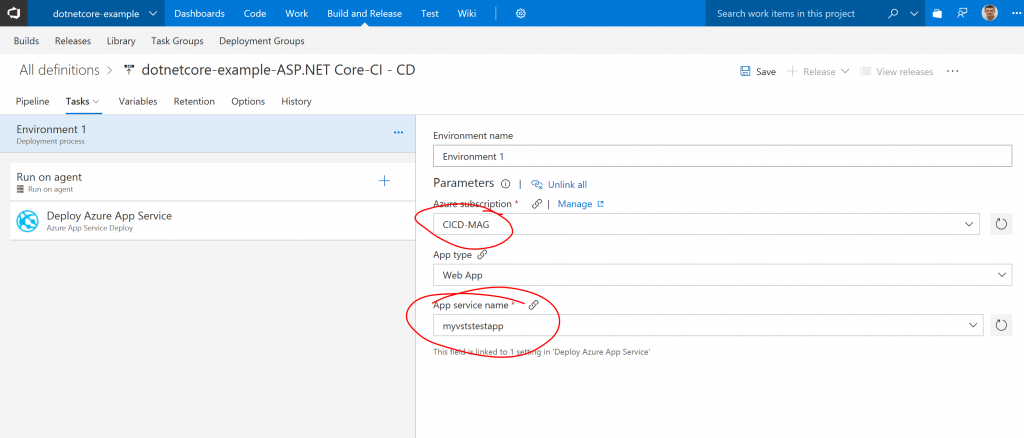
You should notice that you will only be able to pick a single "App service name", since we only granted privileges on a single Web App. You can of course use the Service Principal to grant access to any number of resources and even to entire resource groups. Unlike the simplified dialog discussed in the beginning, this gives you granular access.
And that's it, you now have the tools to delegate just enough control to specific credentials. Let me know if you have questions/comments/suggestions.