Lightweight Geospatial in Dynamics 365 for Phones
Bringing geospatial insights to business solutions is certainly nothing new; mapping and spatial searching are core components of the Dynamics 365 for Field Service, and many ISV solutions are available to glean location-based insights to optimize operations in Dynamics.
In this post, we will see how we can quickly and easily bring lightweight geospatial capabilities to the Dynamics 365 for Phones application, with nothing more than a Bing Maps key, and a Web Resource that we will create. This 60 second video (with voice-over) shows our end-result in action:
[video width="1920" height="1080" mp4="https://msdnshared.blob.core.windows.net/media/2019/03/MapsOnMobile.mp4"][/video]
We will enable our users in the field to:
- Quickly open account records based on proximity, saving time and increasing adoption
- Visualize customer buildings and sites to streamline visits
- Identify nearby accounts for ad-hoc visits, to optimize time in the field
We will create an HTML Web Resource that will identify the user’s location, search the Web API to find nearby accounts, then plot those accounts (with corresponding entity images) on a map. While in the field, users can launch their app, and immediately bring up account records as they approach.
Prerequisites
The prerequisites for building and deploying our account mapping in D365 for Phones include:
- An instance of Dynamics 365 (Online)
- You can request a trial of Dynamics 365 here
- Geocoded Account Records, with address1_latitude and address1_longitude attributes populated (note that the Field Service module for Dynamics includes in-built geocoding capabilities)
- The Dynamics 365 for Phones app installed on your mobile device
- The text editor of your choice
- A Bing Maps for Enterprise key
- You can obtain a key using the instructions found here
Creating our HTML Web Resource
In a Web Resource, we can use JavaScript to not only access the Dynamics Client API, but also the Bing Maps v8 control for interactive mapping. As a result, most of our work will be done in JavaScript.
Using the text editor of our choice, we will begin building our web resource. We start with our HTML document, in which we include the JavaScript library for our Dynamics Client API, along with some global variables defined in JavaScript:
[snippet slug=maps-on-mobile-web-resource-start line_numbers=false lang=html]
Creating our Map
We define our GetMap function (to be called when the Bing Maps JavaScript library has loaded) such that it will:
- find the user’s location using the Xrm.Device.getCurrentPosition method
- instantiate an interactive map in our HTML page, and
- call the getNearbyAccounts function, passing the user's locationFinding Nearby AccountsgetNearbyAccounts
- build and execute a retrieveMultipleRecords call against the D365 Web API using a bounding box around our user’s location
- load the Microsoft.Maps.SpatialMath module to enable us to readily determine distances between locations
- sort our locations by distance, using the compareDistance function
- call our AddPushpinCanvas function for each account
- set the map view to optimally display all accounts and the user’s location Adding Pushpins with Account Images and Click HandlersAddPushpinCanvas
- define a function to call after our account entity image has been loaded, to:
- create a Canvas element
- add the entity image to the canvas, cropped to a circle
- add a border to the canvas
- create a Pushpin using the Canvas we created as the icon
- add a click handler to the pushpin, to open the appropriate account record
- call the specified callback function, which will then add the pushpin to the map
- load the entity image for the account, subsequently triggering the onload function Our HTML Web Resource Body
- a DIV to present messages to the user as an overlay
- a DIV to host our interactive map
- a SCRIPT tag to load the Bing Maps v8 map control, with our GetMap function specified as the function to call upon load
Creating a DashboardSettings > Customizations > Customize the System > Web Resources > New
 Note:Enable Mobile
 Settings > Mobile SettingsUser Content and Location
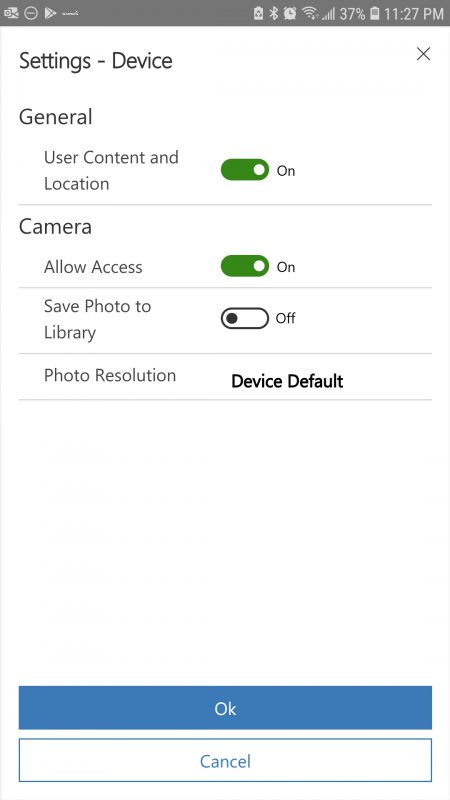
 here
here
- [snippet slug=maps-on-mobile-getmap line_numbers=false lang=js]
- Our
- function will receive the user's location as parameters, and will then:
- [snippet slug=maps-on-mobile-getnearbyaccounts line_numbers=false lang=js]
- Our
- function will accept the account and callback function as parameters, and will then:
- [snippet slug=maps-on-mobile-addpushpincanvas line_numbers=false lang=js]
- The body of our HTML document is minimal:
- [snippet slug=maps-on-mobile-body line_numbers=false lang=html]
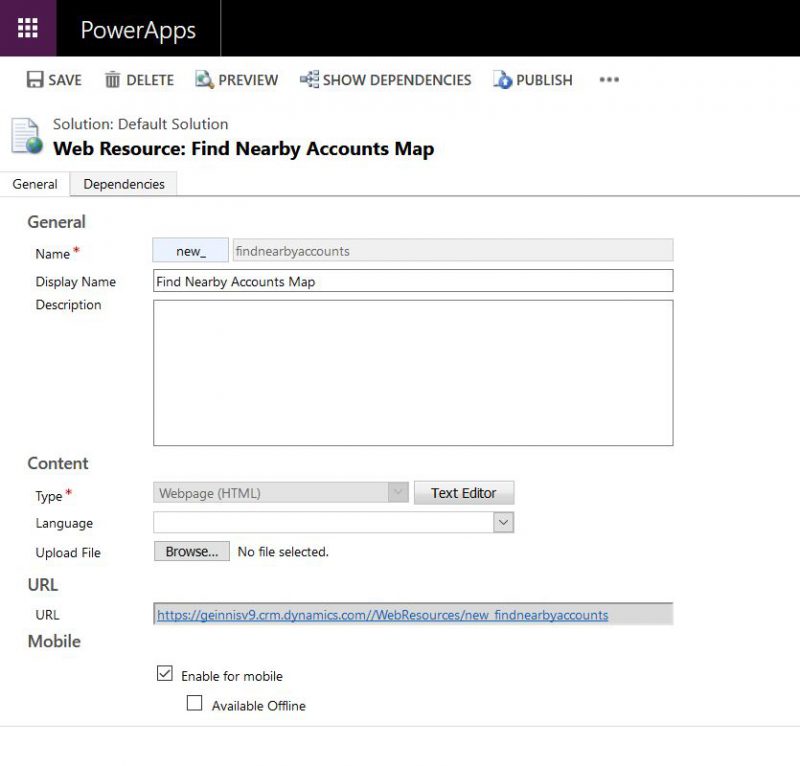
- We will now create a basic dashboard containing our web resource. First, we will upload our HTML document as a new web resource, navigating in the Web Client to
- :
- Ensure you select Enable for Mobile.
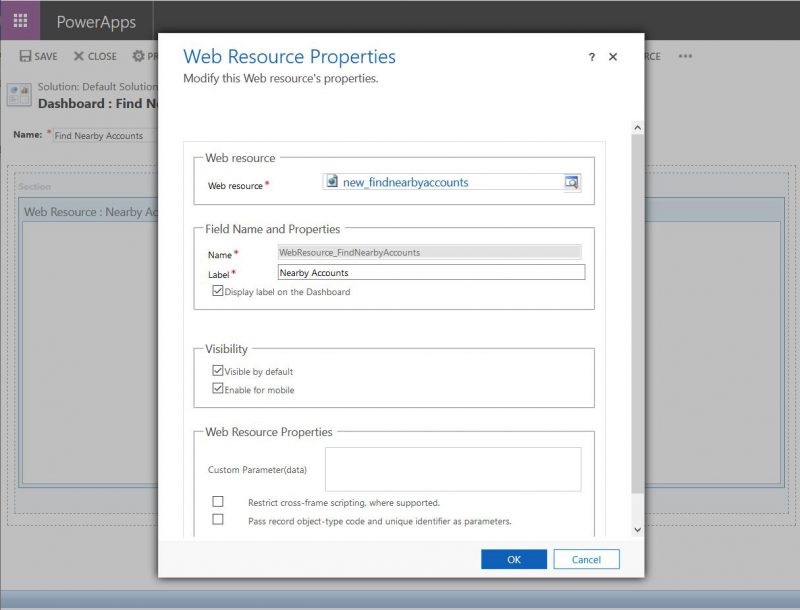
- We then navigate to Settings > Customizations > Customize the System > Dashboards > New, and create a new Dashboard. We can choose any layout, but we then remove all but one component, which we populate with our web resource. Ensure you
- for the Dashboard:
- And Enable Mobile for the Web Resource in the dashboard:
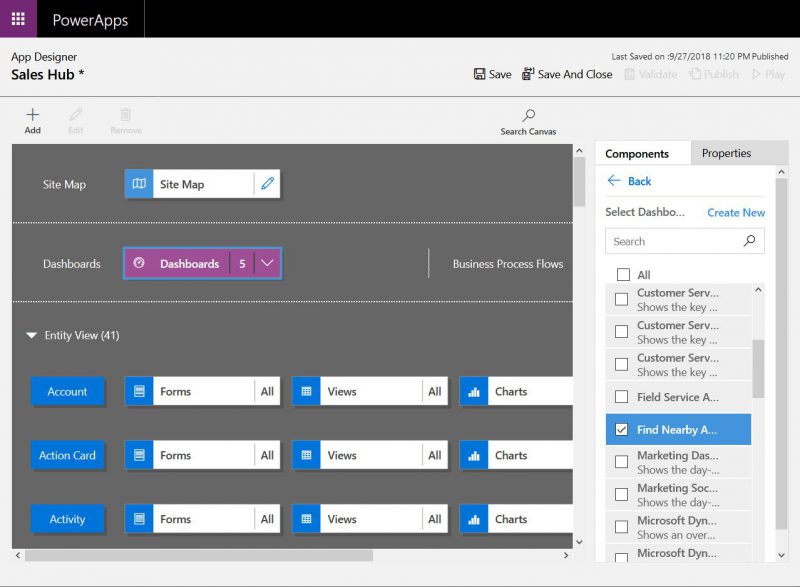
- In the App Designer for your desired Hub App, ensure your newly created dashboard has been added, then save and publish:
- Now, on your mobile device, launch the Dynamics 365 for Phones app, and navigate to
- , ensuring that you have enabled
- :
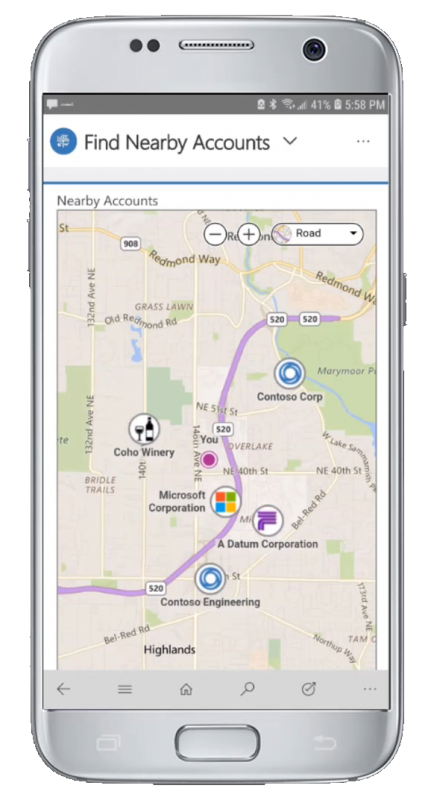
- Now, if you navigate to the newly created dashboard in the app, you should be able to see your location, and any accounts in the vicinity:
- With this simple web resource, we can increase adoption, and empower our field teams with relevant geo-centric efficiency.
- The full Web Resource code for this sample can be found
- .