Building Microservices with AKS and VSTS – Part 2
Hopefully you managed to get through the first part of this series, and get the basic C# code stored in the right places.
https://blogs.msdn.microsoft.com/azuredev/2018/03/27/building-microservices-with-aks-and-vsts-part-1/
If this is new to you the quick recap is that we are trying to build a setup for microservices using managed Kubernetes in Azure (AKS) and Visual Studio Team Services (VSTS). So come along for the ride :)
As the next step it's probably best if we create some Azure components that we need to rely on before actually building and releasing the code. I would usually point you to the Azure portal for learning purposes, but you can't really escape the command line for this scenario, so if you don't have it installed already I would strongly advise you to install the Azure CLI:
/en-us/azure/install-azure-cli?view=azure-cli-latest
(If you have an old version installed I would recommend upgrading to get the proper support for AKS along with some bugfixes.)
And while we're at it you should probably download two important Kubernetes tools as well:
Kubectl - https://github.com/kubernetes/kubernetes/blob/master/CHANGELOG-1.9md (Go to the newest "Client Binaries" and grab it.)
Helm - https://github.com/kubernetes/helm/releases
They are plain executables, so no installer; just paste them into a folder of your choosing like C:\k8s
For the sake of simplicity you should add this folder to your path in Windows:
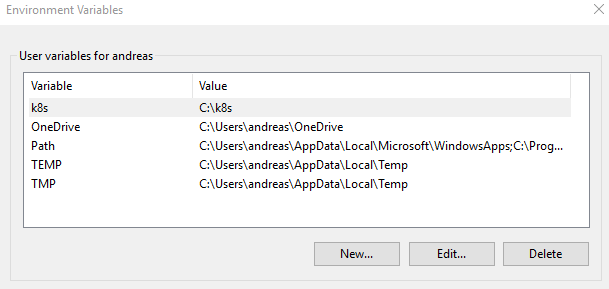
Kubectl is the "control app" for Kubernetes, and Helm is the package manager (or the equivalent of NuGet in the .NET world if you like) for Kubernetes. More on the usage of these tools later.
You might ask yourself why you need Kubernetes native tools, when you are using a managed Kubernetes service, and that is a valid question. A lot of managed services put an abstraction on top of the underlying service, and hides the original in various manners. An important thing to understand about AKS is that while it certainly abstracts parts of the k8s setup away from you it does not hide the fact that it is k8s. This means that you can interact with the cluster just like if you had set it up from scratch. Which also means that if you are already a k8s ninja you can still feel at home, and vice versa, if you come from knowing nothing about k8s it's necessary to learn at least some of the tooling. (Though you don't necessarily need to aspire to ninja-level knowledge of Kubernetes. Though you need to be able to follow along as I switch between k8s for shorthand and typing Kubernetes out properly:) )
For a complete reference on what kubectl can do you can add the kubectl Cheat Sheet to your favorites:
https://kubernetes.io/docs/reference/kubectl/cheatsheet/
For a lot of the things we will do now, the full-blown Visual Studio IDE is probably not what you want to use to get there. I find myself switching between Visual Studio Code, the PowerShell ISE, and the good old command line depending on what I'm doing. (So, don't get confused if I jump back and forth in my screenshots either.)
Creating the AKS cluster
The first step for using the Azure CLI is logging in:
az login 
Pro tip: This login process is implemented using the OAuth DeviceProfile flow. You can implement this yourself if you like:
https://blogs.msdn.microsoft.com/azuredev/2018/02/13/assisted-login-using-the-oauth-deviceprofile-flow/
If you have multiple subscriptions in Azure you might need to use
az account list, and
az account set --subscription xyz,
to make sure you're working on the right one.
We need a resource group to contain our AKS instance. (Technically it doesn't matter which location you deploy the resource group too, but I suggest going with one that is supported by AKS and stick with it throughout the setup.)
az group create --name csharpFiddleRG --location westeurope
Next you need to create the AKS cluster:
az aks create --name csharpFiddleAKS --resource-group csharpFiddleRG --node-count 1 --generate-ssh-keys --kubernetes-version 1.9.2 --node-vm-size Standard_DS1_v2 
You will note that I chose a specific Kubernetes version, even though that seems to be a low-level detail when we're dealing with a service that should handle this for us. However, since Kubernetes is a fast-moving target you might need to be on a certain level for specific features and/or compatibility. 1.9.2 is the newest AKS supported version as I am typing this, so you can verify if there is a newer one if you like. (You can upgrade the version later of course.) If you don't specify the version you will be given the default version, which was on the 1.7.x branch when I tested. Since this is a managed service there might be a delay from a new version of Kubernetes is released until it is available in AKS, so if you want to go bleeding edge managed might not be for you.
To keep costs down in the test environment I'm only using one node, but in production you should ramp this up to at least 3 for high availability and scale. I also specified the VM size to be a DS1_v2. (This is also the default if you omit the parameter.) I tried cheaping out, and going with the cheapest SKU I could locate, but the performance was abysmal when going through the cycle of pulling and deploying images repeatedly so I upgraded.
In light of this I would like to highlight another piece of goodness with AKS. In a Kubernetes cluster you have management nodes and worker nodes. Just like you need more than one worker to distribute the load, you need multiple managers to have high availability. AKS takes care of the management, but not only do they abstract it away - you don't pay for it either. You pay for the nodes, and that's it. (Since the service is in preview I would like to add the disclaimer that I do not know if things might be adjusted at a later point in time.)
The creation of the cluster should take 5-10 minutes so have a minor break here if you like.
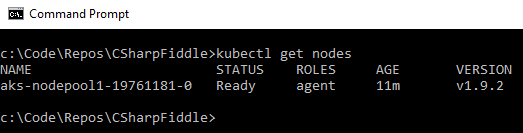
To make sure that things are in a good state you should verify the cluster is working before proceeding. You should run kubectl get nodes, and get something like this:
You should also check that you are able to open the Kubernetes dashboard by running
az aks browse --resource-group csharpFiddleRG --name csharpFiddleAKS 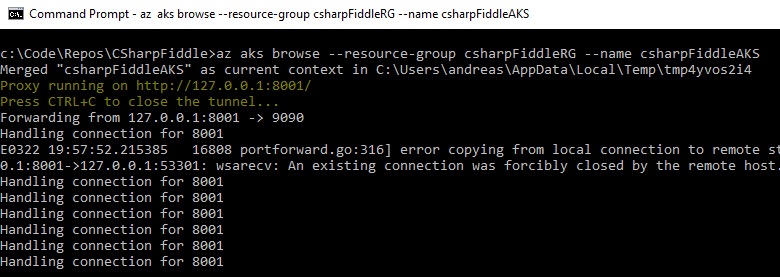
This will launch a browser tab for you with a graphical representation:
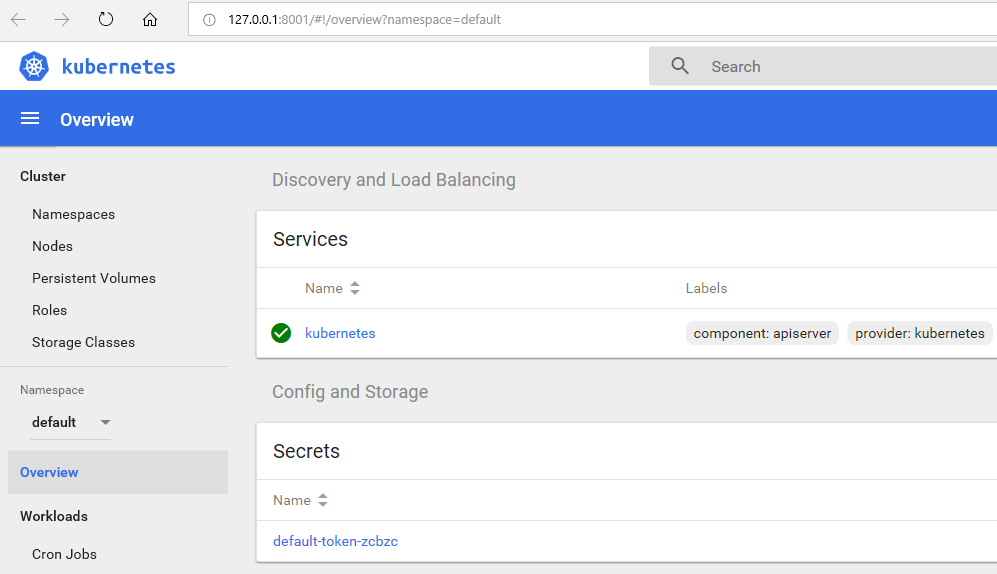
Kubectl also allows for connecting to the dashboard (kubectl proxy), but using the Azure CLI everything is automatically piggybacked onto the Azure session you have. You'll notice that the address is 127.0.0.1 even though it isn't local, but that's just some proxy tricks where the traffic is tunneled through to Azure.
Helm needs to be primed as well to be ready for later. Based on having a working cluster as verified in the previous step, helm will automagically work out where to apply its logic. (You can have multiple clusters so part of the point in verifying the cluster is ok is to make sure you're connected to the right one.) So apply the following:
Helm init
Helm repo update 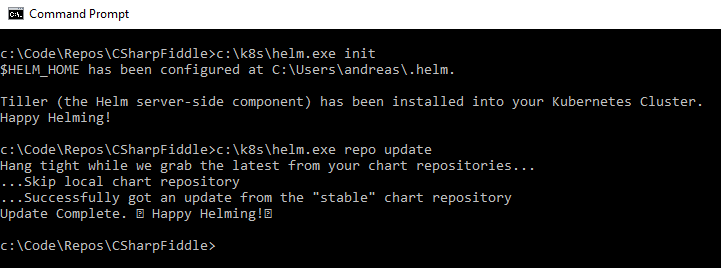
The cluster should now be more or less ready to have images deployed. (We built a Docker image locally in the previous post.) Which brings us to another topic - management of images.
Much like we refer to images when building virtual machines, Docker uses the same concept although slightly different on the implementation level. So to get running containers inside your Kubernetes cluster you need a repository for these images. The default public repo is Docker Hub, and images stored there will be entirely suited for your AKS cluster. (In fact we will acquire some third-party images from Docker Hub for completing our setup.) However we don't want to make our images available on the Internet for now, so we will want a private repository. In the Azure ecosystem this is delivered by Azure Container Registry (ACR).
You can easily create this in the portal, but for coherency let's do this through the CLI as well. You can throw this into the AKS resource group, but since a registry logically speaking is a separate entity we will create a new group for our registry. (Then it becomes more obvious to re-use across clusters too.)
Setting up Azure Container Registry (ACR)
Create a resource group:
az group create --name myACRrg --location westeurope
Create an Azure Container Registry:
az acr create --resource-group myACRrg --name myFiddleregistry --sku Basic
Since it needs to be globally unique you need to come up with your own moniker for the name parameter :)
While you can now browse the contents of the registry in the portal that does not mean that your cluster can do so. As is indicated by the message upon successful creation of the ACR component we need to create a service principal that will be used by Kubernetes, and we need to give this service principal access to ACR. If you're new to the concept this doesn't explain what a service principal is, but you can think of it as a user account for applications in this context. (I will stop myself from going into all the details of Azure AD, as that will quickly grow to something that could be a post of its own.)
This is one of those things I find easier to do in the PowerShell ISE:
// Get the id of the service principal configured for AKS $AKS_RESOURCE_GROUP = "csharpFiddleRG" $AKS_CLUSTER_NAME = "csharpFiddleAKS" $CLIENT_ID=$(az aks show --resource-group $AKS_RESOURCE_GROUP --name $AKS_CLUSTER_NAME --query "servicePrincipalProfile.clientId" --output tsv) // Get the ACR registry resource id $ACR_NAME = "myFiddleregistry" $ACR_RESOURCE_GROUP = "myACRrg" $ACR_ID=$(az acr show --name $ACR_NAME --resource-group $ACR_RESOURCE_GROUP --query "id" --output tsv) //Create role assignment az role assignment create --assignee $CLIENT_ID --role Reader --scope $ACR_ID 
Alrighty, now we have everything set up for creating specifications of our pipeline from Visual Studio to a running container. We need three definitions for this:
- How VSTS should build our code.
- How VSTS should push the resulting artifacts to ACR.
- How AKS should deploy the container.
"Definition" is basically just another word for a recipe that VSTS can follow.
Sounds simple right? Well, yes, some of it is. But it turns out that the devil is in the details as he always is.
VSTS CI/CD
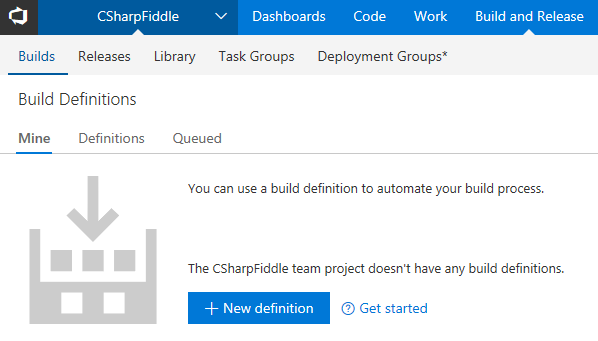
You can either create a definition graphically by going to the right place in the UI:
Or you can put the definition into code as well. Actually you sort of have that code already in the form of a Dockerfile. However I wasn't quite lucky with using the default Dockerfile in VSTS, and the default UI definition produced an error as well.. Ah, such is life.
It might not be apparent to you how to define this in code through VSTS due to the fact that access to viewing/creating YAML files is a preview feature. Depending on the timing of reading this versus when things go GA you might need to enable this to see it:
/en-us/vsts/build-release/actions/build-yaml?view=vsts
There's two (at least) ways you can approach handling of the building process. You can either push the code into the repo, build the code "directly", pack it into a Docker image, and push the result to ACR.
The other approach is to push the code to the repo, "inject" the code into a Docker image for the build, have the output in a new Docker image, and then push the result to ACR. This would for instance allow you to build things that aren't supported natively by VSTS. Very meta to use a container for building a container though :)
I seem to get the second approach to run slightly faster; don't know why. (Could be a coincidence for that matter.) But for now we will choose the first approach. We will re-visit the second approach later on in our walkthrough.
Your docker-compose.yml currently looks like this:
version: '3' services: api-playground: image: apiplayground build: context: . dockerfile: API-Playground/Dockerfile
We'll change the image name to say myfiddleregistry.azurecr.io:apiplayground, and commit/sync to VSTS.
Going back to VSTS we need to create a new build definition (we are as you can see going the UI path here):
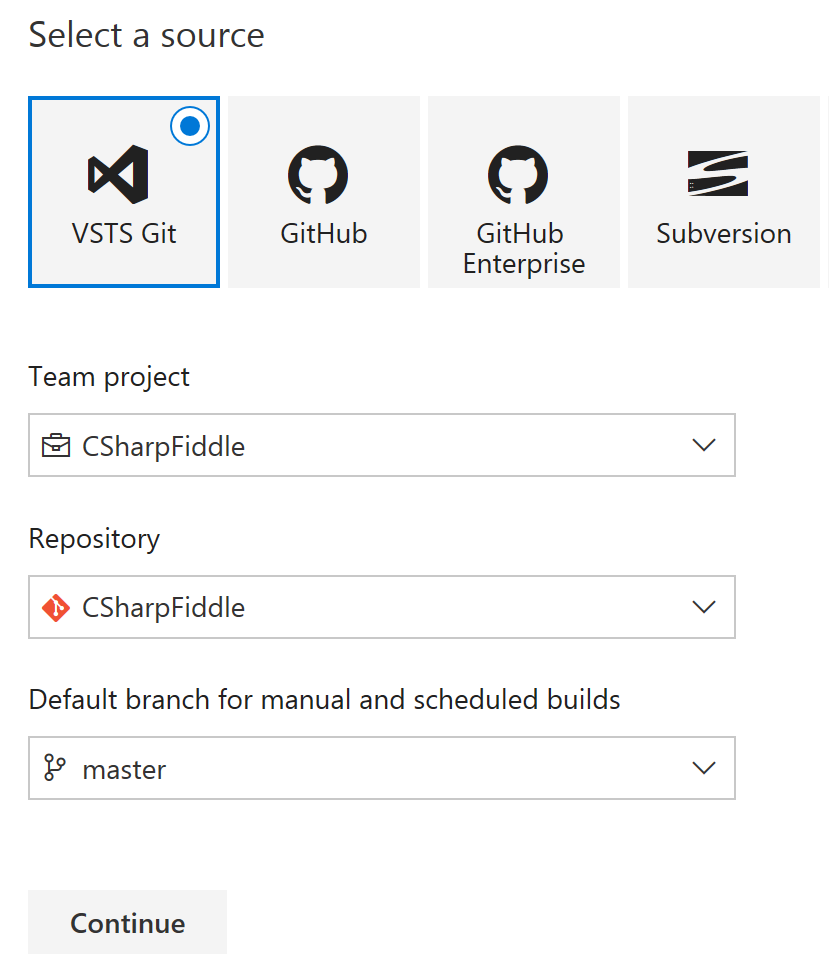
Choose VSTS Git, and the current repo:
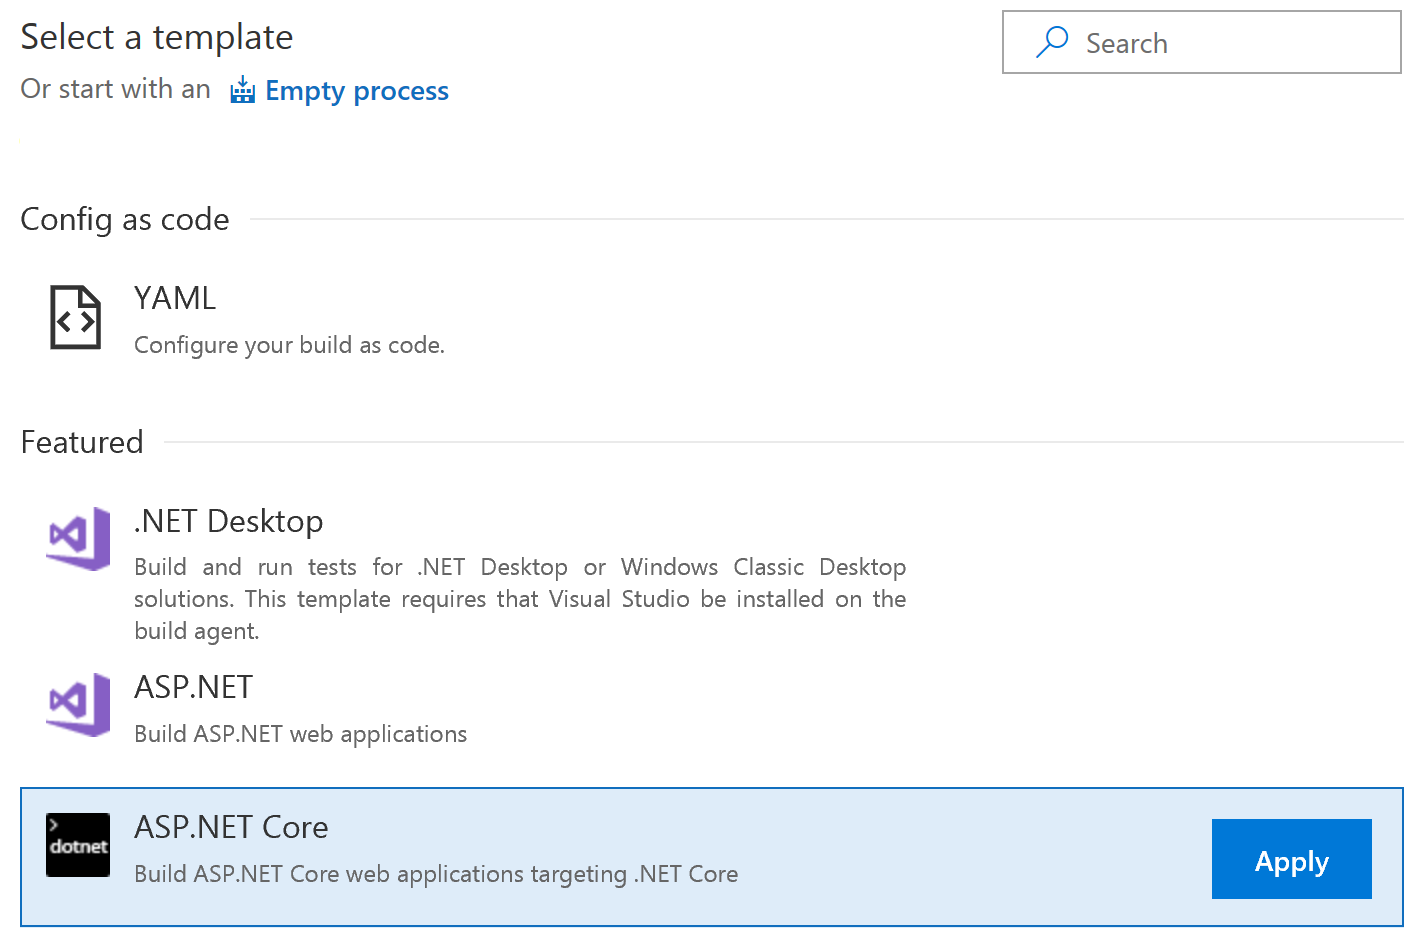
Choose ASP.NET Core as the template, and hit Apply.
You should find yourself on the root config which looks roughly like this:
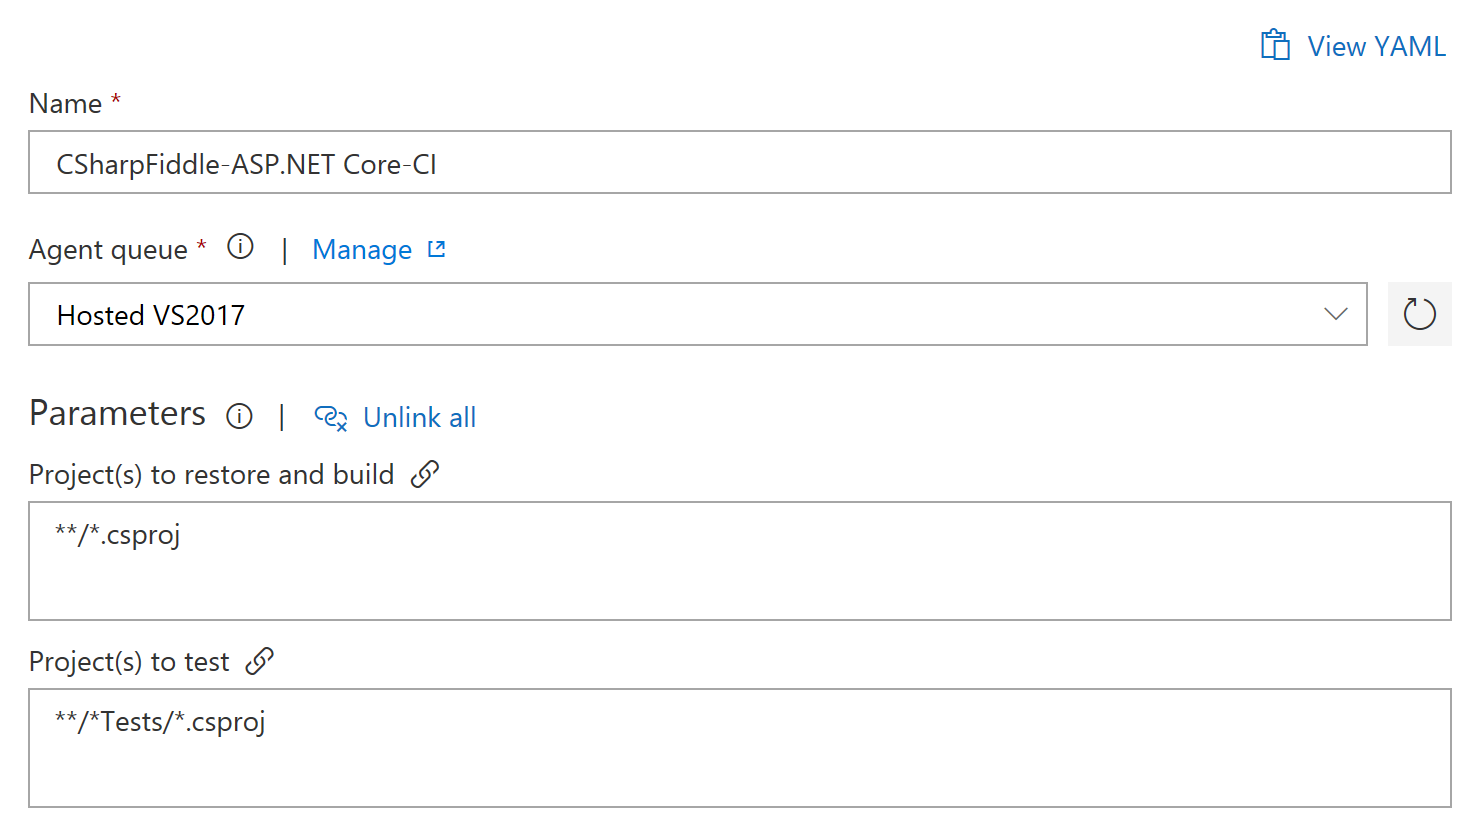
You can see that Restore, Build, Test, and Publish steps have been defined. You can remove the Test step if you like since we're not actually doing that currently :) (It doesn't do anything if you leave it there though.) We will remove the Publish step, because we will not publish this way either.
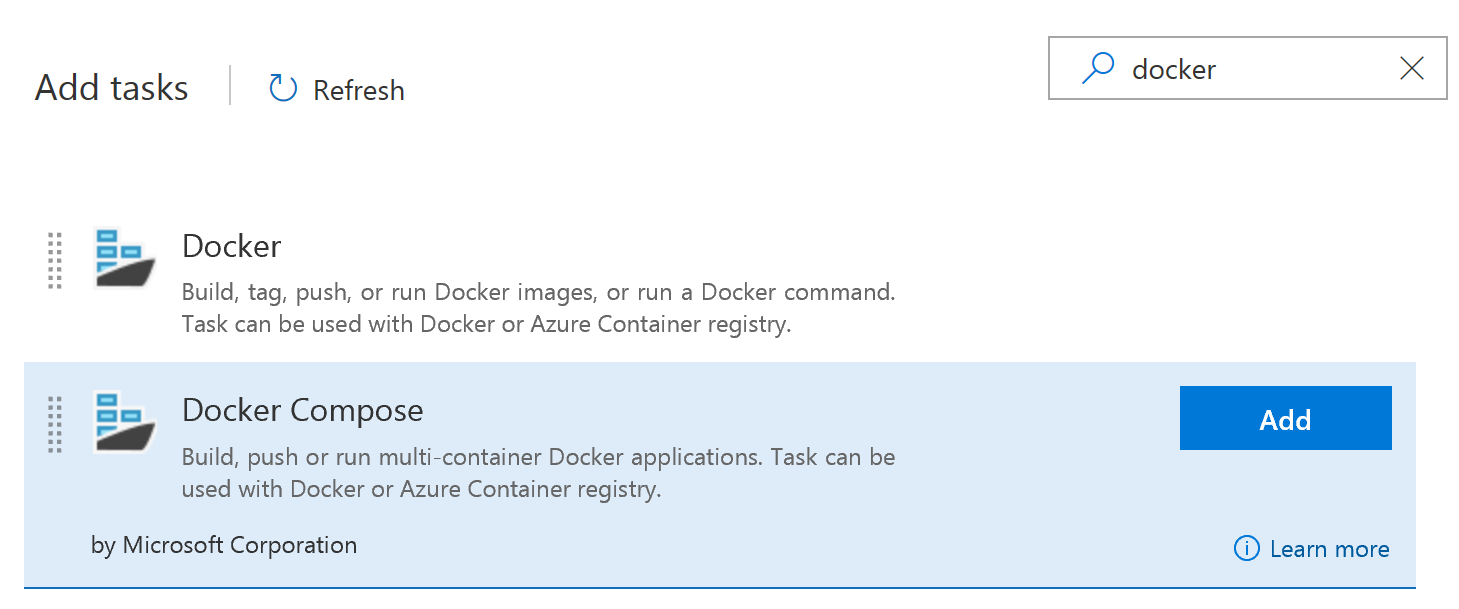
We then need to add two Docker Compose phases (hit the + sign to the right of "Phase 1").
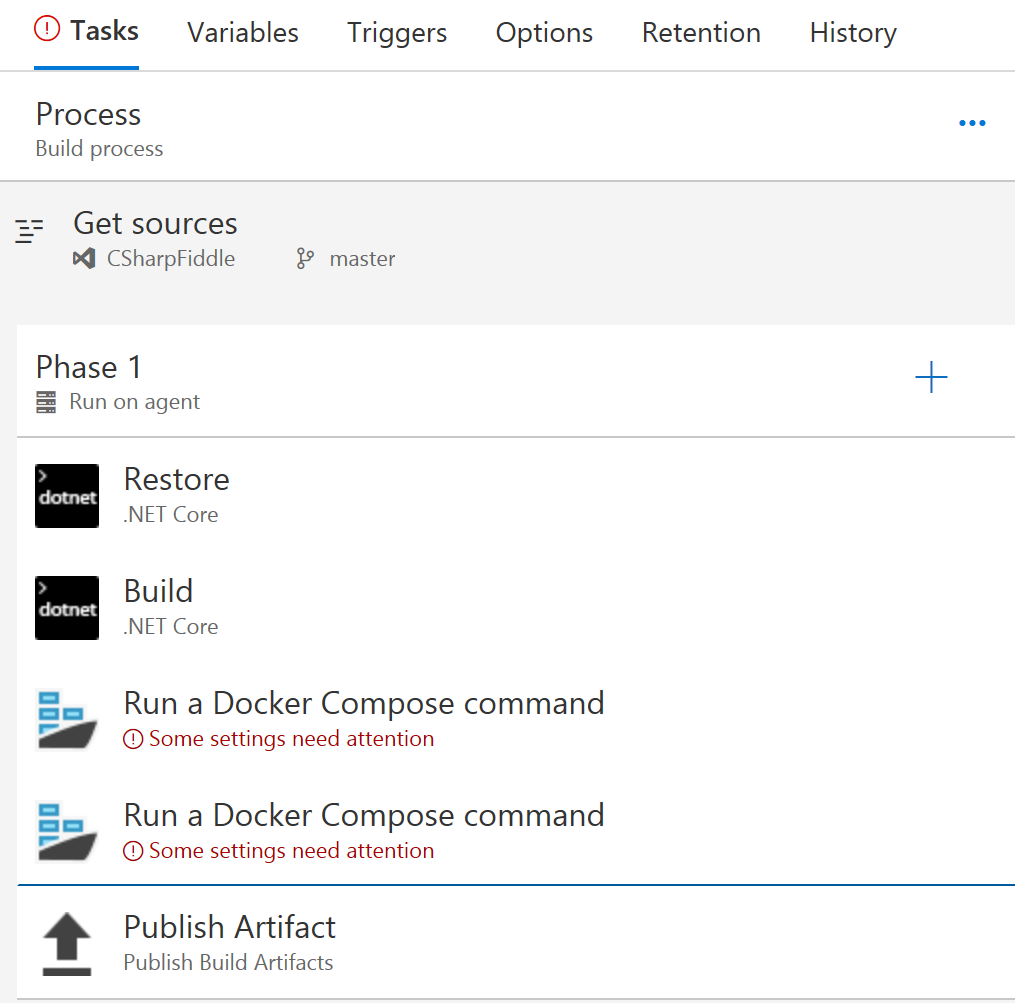
They need to be added at the right stage in the pipeline so things should look like this:
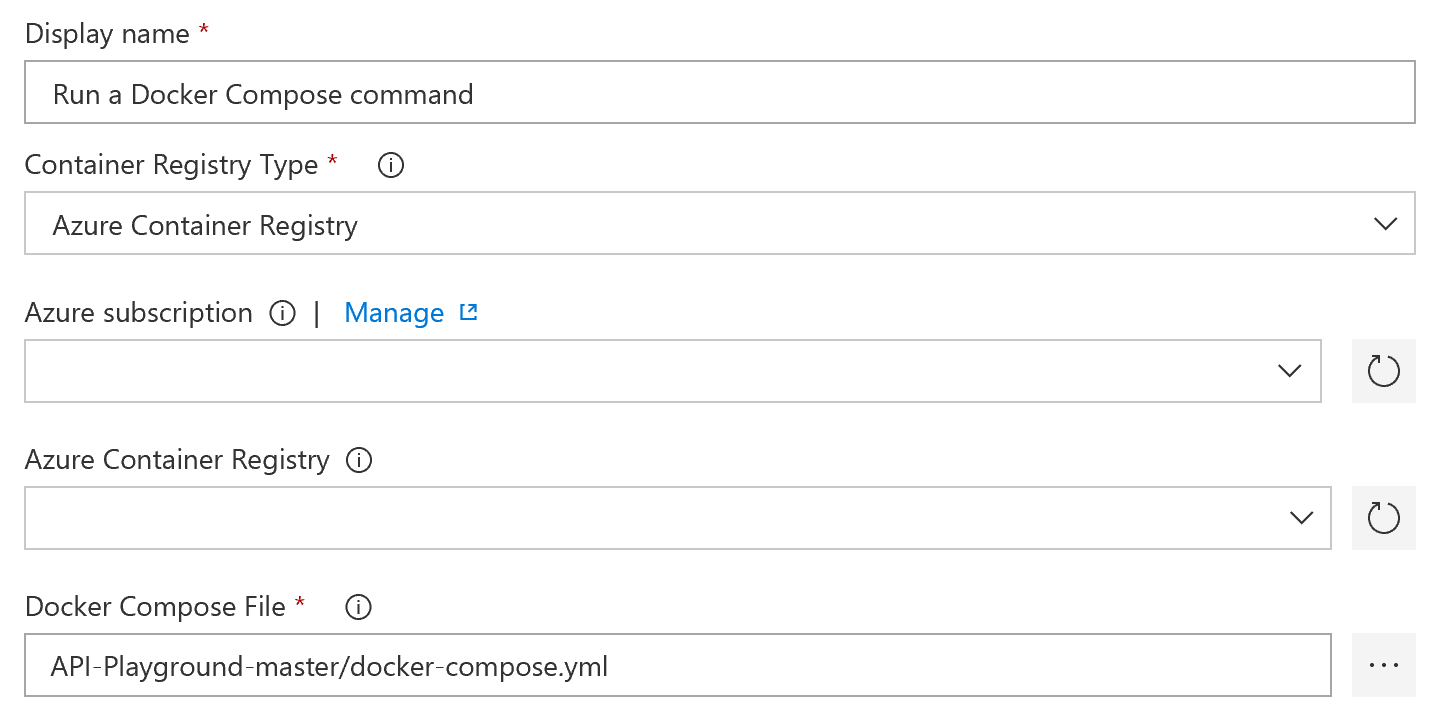
Select the first of these Docker tasks, select your Azure subscription, and select your Azure Container Registry. You need to authorize your VSTS project to access your Azure subscription the first time you're connecting the two, which should be straightforward if you're not juggling multiple user accounts in Azure and VSTS. Select the docker-compose.yml from the root of your project (you did check-in your edit right?):
Scrolling further down select "Build Service Images" as the action, use $(Build.BuildId) for "Additional Image Tags", as well as checking off next to "Include Latest Tag".
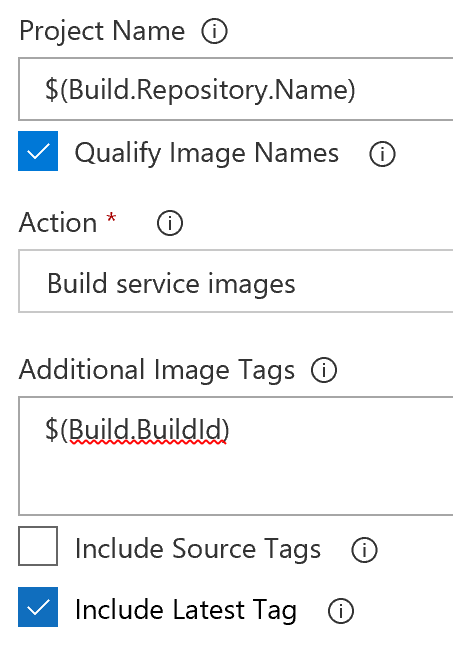
Unless the defaults have been changed in VSTS the rest of this task should be good to go already.
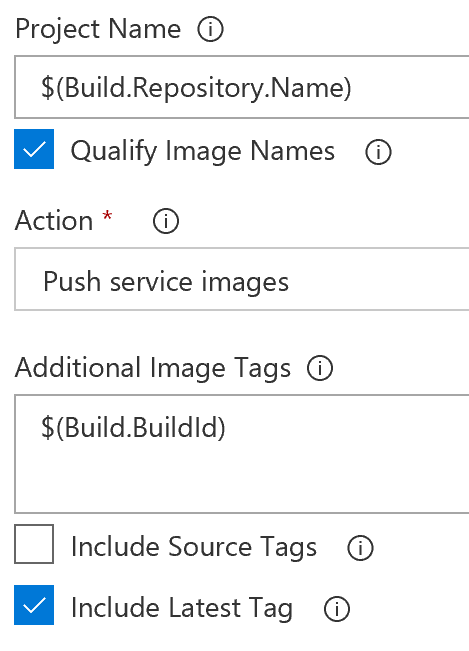
Moving on to the next Docker task you should configure the same Azure subscription and registry, as well as pointing it to the same docker-compose file. The action here should be "Push Service Image".
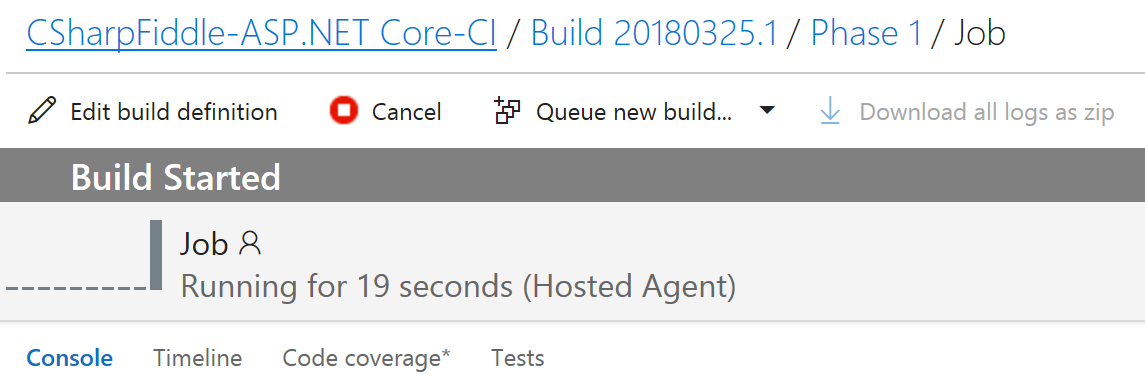
The Publish Artifact task isn't really used now either (not the same as the Publish task we removed), but we will still leave it there (because it can be used when creating releases). You can now hit "Save and queue" to kick off the build.
Since it's a shared system for builds you might need to wait for a minute or two to have it start, but that can vary.
The process will take several minutes since it needs to pull in the .NET Core image and stuff, but with a bit of luck you will have a complete list of green checkmarks:
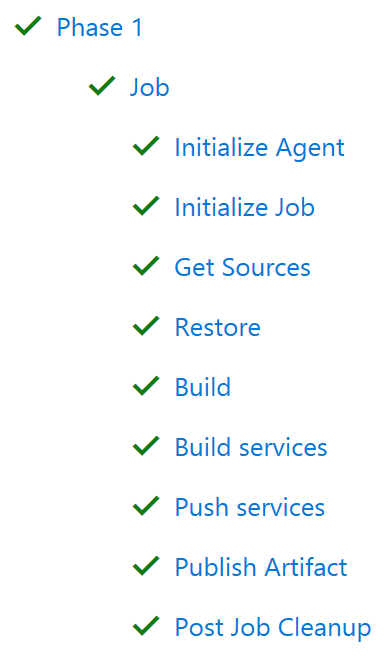
If something fails there should be a hint in the logs to suggest why. (Not necessarily helpful hints though.)
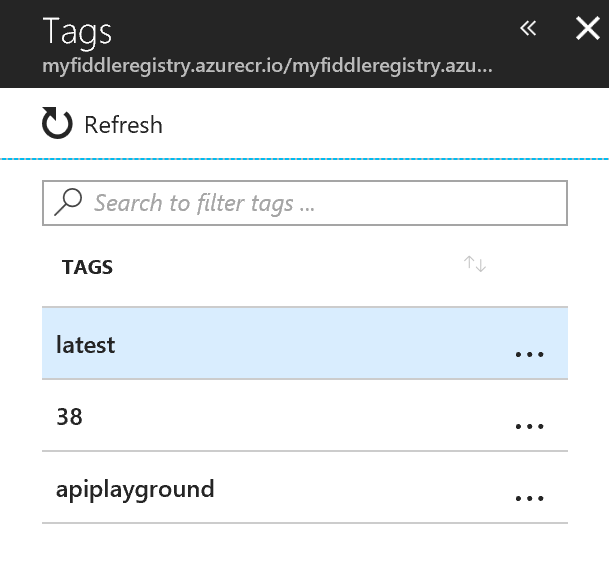
You can verify things ended up in the right place by browsing the ACR in the Azure Portal, and list the tags in the repository:
Status so far is that we have coded up something, and we have built and pushed an image to ACR. But there is nothing actually running yet. We need to get the image from ACR, and into the cluster. Kubernetes runs on having the recipes, (or definitions if you will), for the containers defined in yaml files. So let us define one for our service:
Api-playground.yaml
apiVersion: apps/v1beta1
kind: Deployment
metadata:
  name: api-playground
spec:
  template:
    metadata:
      labels:
        app: api-playground
    spec:
      containers:
      - name: api-playground
        image: myFiddleregistry.azurecr.io/apiplayground:latest
        ports:
        - containerPort: 80
---
apiVersion: v1
kind: Service
metadata:
  name: api-playground
spec:
  ports:
  - port: 80
  selector:
    app: api-playground
I'm not delving into the explanations here, but as you can probably figure out this defines some of the necessary things to describe the container. Be aware - yaml files want spaces, not tabs, and it expects the indent hierarchy to be as above. If you get the indentations wrong it will not work.
This should eventually go into our source repo too, but for now I actually chose to create it separately to illustrate how microservice definitions are not necessarily a part of the Visual Studio side of things.
From the terminal in VS Code (or command line if you like) run
Kubectl create -f API-Playground.yaml 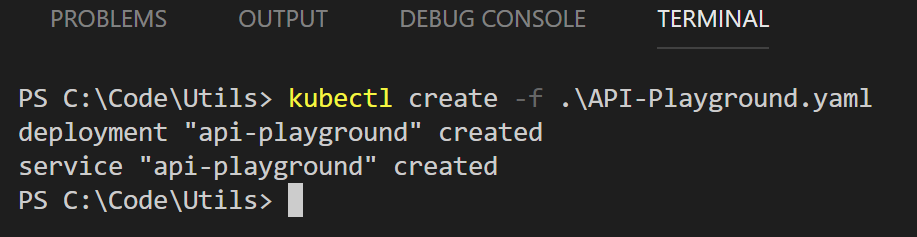
If everything went well you should now have a running container in Azure. Let's browse to the site and see how it looks. Ehh.. Which address should we browse to?
Run kubectl get svc, and you'll see something like this:
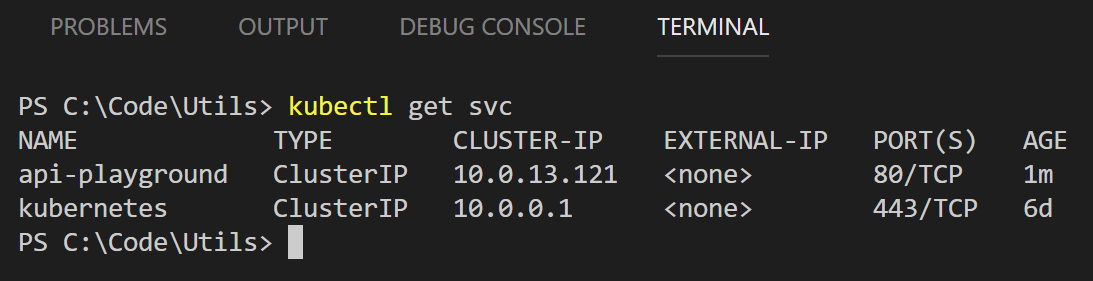
Kubectl gives us an IP address, but it is internal to the cluster. This goes to prove "things" have happened, as k8s will not assign an address to a non-existent entity. Not that this really helps the average end-user as this IP isn't really usable for the world at large.
This is where things crosses more into the ops part than the dev part of the DevOps term. And we will cover those pieces of the puzzle in our next post.