Part 2: Secure your Logic App using API Management – Access Restriction Policies
This is the second part in the series about securing your Logic Apps. In the previous post, I’ve provided several ways to secure your Logic App at the Trigger Level. In this post, I’m going to show how to secure your App using API Management with Access Restriction Policies.
In this series:
- Secure access to the trigger
- Secure your Logic App using API Management – Access Restriction Policies (this post)
- Secure your Logic App with Azure Active Directory using Azure API Management
- Secure your Logic App using API Management - Validate JWT Access Restriction Policy
Setting up API Management
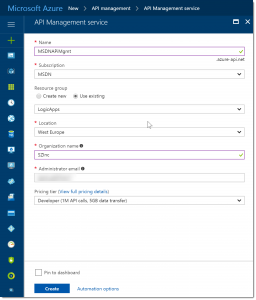
Open the Azure Portal and create a new service. Search for ‘API Management’ and click the Create button.
Enter a name for the service, select the Azure subscription and select the resource group. I’ve picked the same resource group which I have created in the previous post. Add an organization name, an email address and pick a pricing tier. After that, click Create.
It takes some time to create the API Management service. After creation and activation, open it from the Azure Portal .
Adding the API
I’m using the Logic App which is created in the previous post to import into the publishing portal. So, copy the callback URL from the settings page of the Logic App in the settings portal.
In the left menu of your API Management Service, click APIs – Preview.

A wizard is opened. Select the Logic App in here.
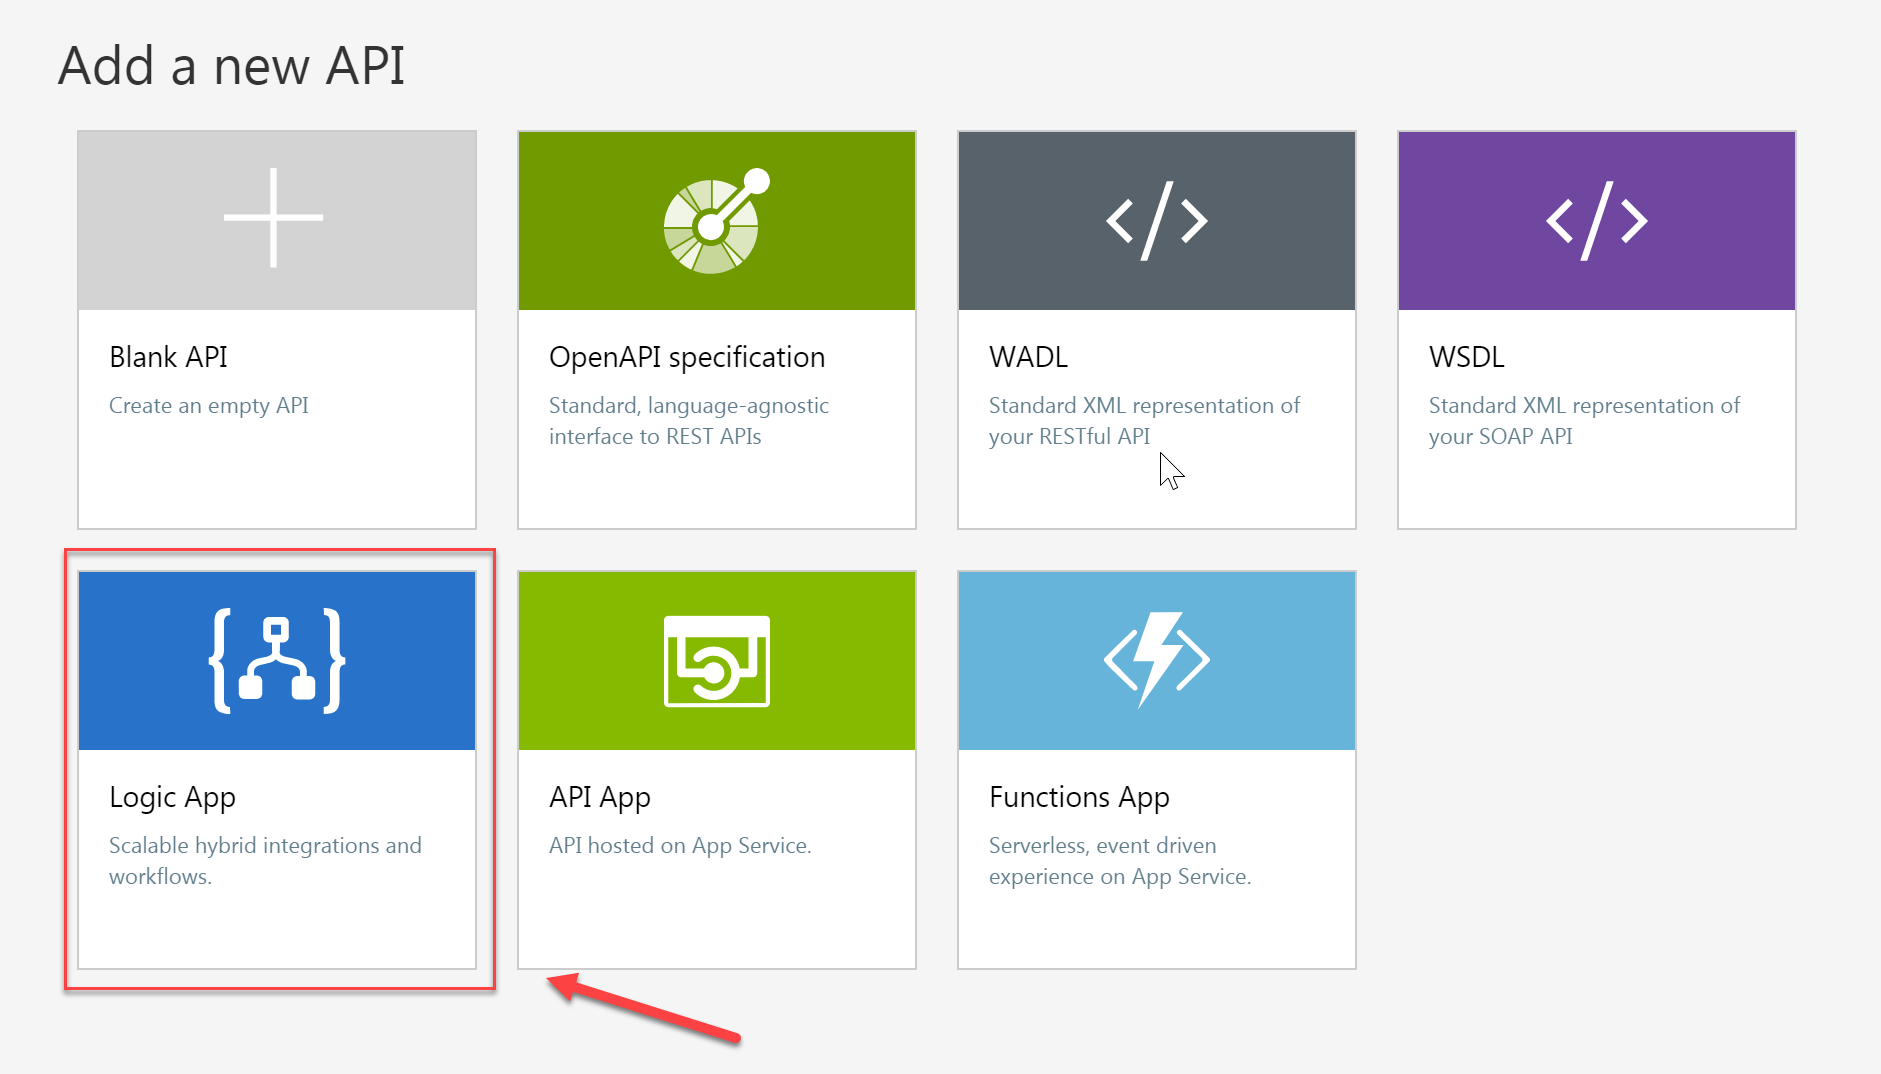
You can now browse for your Logic App. Cool!
Click the Browse button and select the Logic App that you want to import. Add an API URL suffix, I’ve named my ‘secure’ and click Create.
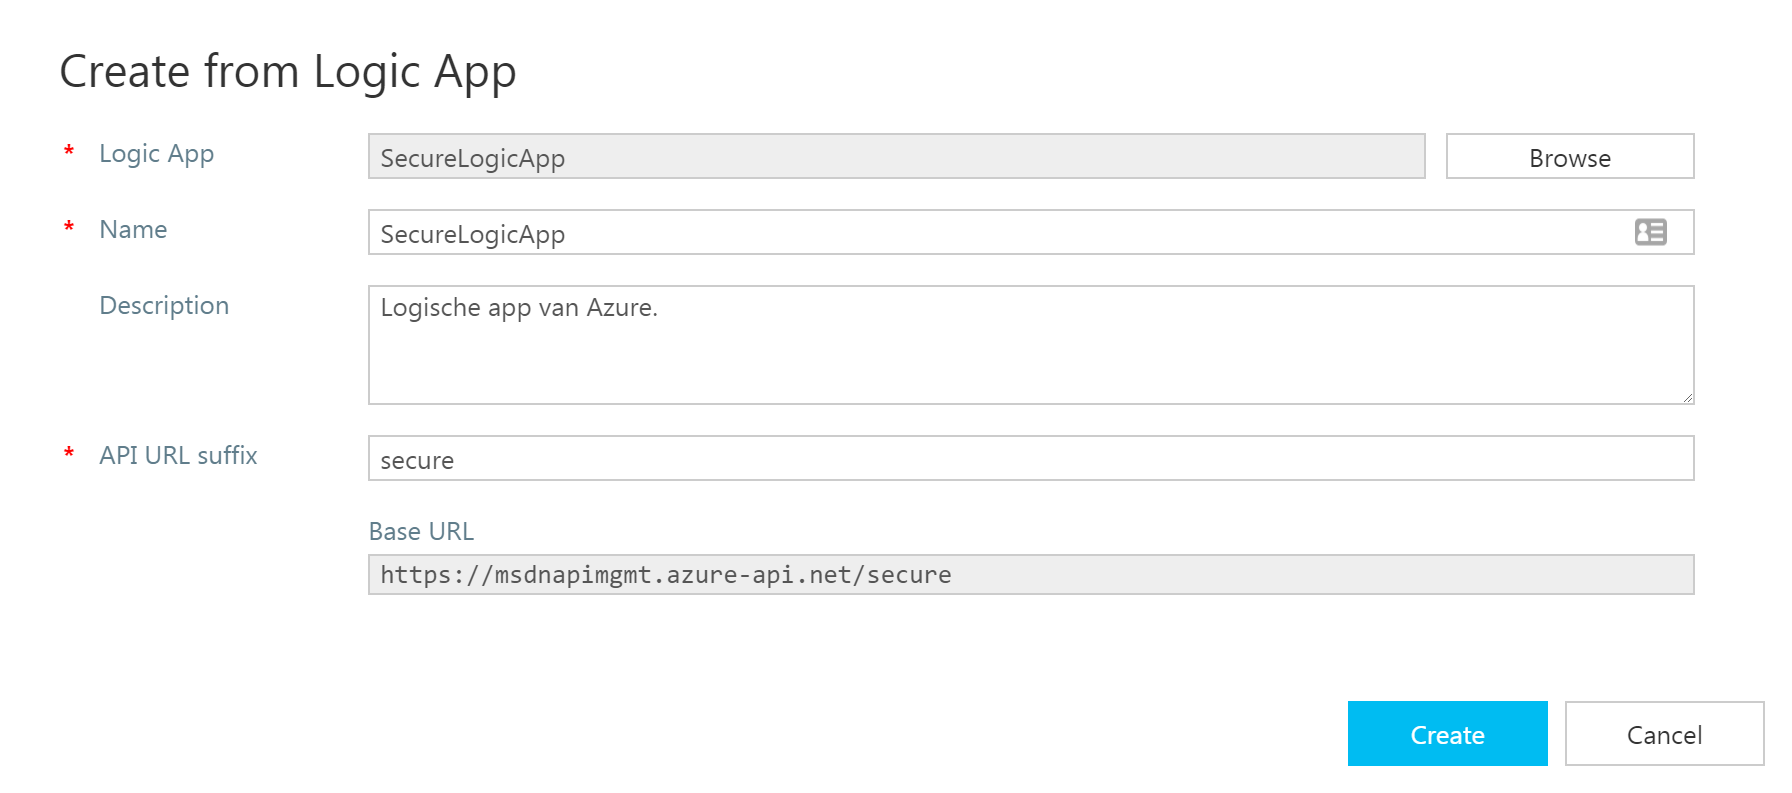
Note: If you are using the Logic App which is created in the previous post, don’t forget to remove the NotAfter tag from your Logic App code. This will cause an error when importing into the API Management Service.
And there it is!!
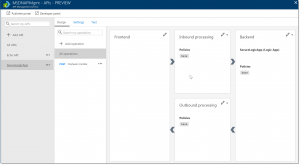
In this design surface, we now have a visual representation of the API, including the Logic App backend. The current context is set for all operations, so all policy changes will take place on a “global” level.
Select ‘Manual-invoke’ below the already selected ‘All Operations’

Instead of empty policies, this will display some default policies that are already in place by importing the Logic App.
Access Restriction Policies
To add authentication to this API we need to add some extra policies to the design surface.
Check HTTP Header
The first is the Check HTTP header policy. For this we are going to add an extra check to the header of the request.
Click the arrow next to Inbound Processing and click Form-based Editor. 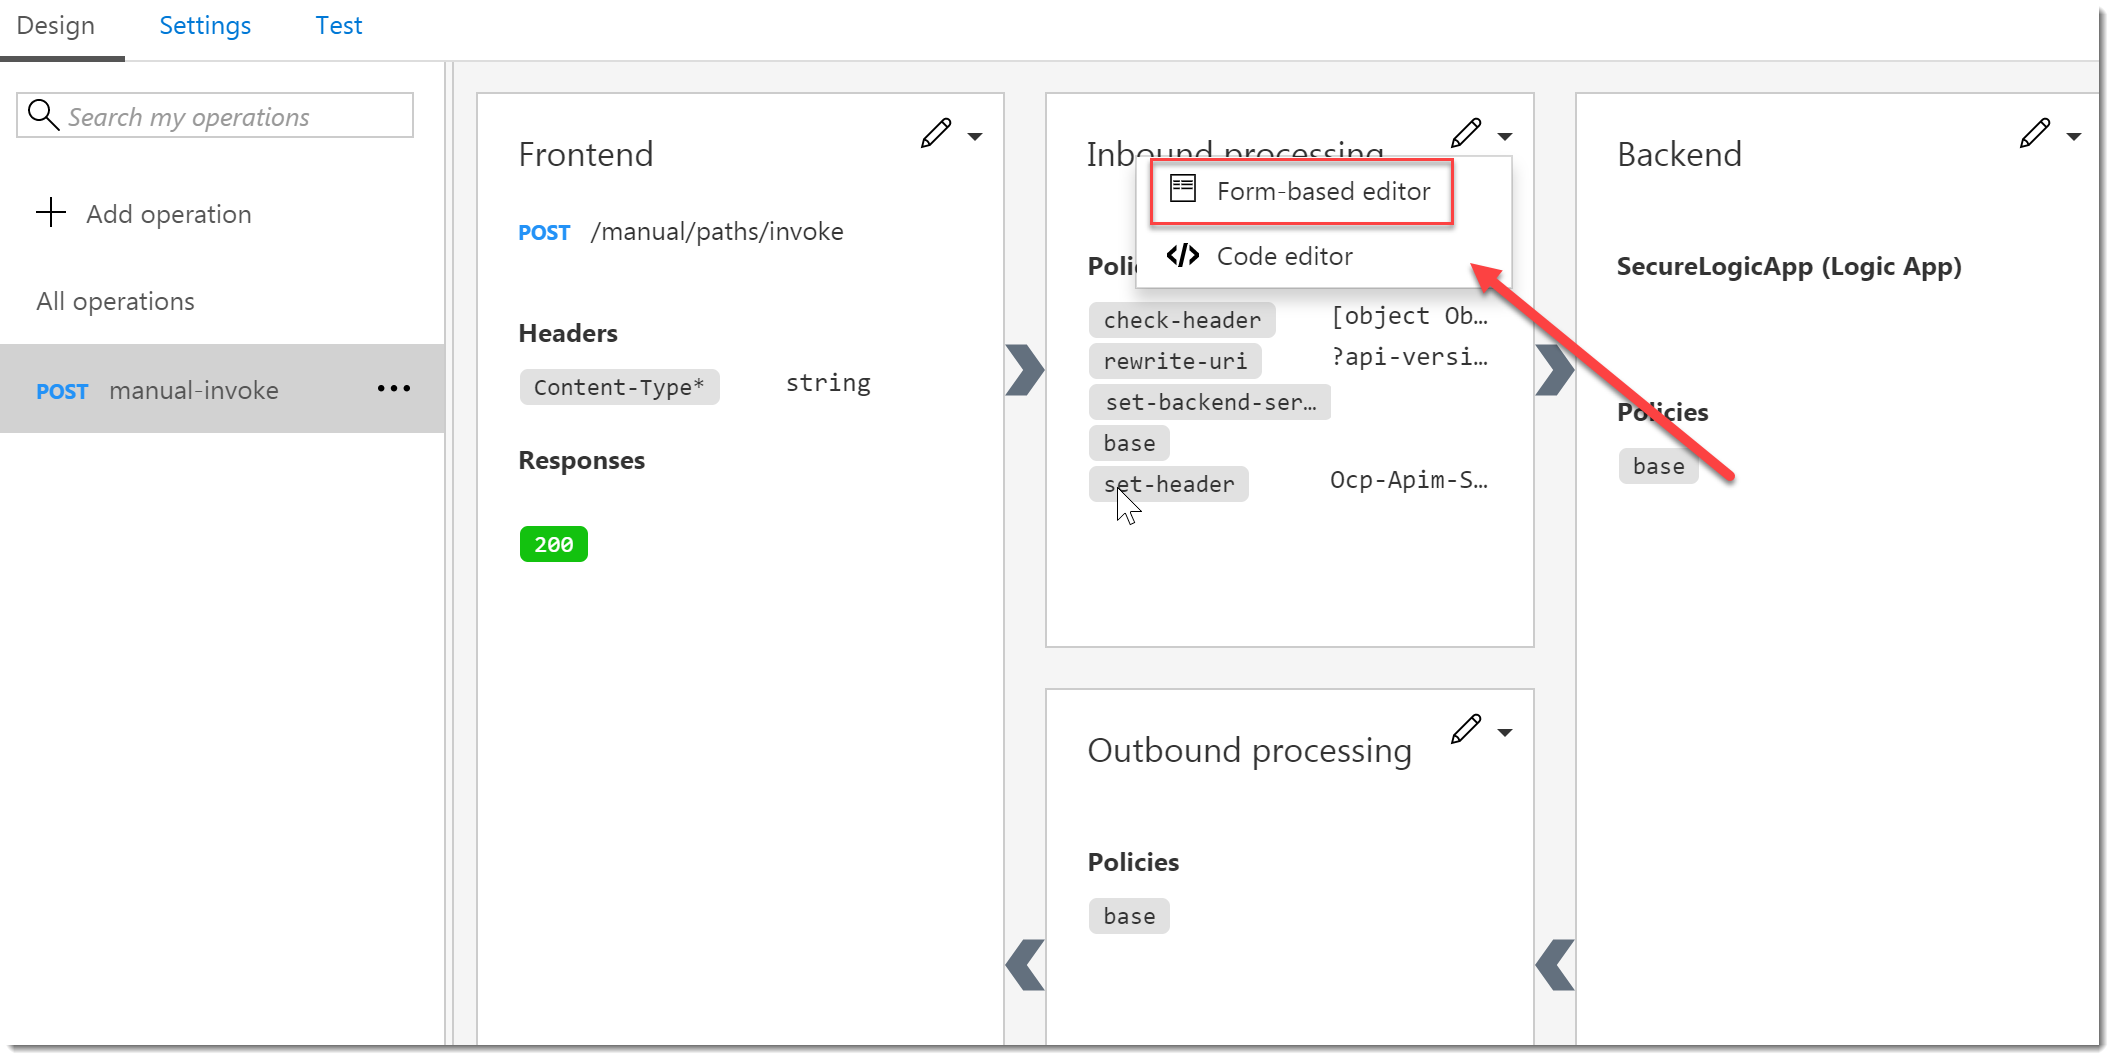
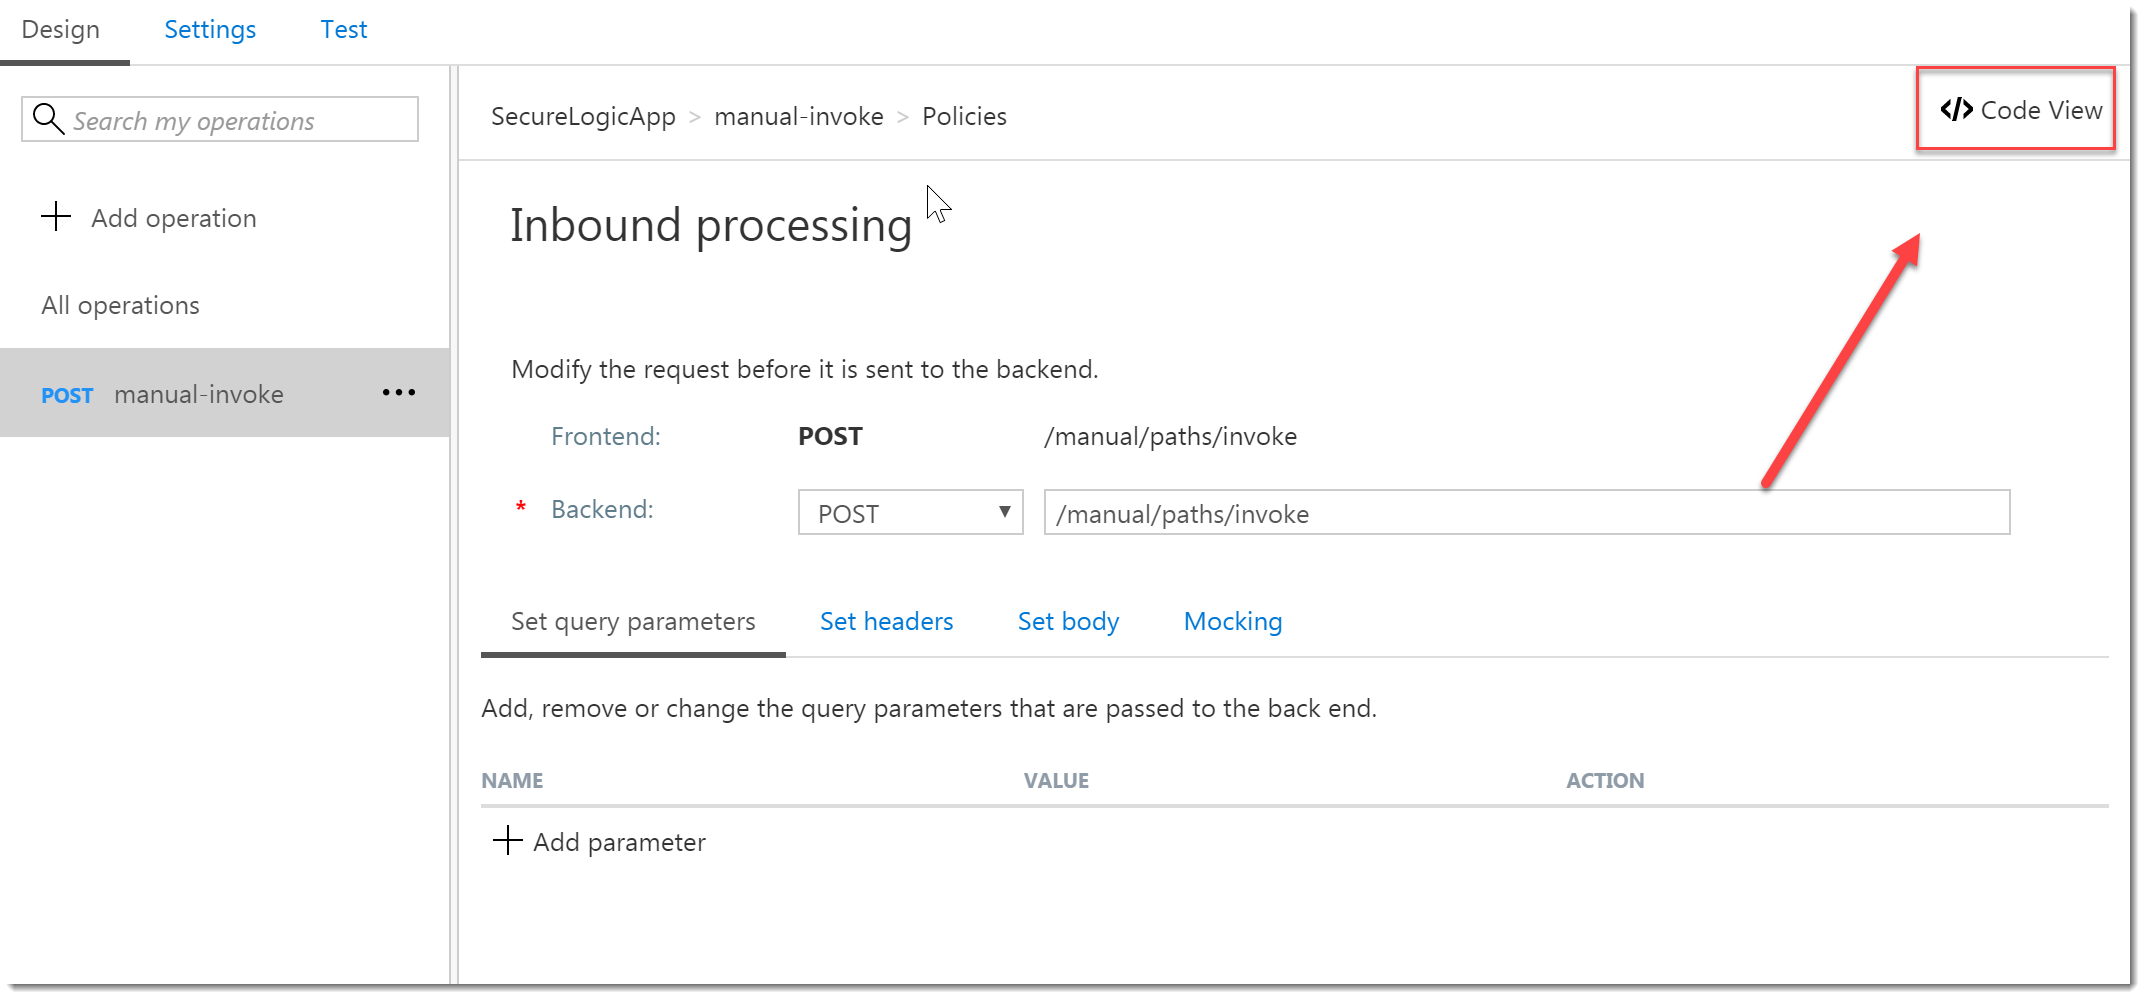
On the right, click Code View.
Set your cursor inside the <inbound> tag and under Access Restriction Policies, click on Check HTTP header.
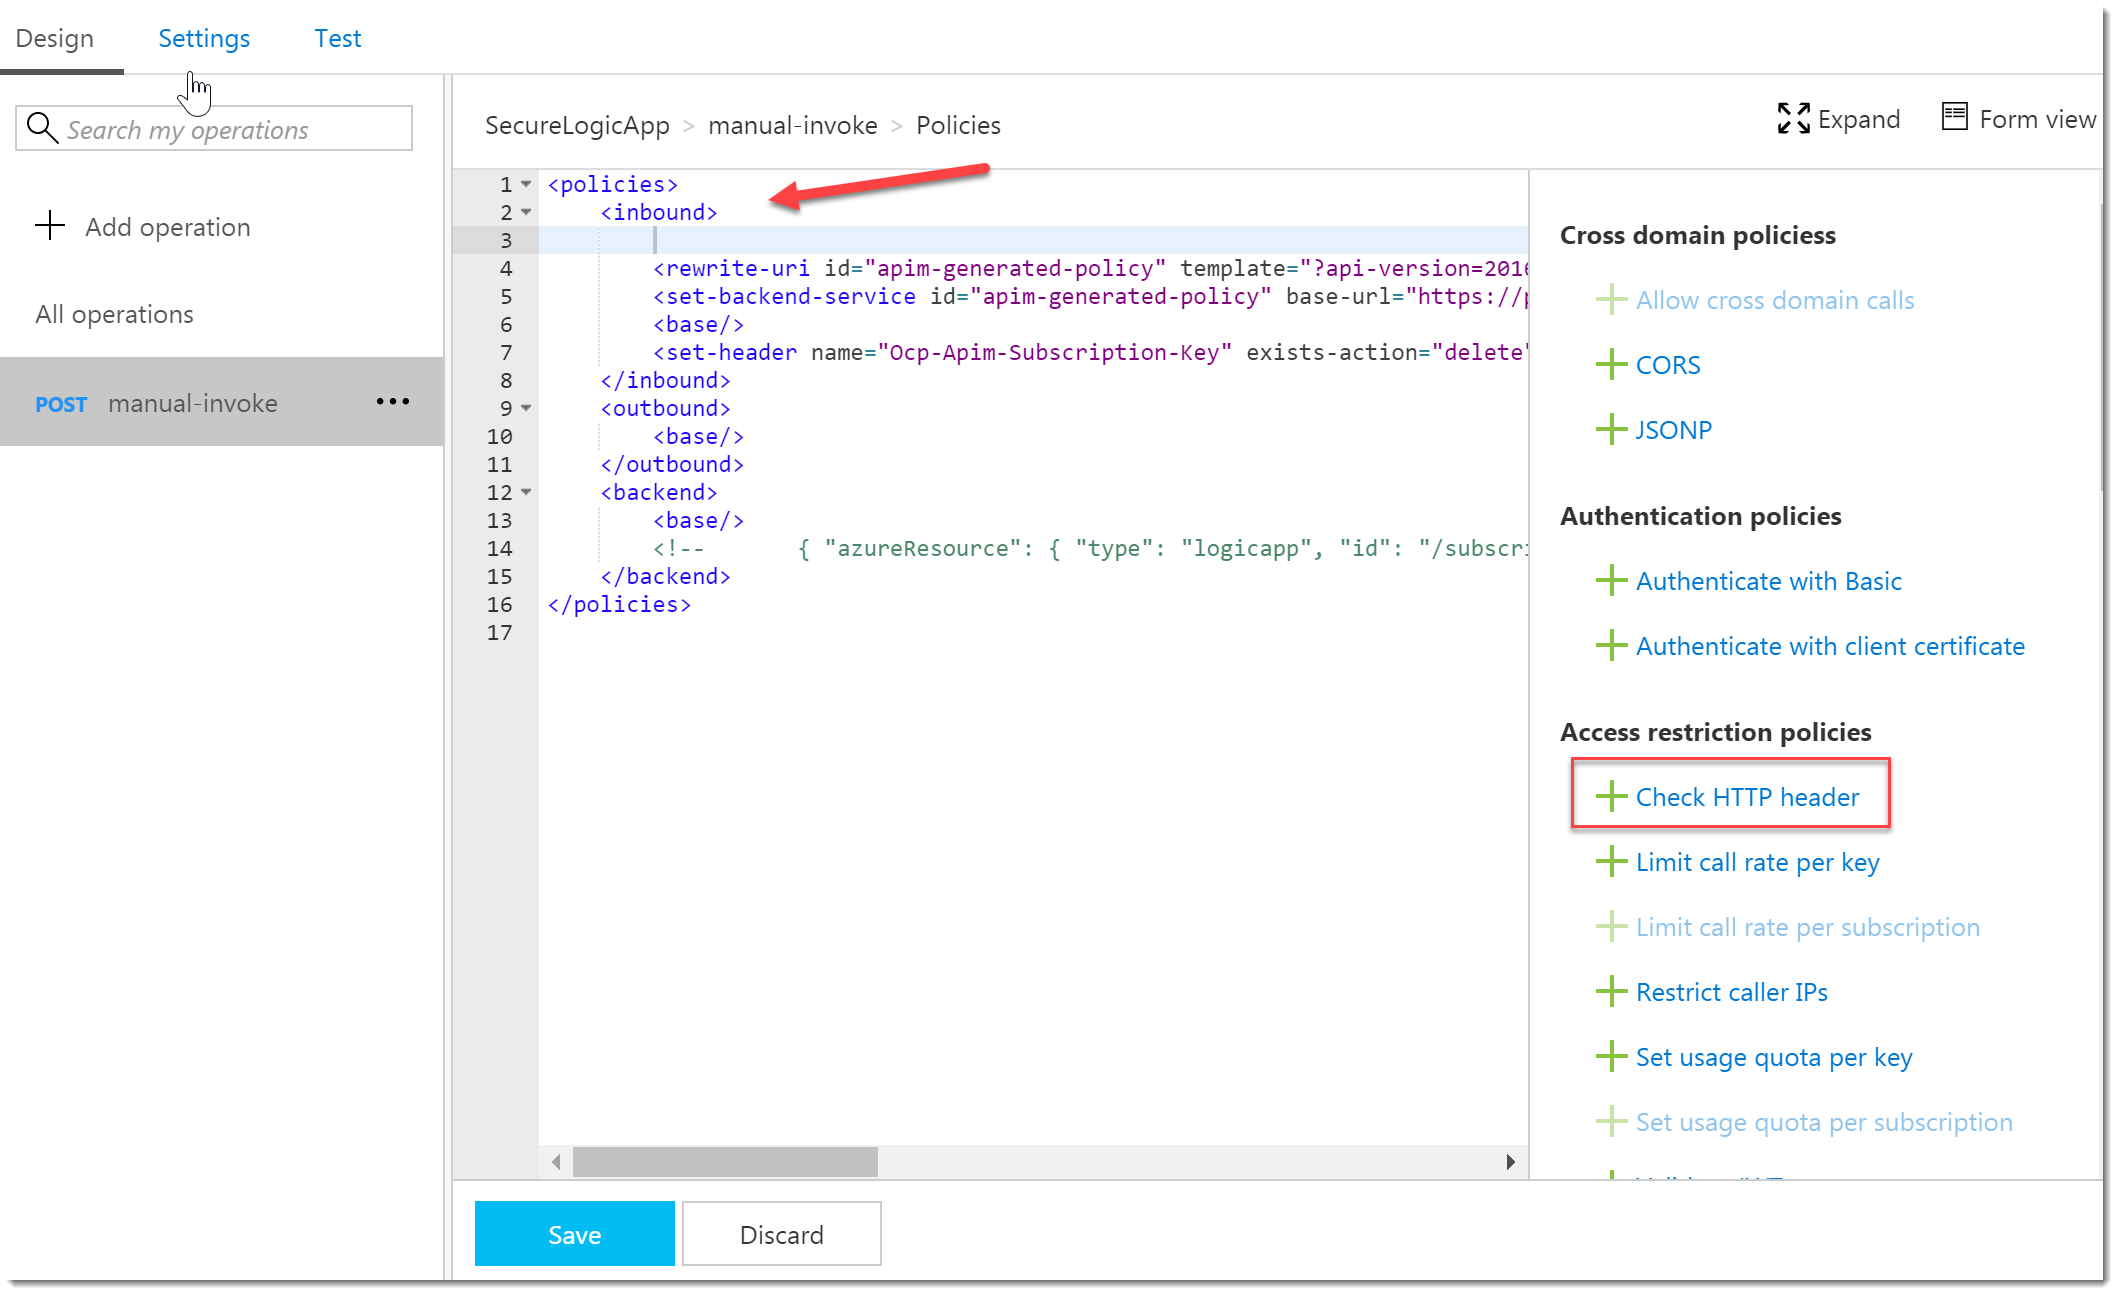
There is a code block added to the xml. Replace it with the following:
[sourcecode]
<check-header name="ExtraCheck" failed-check-httpcode="401" failed-check-error-message="Not authorized" ignore-case="false">
<value>Yes</value>
</check-header>
Click Save.
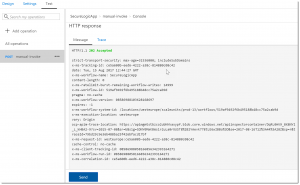
Click Test in the left menu, add an additional header to the header section, which is equivalent to the header code block which is added in the previous step, add the body text to the Request Body part and click Send. 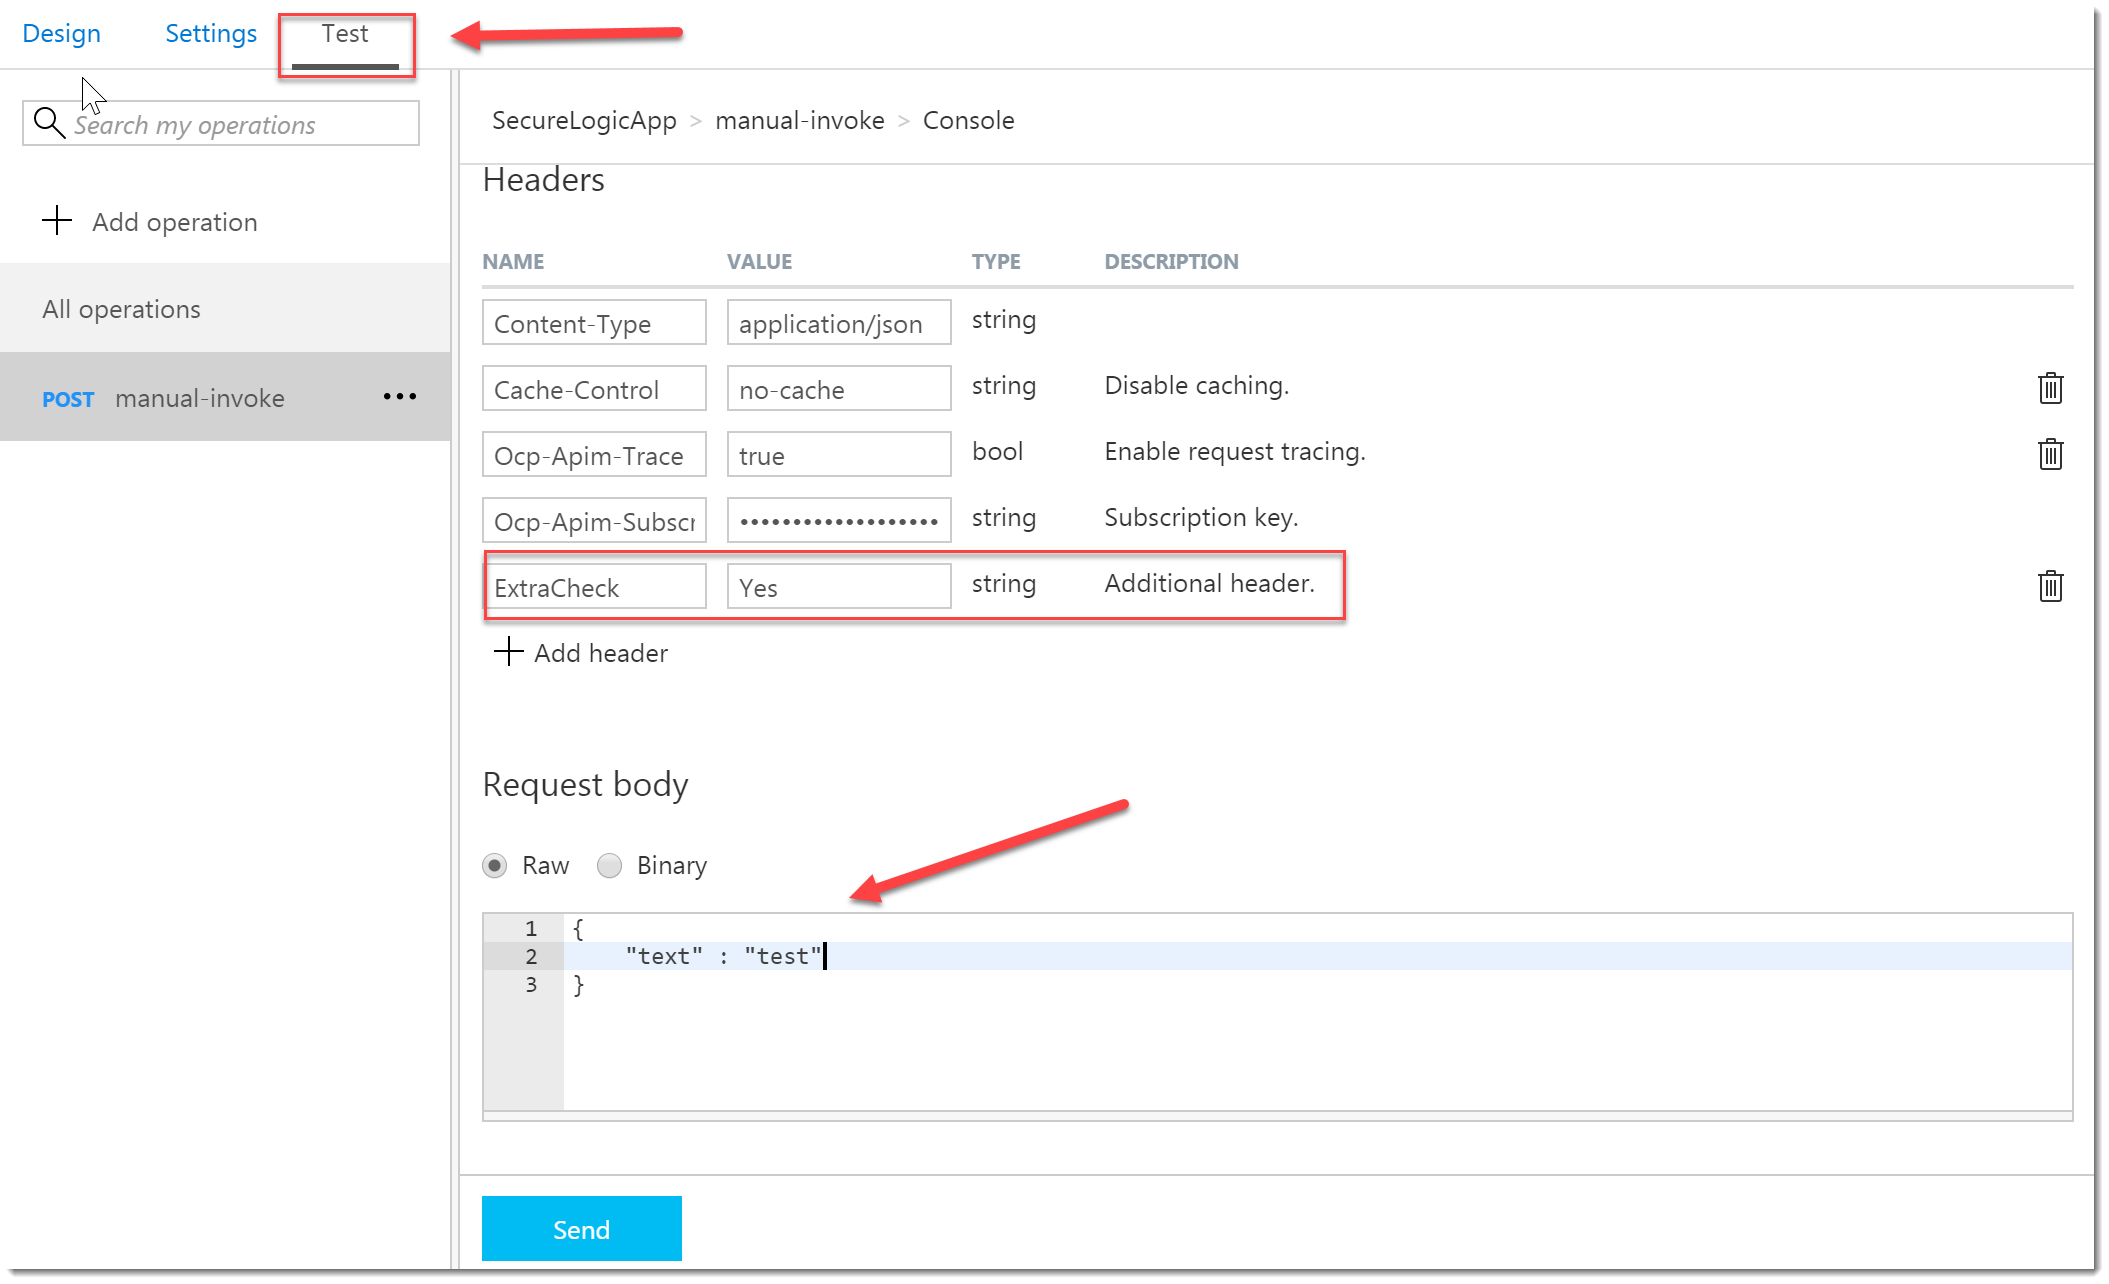
If anything went well you will a similar response like displayed below:
Limit Call Rate Per Key
Next is the possibility to limit the call rate per key. This adds Throttling capabilities to your API.
To add this functionality to your API, open the Code View again (refer to the previous Access Restriction Policy), place the cursor in the <inbound> tag and click the Limit Call Rate Per Key. The boilerplate code is added to the xml.
Replace the code with the following:
[sourcecode]
<rate-limit-by-key calls="10" renewal-period="60" increment-condition="@(context.Response.StatusCode == 200)" counter-key="@(context.Request.IpAddress)" />
In the above sample, the API only allows 10 requests in 1 minute from a certain IP Address.
For more samples about Advanced Throttling, check the following article: /en-us/azure/api-management/api-management-sample-flexible-throttling
Set Usage Quota Per Key
In addition to the above, you can also set throttling based on a certain quota.
Add the Boilerplate code to the code view to the <inboud> tag, by clicking the Set usage quota per key link on the right.
Replace the code with the following:
[sourcecode]
<quota-by-key calls="10000" bandwidth="40000" renewal-period="2629800" increment-condition="@(context.Response.StatusCode >= 200 && context.Response.StatusCode < 400)" counter-key="@(context.Request.IpAddress)" />
This policy restricts a single client IP address to a total of 10000 calls and 40,000 kilobytes of bandwidth per month.
You can also combine these last two access restriction policies.
Restrict Caller IPs
You can also allow or deny calls from specific IP addresses by adding the following piece of xml to the <inbound> tag:
[sourcecode]
<ip-filter action="forbid">
<address>192.168.1.1</address>
</ip-filter>
Or use the following for a range of IP addresses:
[sourcecode]
<ip-filter action="forbid">
<address-range from="192.168.1.1" to="192.168.1.100"/>
</ip-filter>
Conclusion
The new preview API functionality I’ve used in this post works a lot better than the previous way of adding your policies!
Azure API Management adds a lot of functionality for authentication scenario’s. Most of the Access Restriction Policies are discussed in this post, except for the Validate JWT policy. I’m going to write about that one in a separate post, because it is basically too much to add to this post as well.
So, there is more to come in this series of posts…
-Sjoukje