IoT Hub - Visual Studio Team Services Deployment & Continuous Integration
I had this question the other day about ARM deployment.
We were talking about deploying IoT Hub using deployment scripts. Until then, I had deployed resources purely with code. This is easily performed with the Azure Resource Manager SDKs. Keeping it all in code libraries seemed right for a coder, but I soon realised the benefits of lifting it out into script form.
A big advantage of ARM is the ability to script your different environments (eg Dev, Test, UAT, Production).
As mentioned, you can use Resource Manager to deploy resources to Azure from code. You create an "Azure Resource Group" project in Visual Studio, which gives example files and PowerShell script to deploy a project. A similar PowerShell script that you will notice in the console output, near the end of the article.
One process I wasn't proficient with was the Visual Studio Team Services deployment method.
As with other build processes, VSTS build definitions allow you to decide how changes are published. You may choose continuous integration for the Dev environment (every new commit is published), but manual for the others (only queue a build when we're ready to present something).
Below is a very quick scoot through the whole process of setting up an Azure Resource Manager Deployment for IoT Hub, with Continuous Integration, plus an example of tweaking a file, to show the continuous integration automatically trigger and update the resource.
I have broken this down into ten [fairly] simple steps.
You can click the images for a full size version.
1. New team project
First off, go to your Visual Studio Online account (now branded "Team Services") and create a new project.
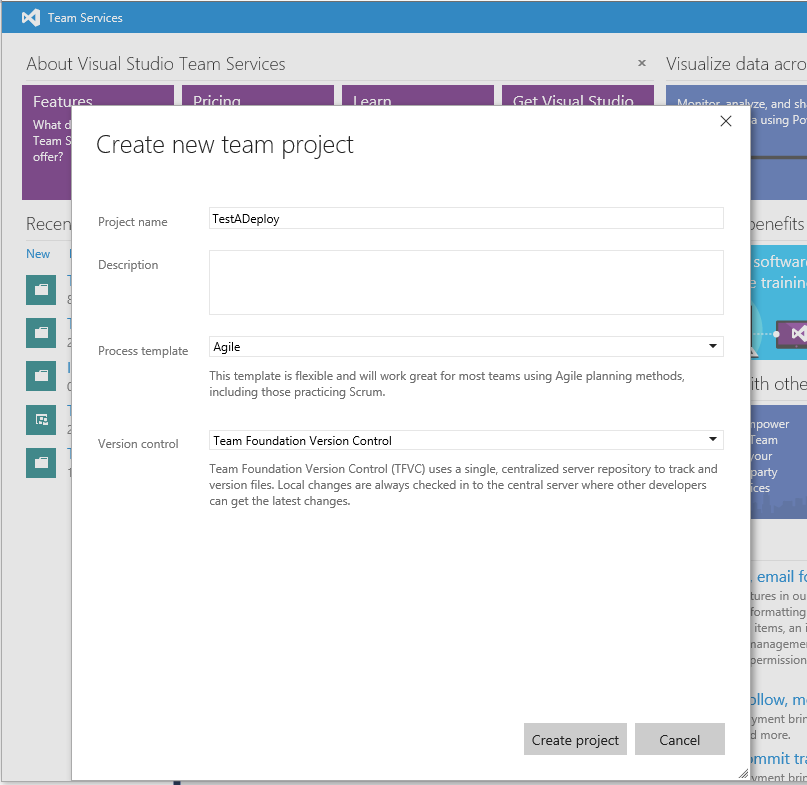
Note that I chose Team Foundation here instead of GitHub. GitHub works just as well, as I played with both. In this example however, I am not even touching Visual Studio, just using the portal tools.
2. Deployment template and parameters
Once your project is created, you can hop over to the "CODE" tab where you can choose your favorite way to integrate your code.
If you choose GitHub for example, you get this page to help you get it all working:

However, as I chose Team Foundation, I can dive straight into adding files:
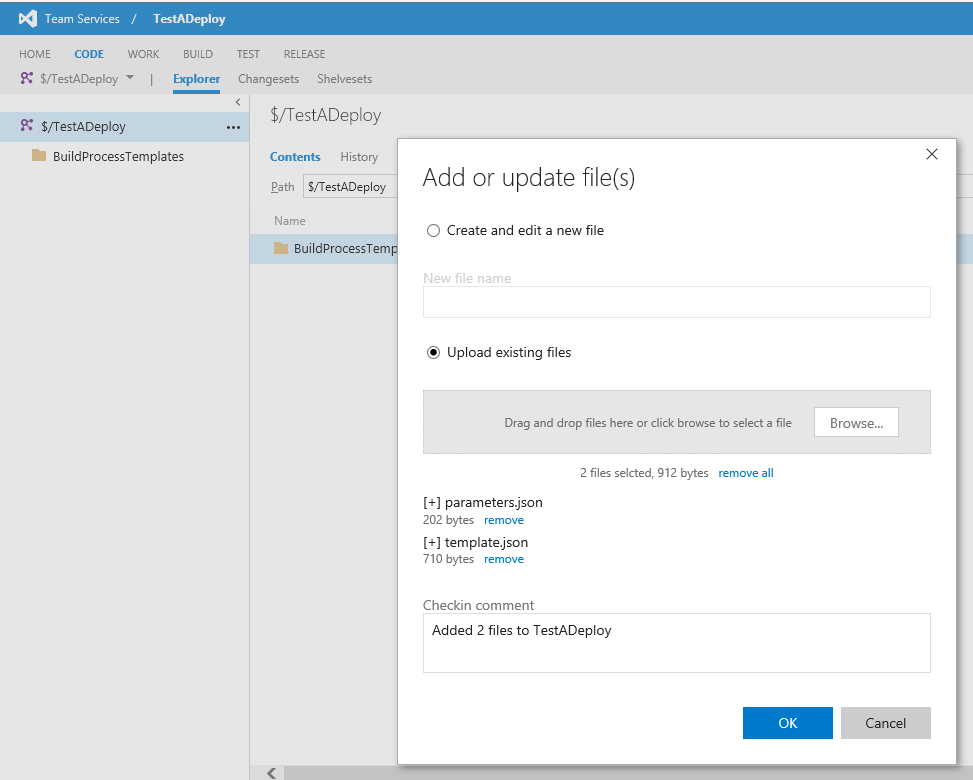
The deployment comprises of just two files.
1) The template file, which defines the Azure resource you are creating (Storage, Server, Service, etc)
2) The parameters file, which defines a specific instance that makes it unique, for example the deployment environment (dev, prod) or client name.
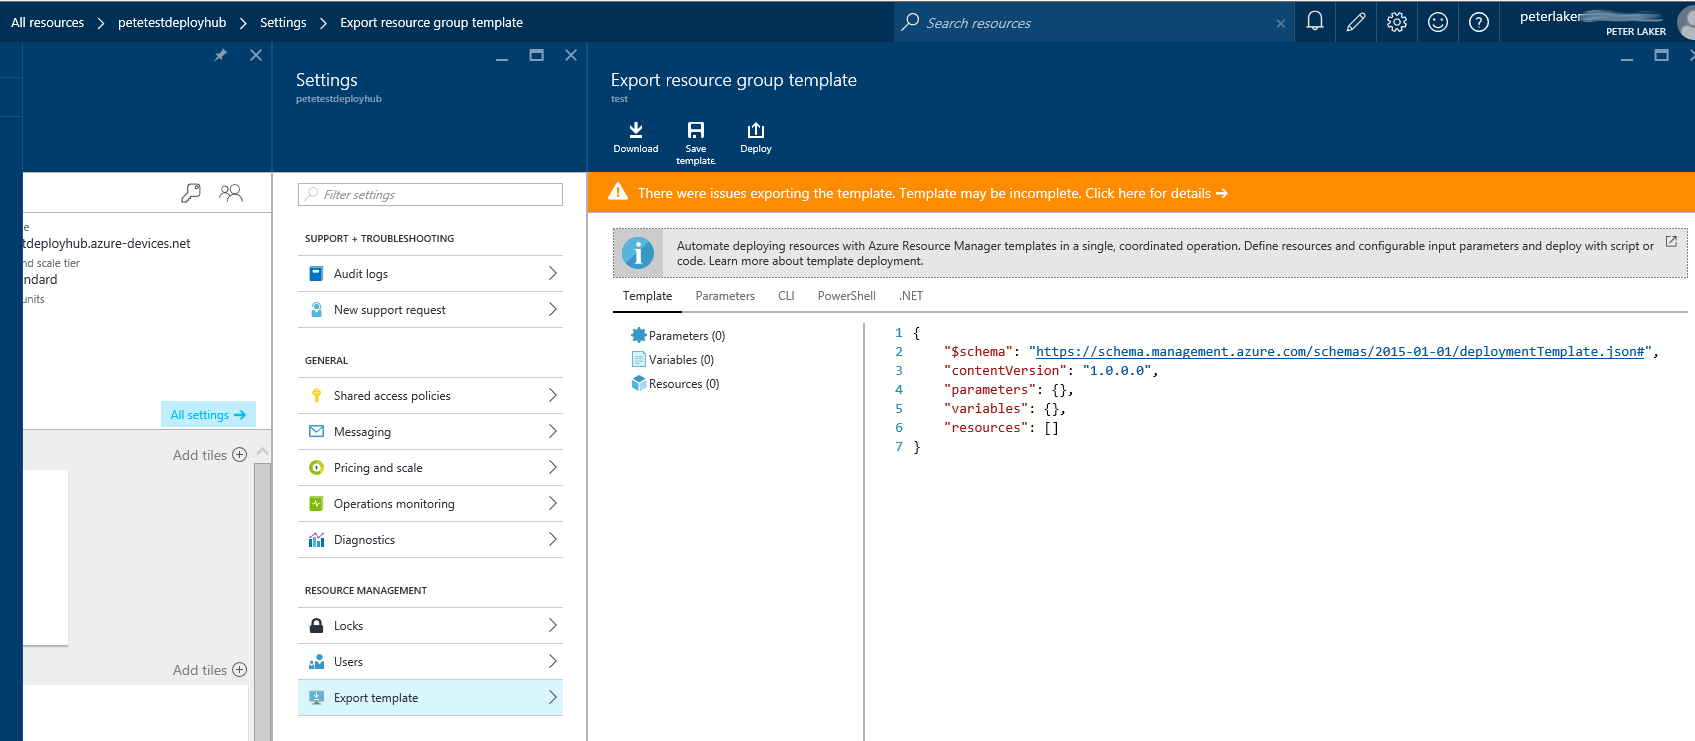
You can find a collection of starter templates here if your resource is listed. Alas, "IoT Hub" is not :/
For most established types of resource, you can simply create the template in the portal, then click on the settings option "Export Template". However, I guess IoT Hub is too new and [at the time of writing] hasn't had the template added yet :/
Luckily, I have already done this kind of thing in C# for a web portal, which auto-creates the IoT Hub, Streaming Analytics and Table Storage. The page I found most useful at that time was this blog by Dominic Betts, which includes an example of the two files needed for IoT Hub.
So I copy them, make my changes and upload them:

Now a quick look at the two files, with some highlighted bits for your attention.
2.1 Template
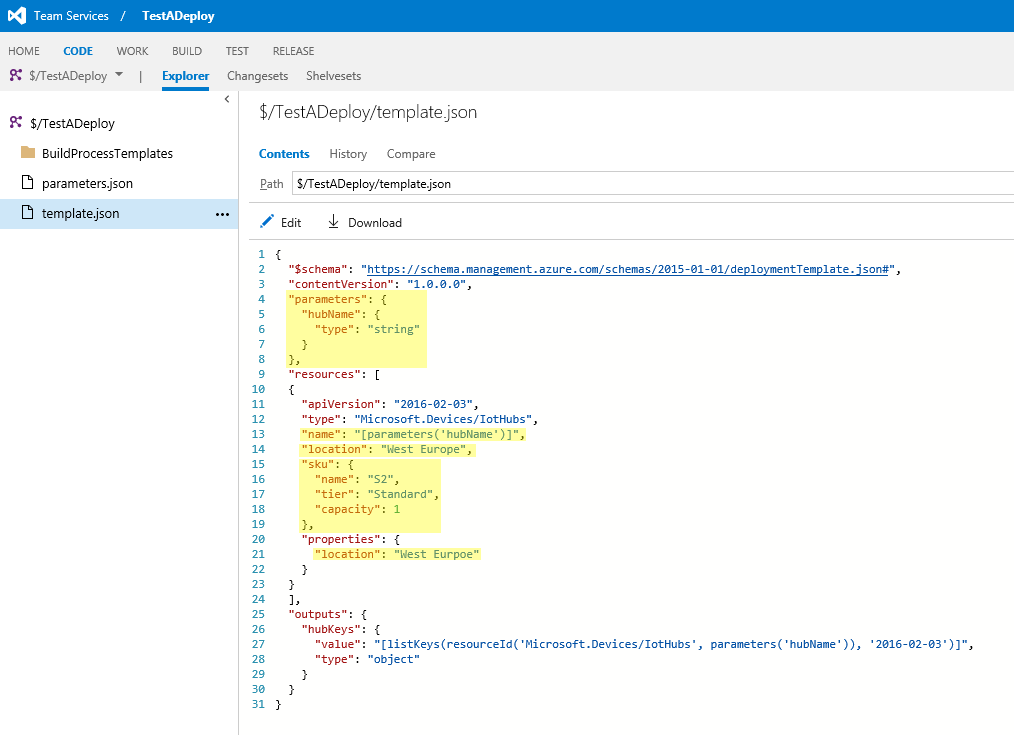
The template file defines the resource and any parameters that are to be broken out to the environment/client specific "parameters" file.
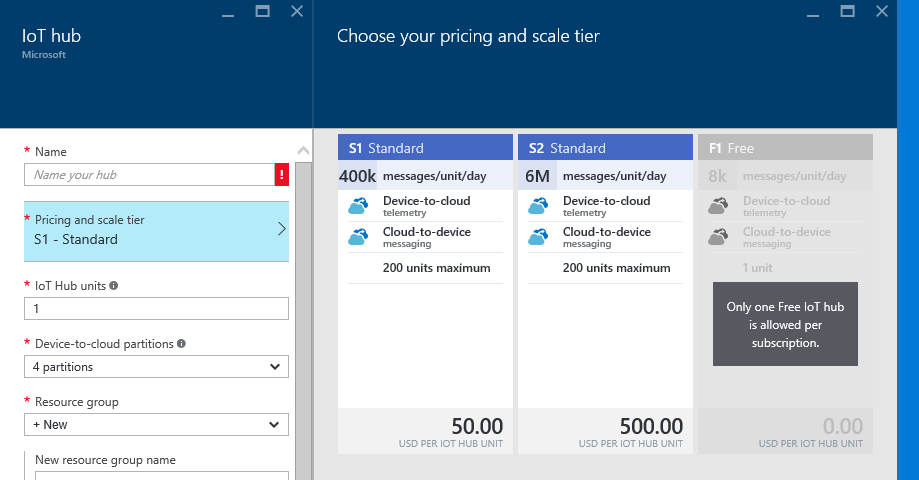
Other bits to watch out for are the tier and location. The tier is the name of the payment plan you choose, as shown below (S1 Standard, S2 Standard, or F1 Free). As you can see below [again at time of writing] you can only have one free IoT Hub per subscription.
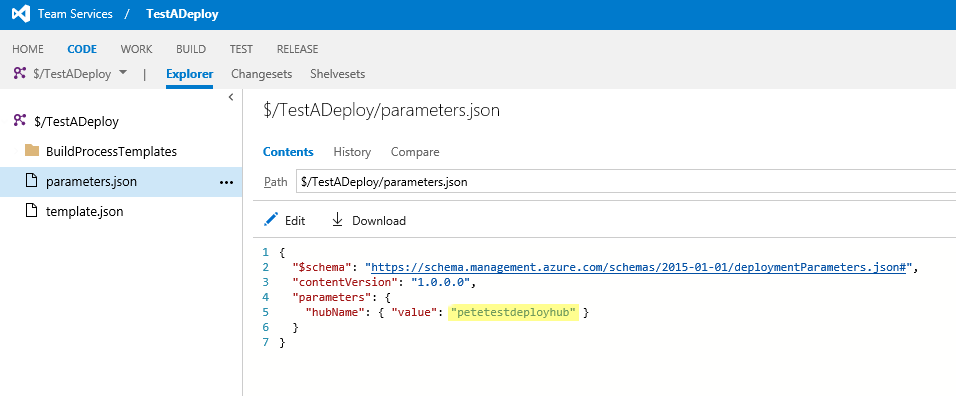
2.2 Parameters
In this example, only the hub name is broken out to the parameters file:
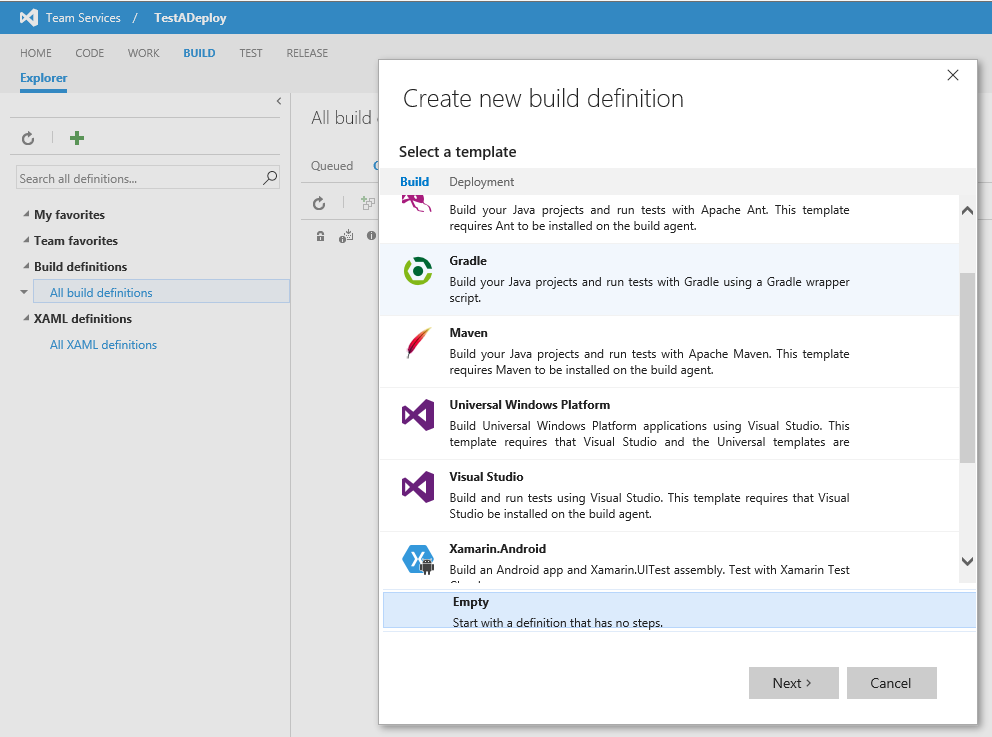
3. Create a build definition
Now we hop over to the "BUILD" tab, to define our build process.
Click the green plus icon and choose an Empty definition. Note how many predefined definitions there are!
As I chose Team Foundation as repository source, that is what I tie this definition into:
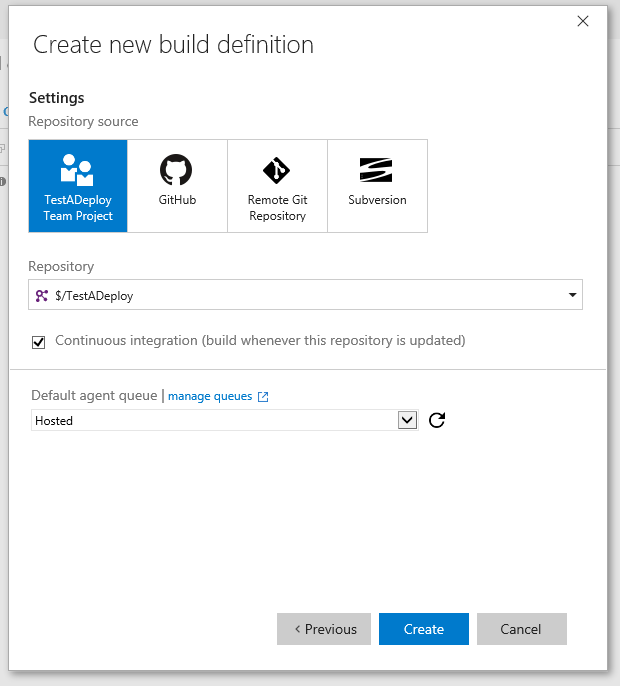
Note I also check the "Continuous integration" box.
Every commit I make will trigger a new deployment job to be queued and run, as shown later.
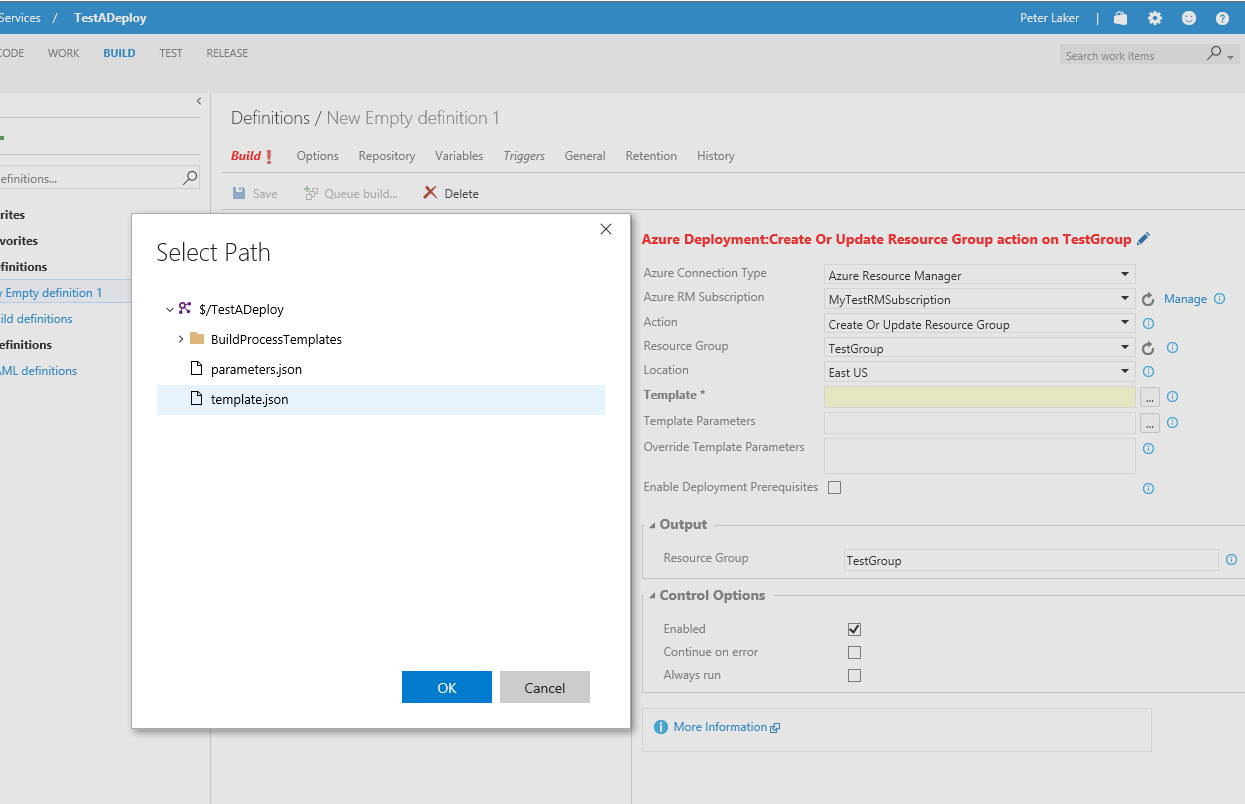
4. Add a deployment task (part 1)
With our empty definition, I click the green add icon and add an Azure Resource Group Deployment task:

Now this is where we start to spin off for a moment, as there are some things we need to have:
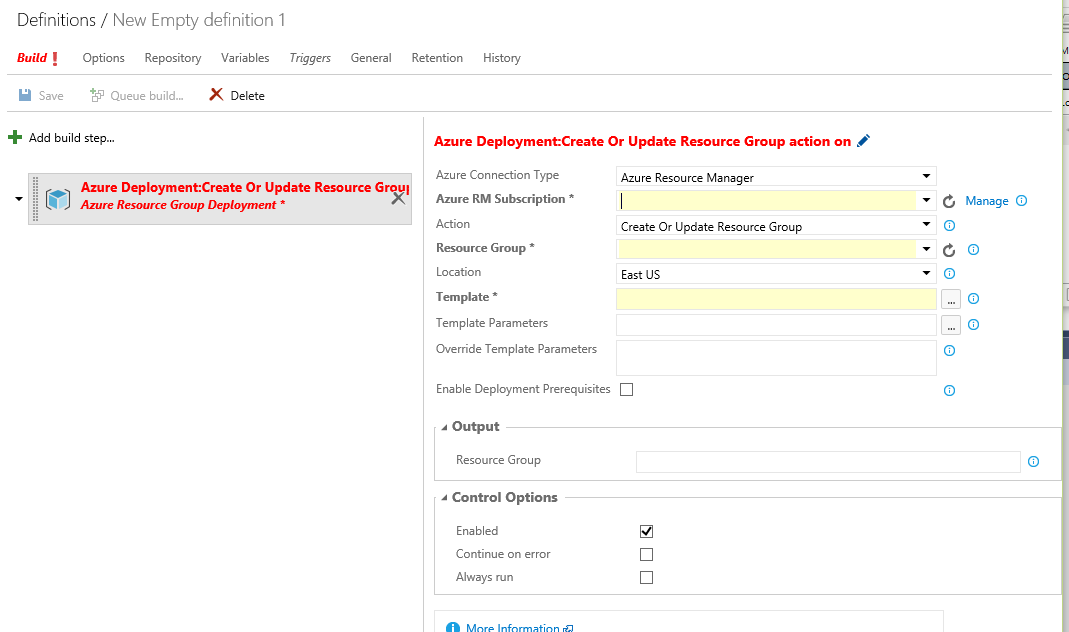
a) You need to have a resource group. Go create one in the portal, then hit the refresh button.
b) You need to specify the "Azure Resource Manager Subscription" (see 5)
c) You need to attach the template and parameters files (see 8)
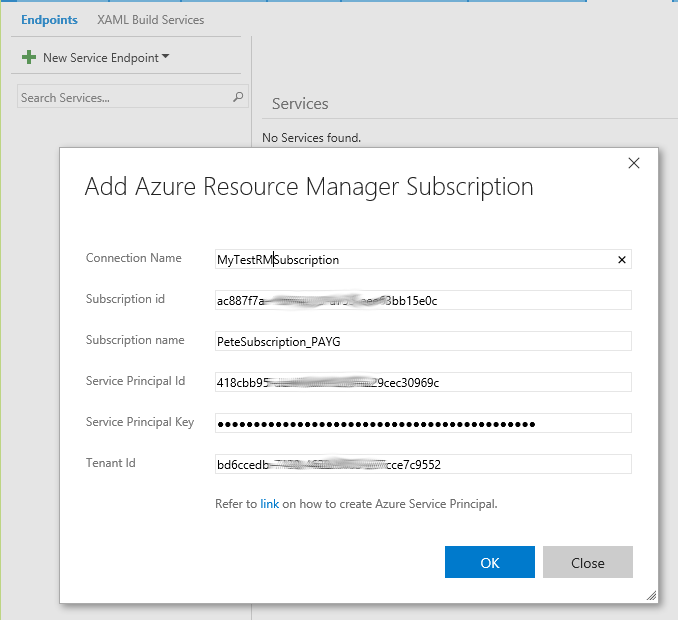
5. Create an Azure Resource Manager (Part 1)
If you study the blog above, the c# version shows how an RM is created on the fly, using a ResourceManagementClient. In this example, we add a resource manager to the project.
In the previous diagram, click on the "manage" link next to "Azure Resource Manager Subscription", which takes us to the control panel for the project. This is where we define the resource management service:
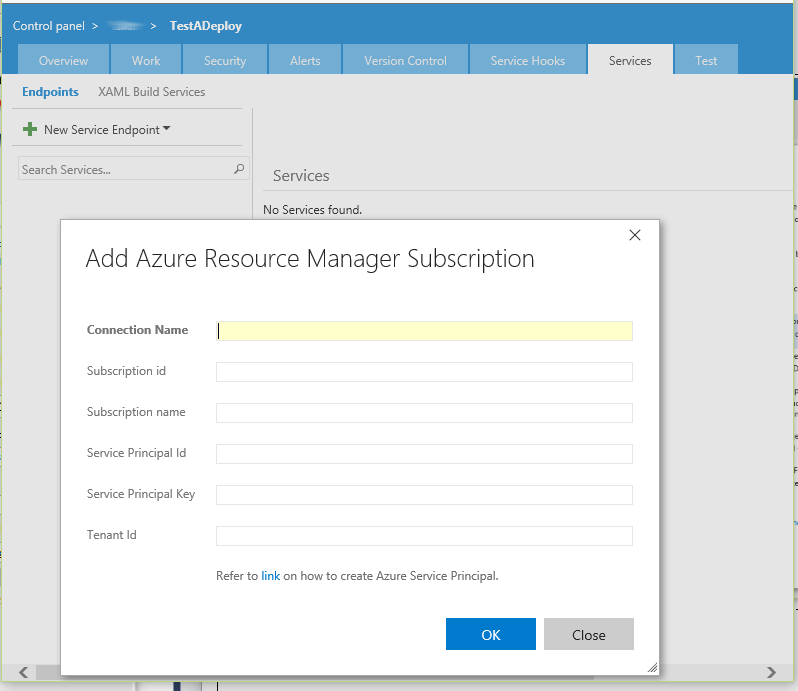
Now you see we have a whole bunch of things we need to find:
a) "Connection Name" can be anything you like.
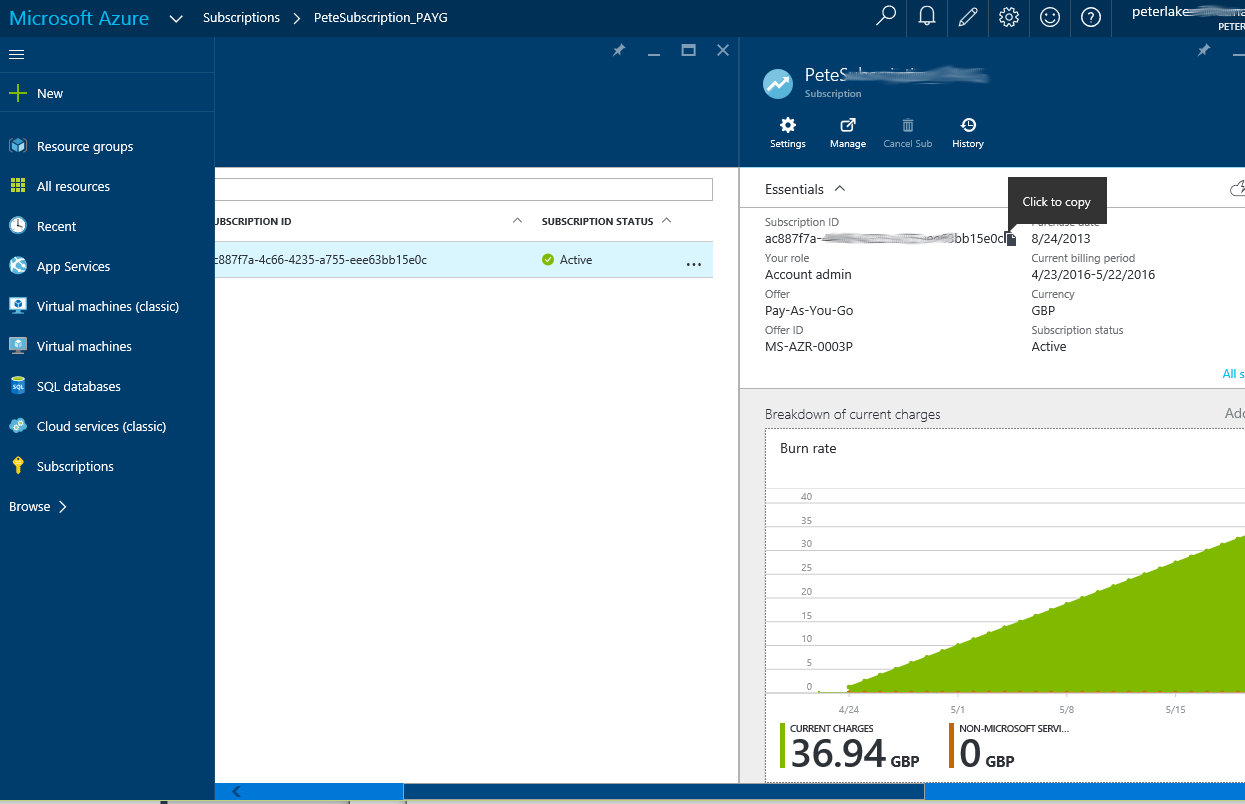
b) "Subscription Id" and "Subscription Name" are easily found on your portal pages. Log in at https://portal.azure.com and click Browse, Subscriptions.
c) "Service Principle Id", "Service Principle Key" and "Tenant Id" are an Azure Active Directory feature, that will be used to access the service. This is a great security feature, allowing you to control what or who can perform a host of actions on your Azure subscription.
So now we need to go to [at time of writing] manage.windowsazure.com (the old portal) to create an "AAD Tenant" for our deploy service to use.
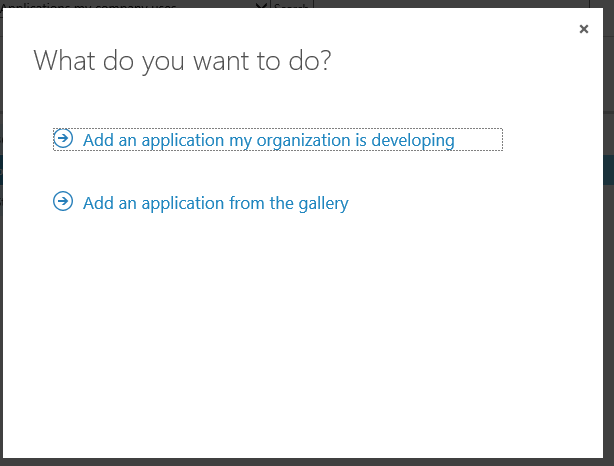
6. Azure Active Directory - New application (Tenant)
You will need to create an Azure Active Directory account on your subscription, if you haven't already done so. Then click the "Applications" tab and add a new entity:
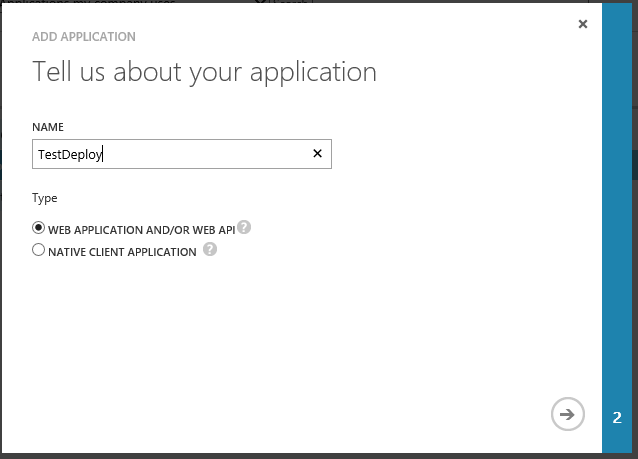
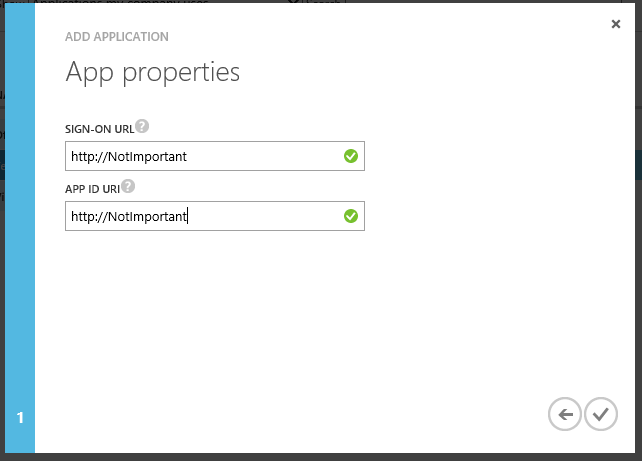
The URL and URI are not important in this example, so put anything in.
Now we get the values we were looking for above.
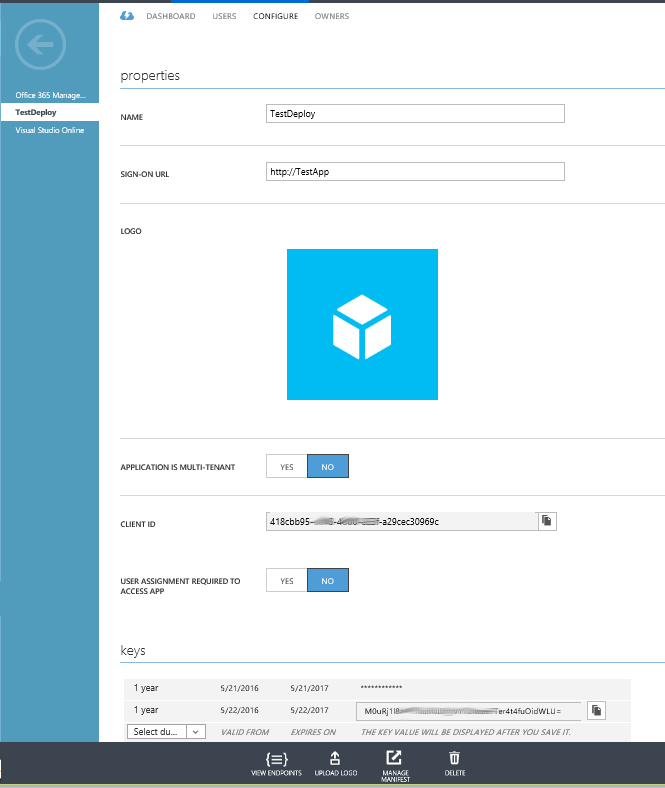
You'll need to generate a key, as shown above.
a) The "Client Id" is the "Service Principle Id"
b) The generated "key" is the "Service Principle Key"
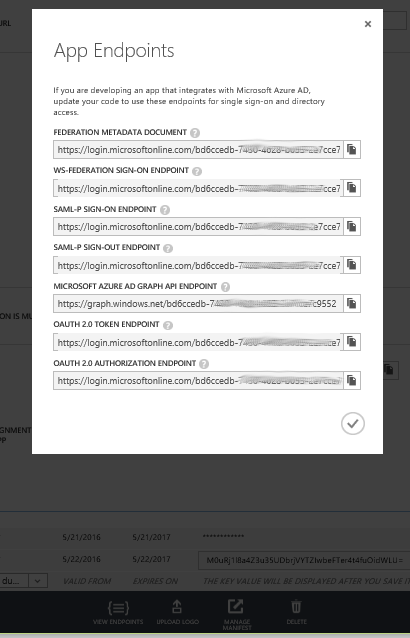
c) You have to click the "VIEW ENDPOINTS" bottom menu button to get to the "Tenant Id", as shown below:
A most important note. You need to give the application permission to access your subscription, or the specific service within.
In this example, I'll simply go back to the portal and select my subscription. Then add the application as a "Contributor" user.

7. Complete Azure Resource Manager (Part 2)
At last we have all the parts we need to create this Service Endpoint:
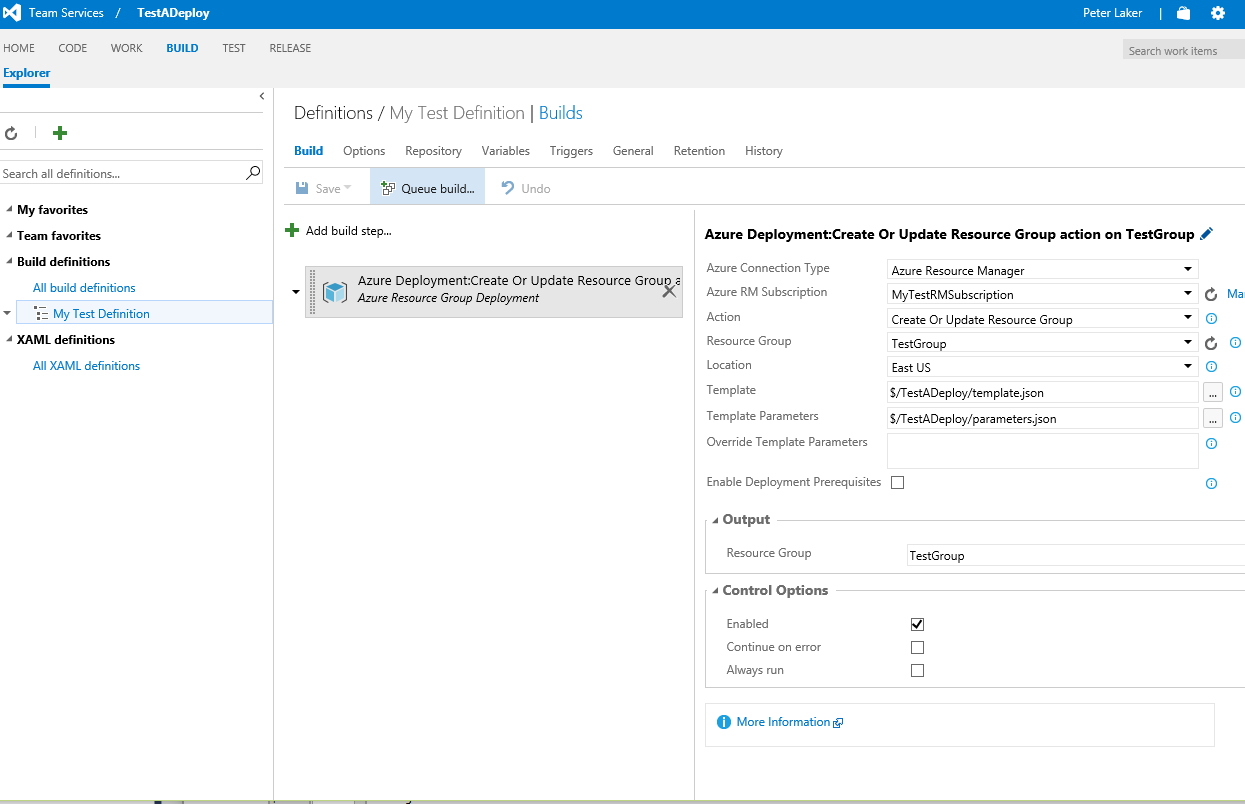
8. Complete deployment task (part 2)
With the service set up, we can tab back to our deployment task and refresh the list, to find our new Azure RM Subscription, as shown below.
Finally, we add the template and parameters files that will be used in the deployment:
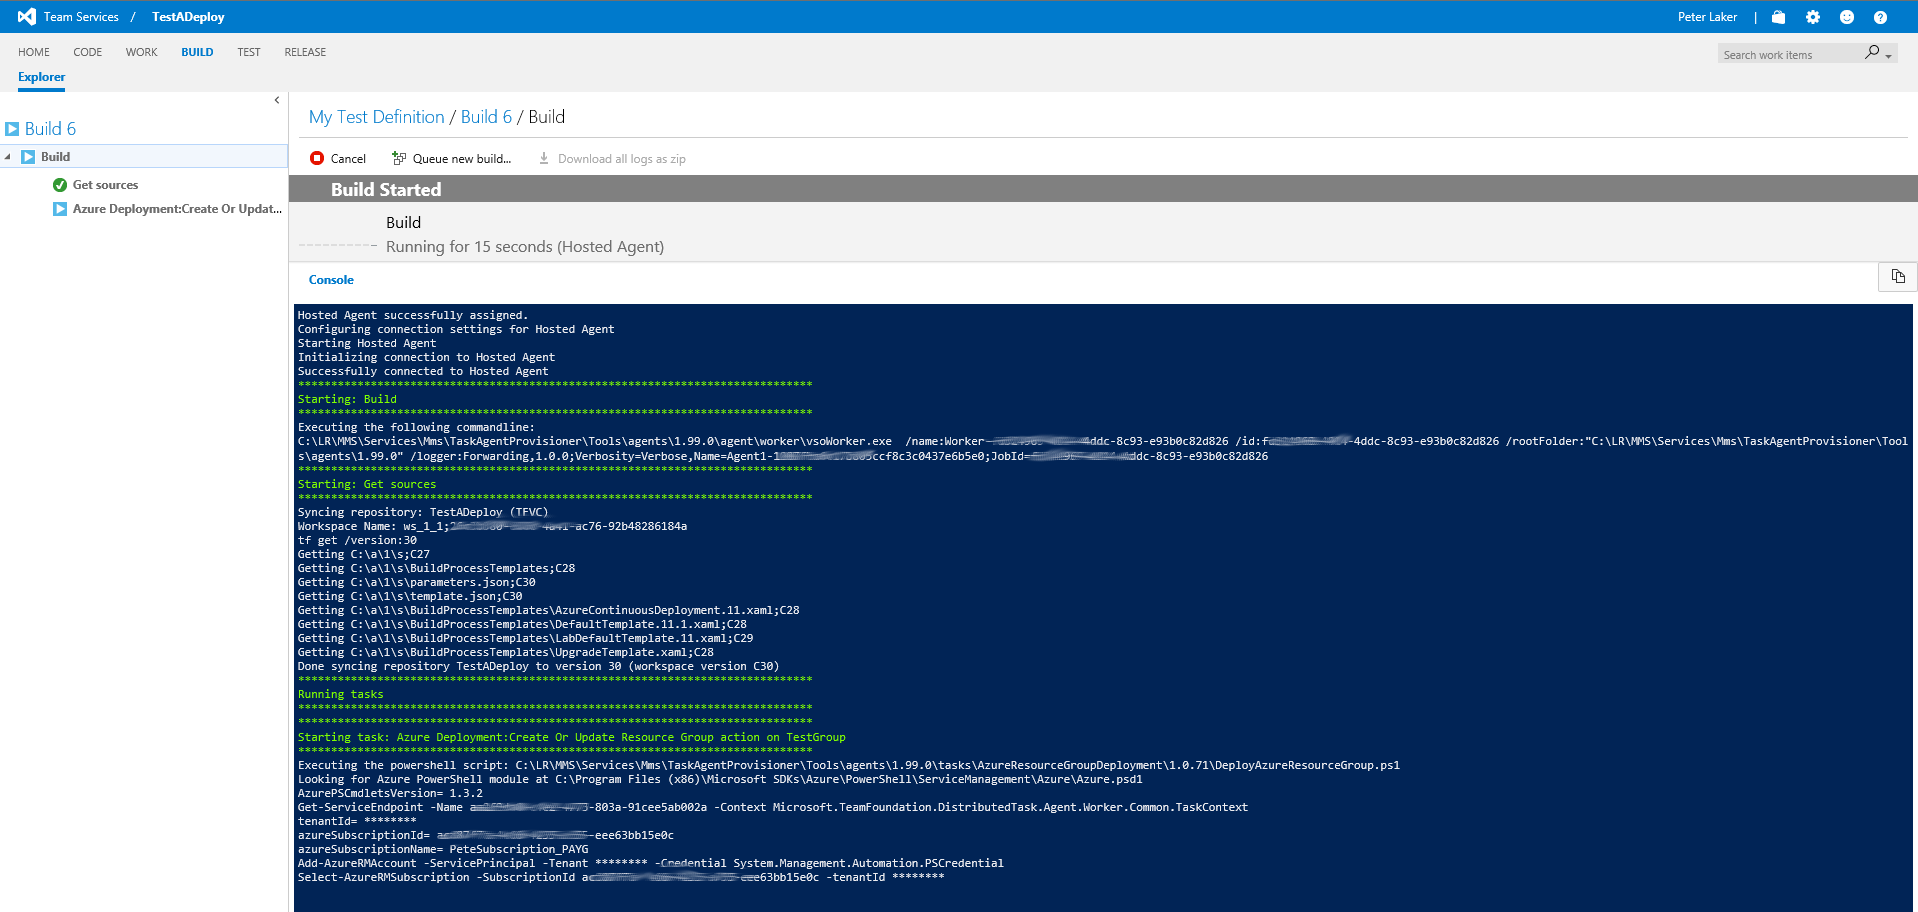
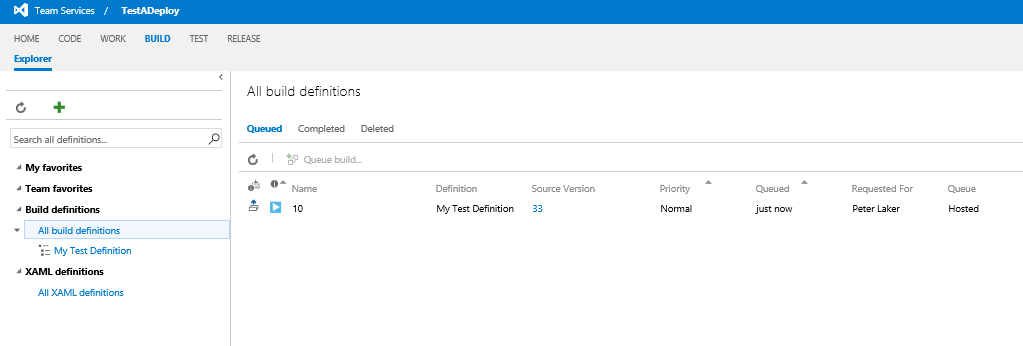
9. Queue and run your build!
At last we see the fruits of our labor!
We can simply press the "Queue build" button to begin the process:
This will then show a console output for the job, as shown below.
Any errors are quite clear, for example if you are trying to deploy to the wrong location, or the hub name already exists.
A reminder that you can click any of these images, for a full size version.
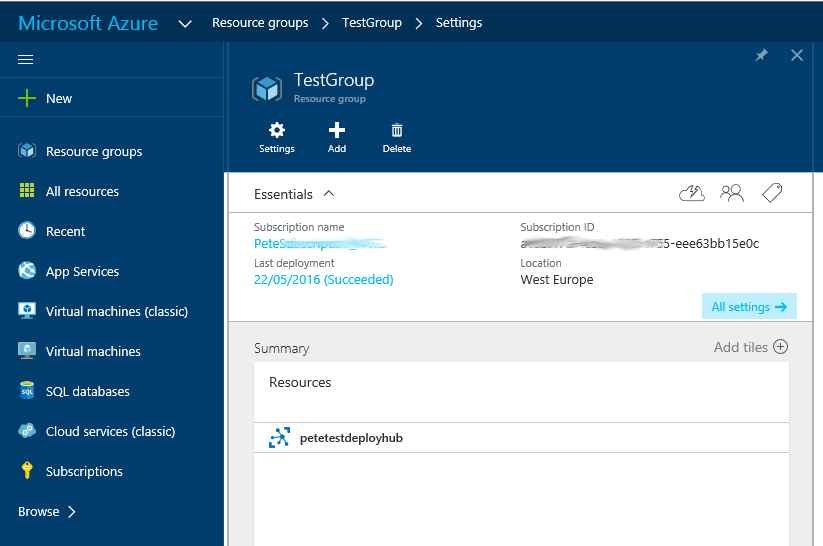
And below is the IoT Hub successfully deployed to my subscription:
10. Continuous integration in action!
Now go back to the "CODE" tab in VSTS and edit the template file.
For example change the tier from "S1" to "S2".
When you save the file, it will trigger a commit, and in turn trigger a build and deploy.
If you click the "Queued" tab, you will find a new build that you did not add manually as before:
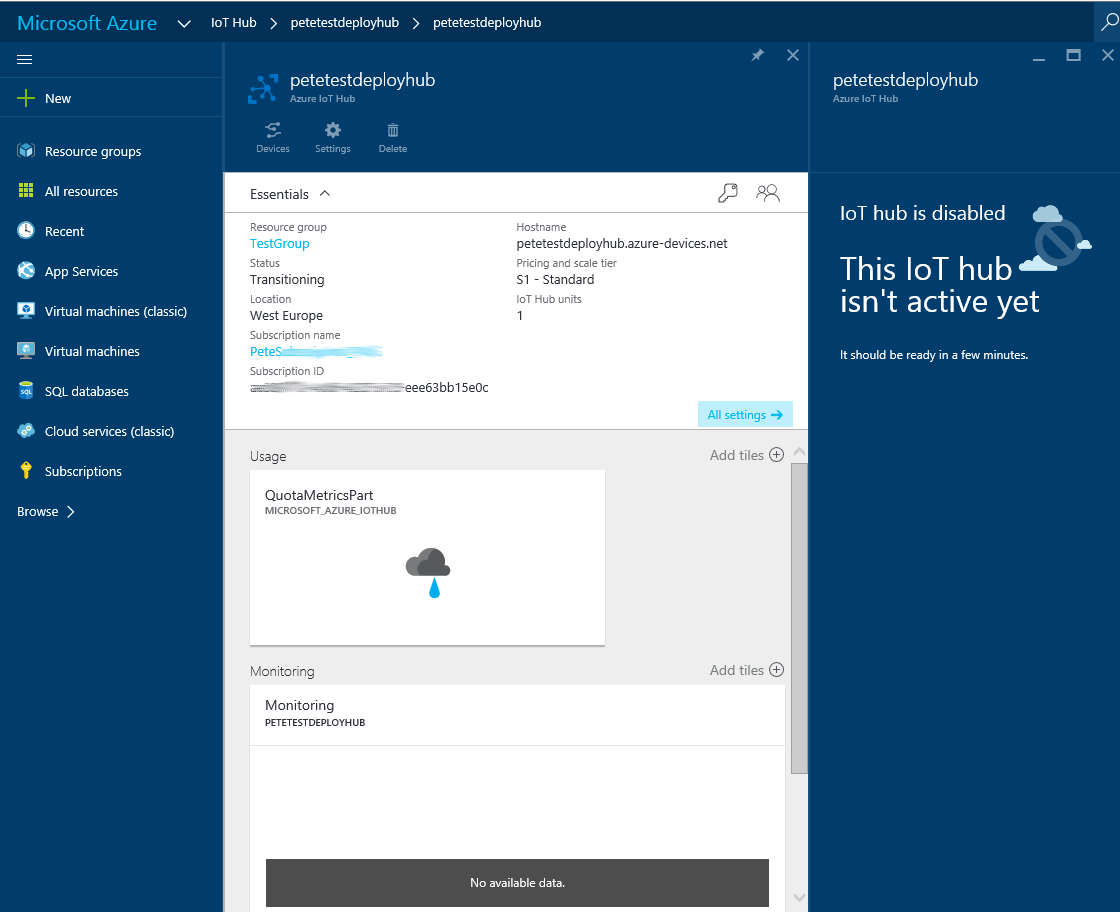
Once the deployment begins, you will also notice in the portal that the status of the IoT Hub has changed to "Transitioning":
Once completed, refresh the page and you should see your changes.
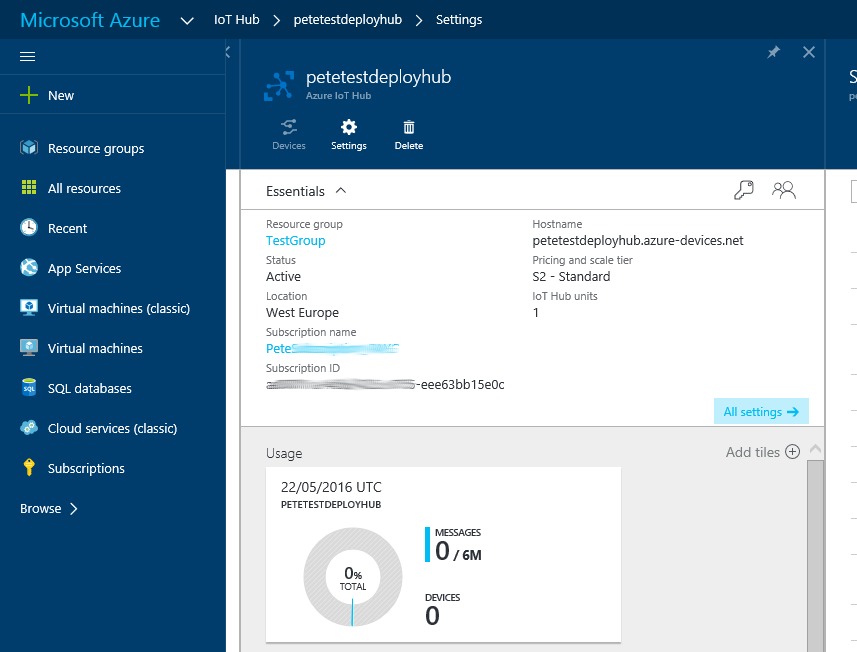
In the image above, it now says "S2" for the service tier.
I hope you found this useful. The whole process was incredibly simple, as you work through it. Most articles I found were slightly out of date, so I hope this gives you some helpful cross-reference.
Best regards,
Peter Laker