MSIX and modification packages: how to improve the DevOps experience for enterprise apps
If you regularly follow the news about the Windows ecosystem, you'll know that one of the biggest new features included in the upcoming Windows 10 Update (codename RS5) is MSIX. MSIX is the new packaging format which aims to replace all the existing installer technologies (like MSI, ClickOnce, etc.) and it's based on the same philosophy of the AppX format. Starting from the next version of Windows 10, you'll be able to generate packages (both for UWP applications or Win32 applications packaged with the Desktop Bridge) using MSIX instead of AppX.
However, MSIX isn't just a rebranding of the AppX format, but there are many new features on the plate. The first one is that the MSIX definition is open source and available on GitHub. As a consequence, Microsoft provides a SDK to pack and unpack MSIX packages for all the major platforms, inlcuding Android, iOS and Linux. Of course, Windows 10 remains the best platform to work with MSIX, since Windows supports it in a native way and it's able to deploy packages just with a double click or with various deployment tools (the Store, Intune, SSCM, etc.)
Another important new feature, which is the one we'll talk about today, is the concept of modification packages. Its purpose is to help IT departments and developers to solve the problem called packaging paralysis, which is greatly described by John Vintzel and Nona Sirakova in their BUILD talked titled MSIX: Inside and Out.
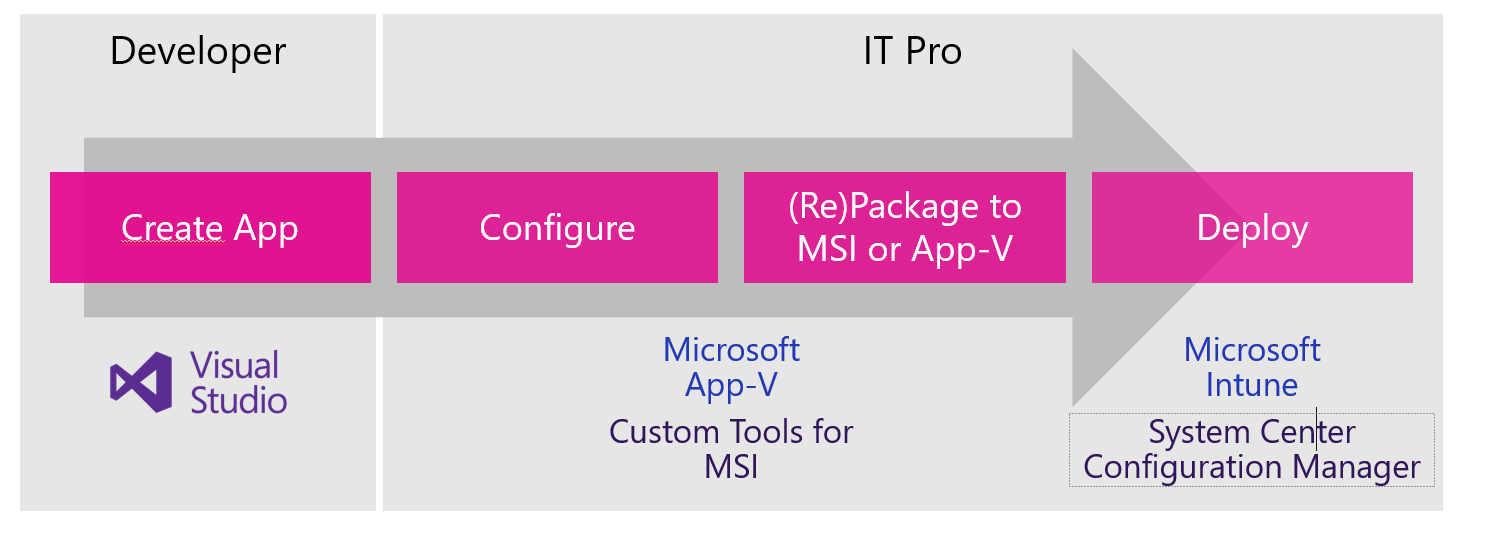
This problem is very common in the enterprise world, where companies acquire a software from an ISV but, before deploying it, they need to customize it. It can be some branding, it can be a special configuration, etc. If we're talking about an internal LOB application, these kind of requests can be handled more easily since the company owns the source code. However, you can't ask the same level of customization when you're purchasing a software from a 3rd party ISV. Think, for example, to very popular applications like Adobe Acrobat. It would simply be impossible, for Adobe, to develop and maintain a custom version for each company who uses it, because we're talking about millions of customers. As such, IT Pros have to take the existing installer of the application and repackage it using technologies like App-V or MSI, which support the opportunity to customize the deployment settings, like disabling the installation of the PDF printer or of the built-in auto-updater.
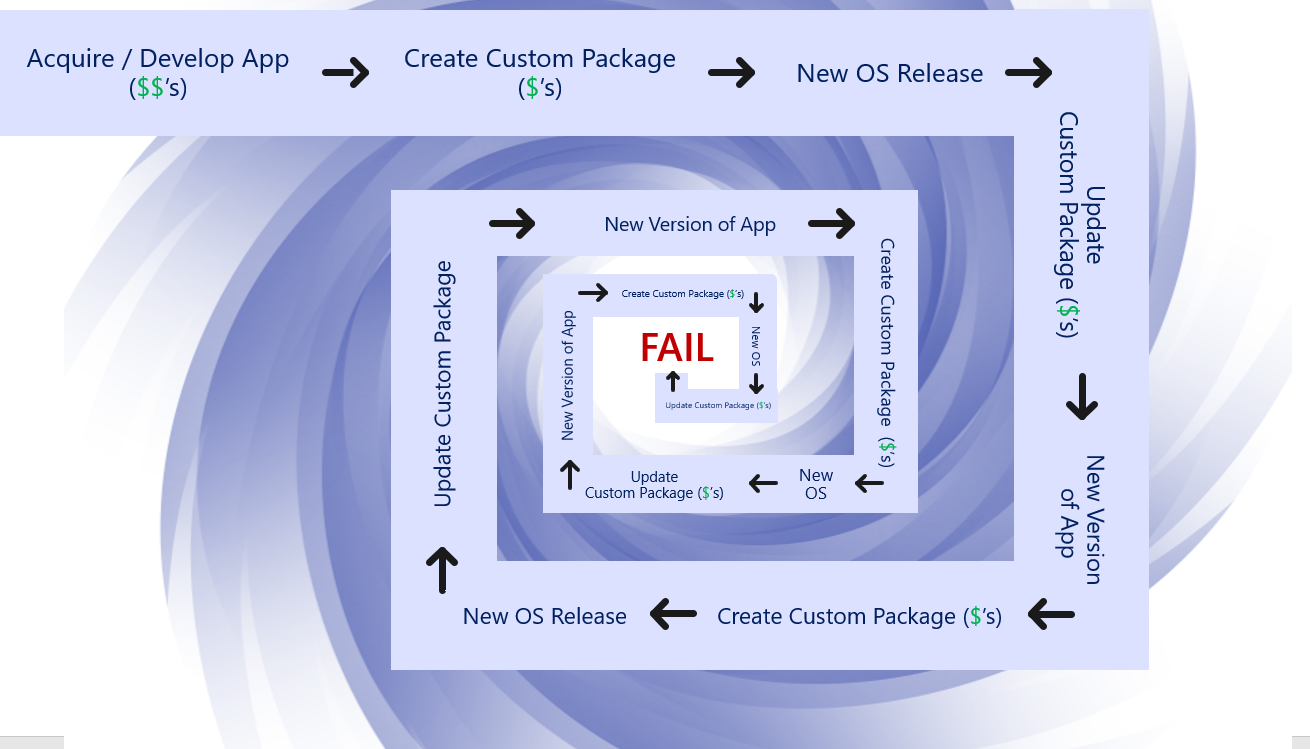
However, the following picture (taken from their slides) explains very well the problem that this approach introduces:
Every time the developer of the application releases a new version, the configuration and repackaging process must be repeated from scratch. This approach leads to the package paralysys we have introduced before. Every time there's the requirement to release a new version of the application (because there's a new version of the OS, because there are some new important features, because it fixes a critical security bug, etc.), the IT Pro department of the company must generate a new customized package starting from the original one. The whole process can be very expensive and, as such, it impacts the ability of the company to be agile and to quickly deploy important updates as soon as they are relased.
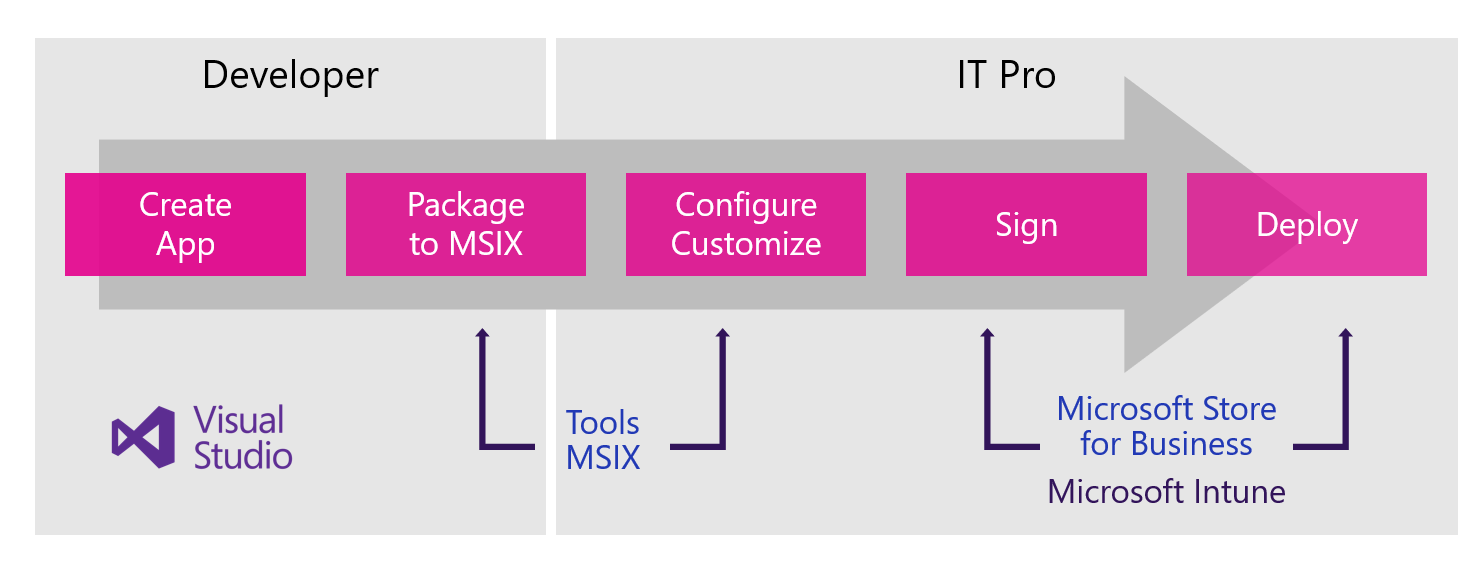
MSIX and modification packages try to solve this problem by decoupling the application from the configuration and the customization. With this approach, the main application and the customization are stored into two different MSIX packages. Instead of having to take each time the installer, customize it and repackage it, you can just deploy the new MSIX provided by the developer with the main application. The same modification package you have built for the previous version will continue to work also with the new one, as long as the developer didn't introduce any breaking change in the way the configuration is defined.
The modification package is a special MSIX package, since it has a dependency from the main application. It can't be installed as a standalone and it doesn't appear as a separate application installed on your system. However, once it's deployed, the application will be able to treat it like if it's part of the main application. Let's understand better how they work.
Using a modification package
Under the hood, modification packages leverage the same infrastructure of optional packages in the UWP ecosystem. Optional packages are a way to add content or native code to an existing application, which is already deployed on the machine. Xbox games on the Microsoft Store heavily leverage this feature to handle add-ons. The main difference between optional packages and modification packages is that the first mainly target developers. Once an optional package has been deployed on the machine, you must use the Windows.ApplicationModel.Package.Current.Dependencies collection to iterate them, access to the built-in files or load code stored inside the package. Modification packages, instead, are a tool mainly for IT Pro departments. If you include some files inside the root of package, in fact, by default they won't be directly accessible from the main Win32 application, but you would need to enhance it with UWP APIs and use the Windows.ApplicationModel.Package class. This is the opposite of one of the main MSIX goals, which is allowing you to repackage your apps without having to change your code. However, if you remember how the Desktop Bridge works, you'll know that a Desktop Bridge package can include some special files (like registry.dat) and a special folder called VFS. When the application tries to read some information from the system registry or from one of the system folders (like C:\Program Files or C:\Windows\System32), the operations are redirected to these special files and folder. Thanks to this approach, you can embed all the dependencies required by your application inside the package and you can solve the DLL hell problem, since you can have packages which embeds different versions of a framework.
Modification packages are able to leverage exaclty this infrastructure. When you add a registry file or a VFS folder inside a modification package, this is merged together at runtime with the content of the main application.
Under the hood, a modification package works in the same way of an optional package. The key is the usage of a special capability inside the manifest called MainPackageDependency. Here is how the manifest of a modification package looks like:
 <?xml version="1.0" encoding="utf-8"?>
<Package xmlns="https://schemas.microsoft.com/appx/manifest/foundation/windows10"
xmlns:desktop="https://schemas.microsoft.com/appx/manifest/desktop/windows10"
xmlns:desktop2="https://schemas.microsoft.com/appx/manifest/desktop/windows10/2"
xmlns:rescap="https://schemas.microsoft.com/appx/manifest/foundation/windows10/restrictedcapabilities"
xmlns:rescap3="https://schemas.microsoft.com/appx/manifest/foundation/windows10/restrictedcapabilities/3"
xmlns:com="https://schemas.microsoft.com/appx/manifest/com/windows10">
  <Identity Name="ModificationPackage-Mod" Publisher="CN=mpagani" Version="1.0.0.0" ProcessorArchitecture="x64" />
  <Properties>
    <DisplayName>Modification Package - Mod</DisplayName>
    <PublisherDisplayName>Matteo Pagani</PublisherDisplayName>
    <Description>Reserved</Description>
    <Logo>Reserved.jpeg</Logo>
  </Properties>
  <Resources>
    <Resource Language="en-us" />
  </Resources>
  <Dependencies>
    <TargetDeviceFamily Name="Windows.Desktop" MinVersion="10.0.14936.0" MaxVersionTested="12.0.0.0" />
    <uap4:MainPackageDependency Name="ModificationPackage" />
  </Dependencies>
</Package>
As you can see, there are two major differences compared to a traditional manifest:
- The usage of the MainPackageDependency capability, which specifies with the Name attribute the identity of the main package
- There isn't any Application node. The package, in fact, doesn't contain any application, so there is no entry point, no tile configuration, etc.
In this post we're going to build a real sample of this approach. We'll build a simple application which reads a text file from the C:\Program Files (x86) folder. Being a system folder, this file will be included in the VFS folder inside the package. However, we won't add it in the MSIX package of the main application, but in a modification package.
In order to follow the tutorial you'll need to use the latest available Windows Insider build since, at the time of writing, RS5 hasn't been officially released it. Additionally, you will need also the latest Windows Insider SDK, which supports building MSIX packages.
Build the sample application
As first step, we're going to build a simple WPF application which we're going to package as MSIX. First let's take a look the UI, which is extremely basic:
 <Window x:Class="ModificationPackage.MainWindow"
        xmlns="https://schemas.microsoft.com/winfx/2006/xaml/presentation"
        xmlns:x="https://schemas.microsoft.com/winfx/2006/xaml"
        xmlns:d="https://schemas.microsoft.com/expression/blend/2008"
        xmlns:mc="https://schemas.openxmlformats.org/markup-compatibility/2006"
        xmlns:local="clr-namespace:ModificationPackage"
        mc:Ignorable="d"
        Title="MainWindow" Height="450" Width="800">
    <StackPanel>
        <Button Content="Read text file" Click="OnReadTextFile" />
        <TextBlock x:Name="FilePath" />
        <TextBlock x:Name="FileContent" />
    </StackPanel>
</Window>
We have just added a button to read the file and a couple of TextBlock controls to display some information. Here is the code invoked when the button is pressed:
 private void OnReadTextFile(object sender, RoutedEventArgs e)
{
    string path = $"{Environment.GetFolderPath(Environment.SpecialFolder.ProgramFilesX86)}\\ModificationPackage\\test.txt";
    FilePath.Text = path;
    if (File.Exists(path))
    {
        string content = File.ReadAllText(path);
        FileContent.Text = content;
    }
    else
    {
        FileContent.Text = "File is missing";
    }
}
By using the .NET APIs we get the path of the system folder C:\Program Files (x86) and we add the location of the file we want to read. The full path of the file will be C:\Program Files (x86)\ModificationPackage\test.txt. After displaying the full path in the UI, we check if fhe file indeed exists. If that's the case, we read its content using the File.ReadAllText() API and we display it in the UI. Otherwise, we communicate to the user that the file doesn't exist.
That's all! Now we're going to generate our MSIX package out from this solution.
Generating the package with the MSIX Packaging Tool
The MSIX Packaging Tool is a new tool built by the Windows team for developers and IT Pro to package their existing applications. In terms of philosophy, it's similar to the Desktop App Converter: the tool will run your installer, it will capture all the changes performed to the file system and to the registry and it will include them inside the package.
However, there are many key differences compared to the Desktop App Converter, like:
- It has a user interface, other than supporting the command line
- It doesn't run inside a container, but on the same machine or in a virtual machine. This means that the setup doesn't have to support a silent installation. You will be able to interact with the installer during the process.
- It's able to capture multiple installations together, so that you can easily include your application's dependencies in the same package.
You can install it from the Microsoft Store.
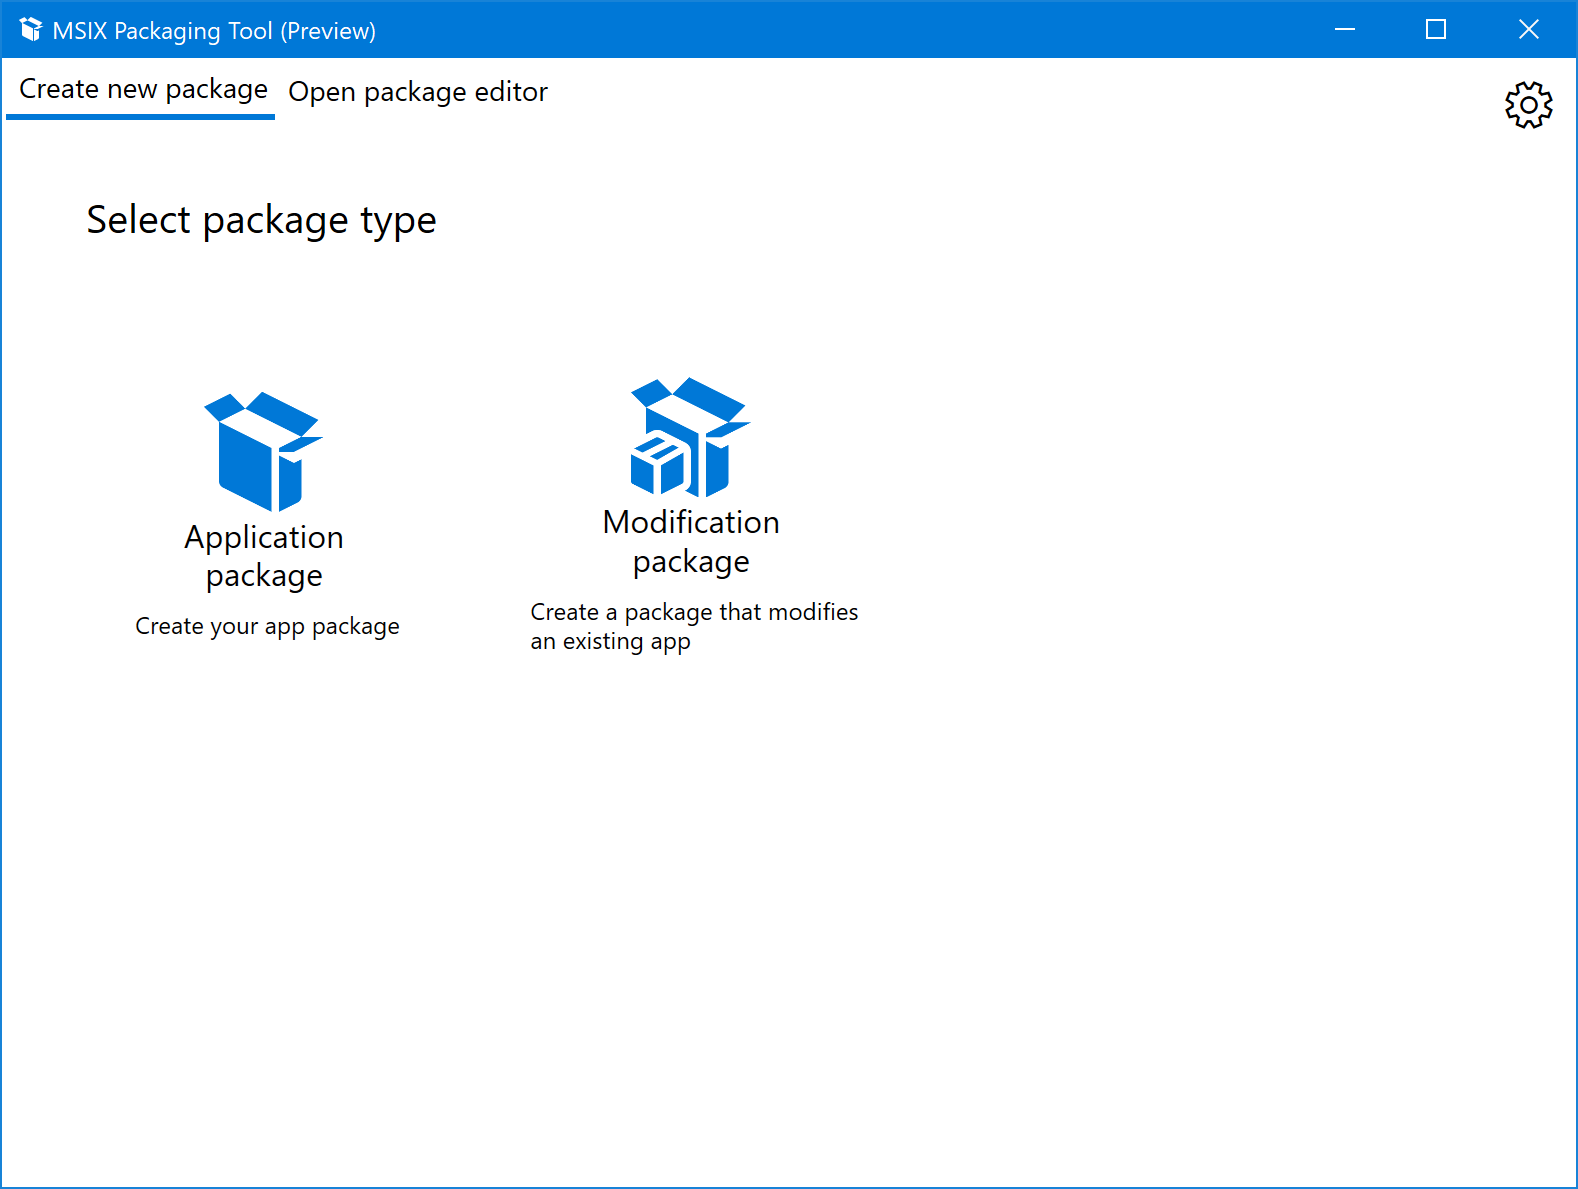
Once you start it, you'll immediately notice that the tool is able to generate an application package or a modification package. The process will be the same, but the output package will be obviously different.
Let's start to generate a package for the main application. We're going to start with a traditional MSI which installs the simple application I'v built in the beginning. I've generated the installer using Advanced Installer, but it could be any installer authoring tool, including ClickOnce which is built-in inside Visual Studio. For your convenience, I've published the installer on GitHub togeteher with everything else required to build this demo.
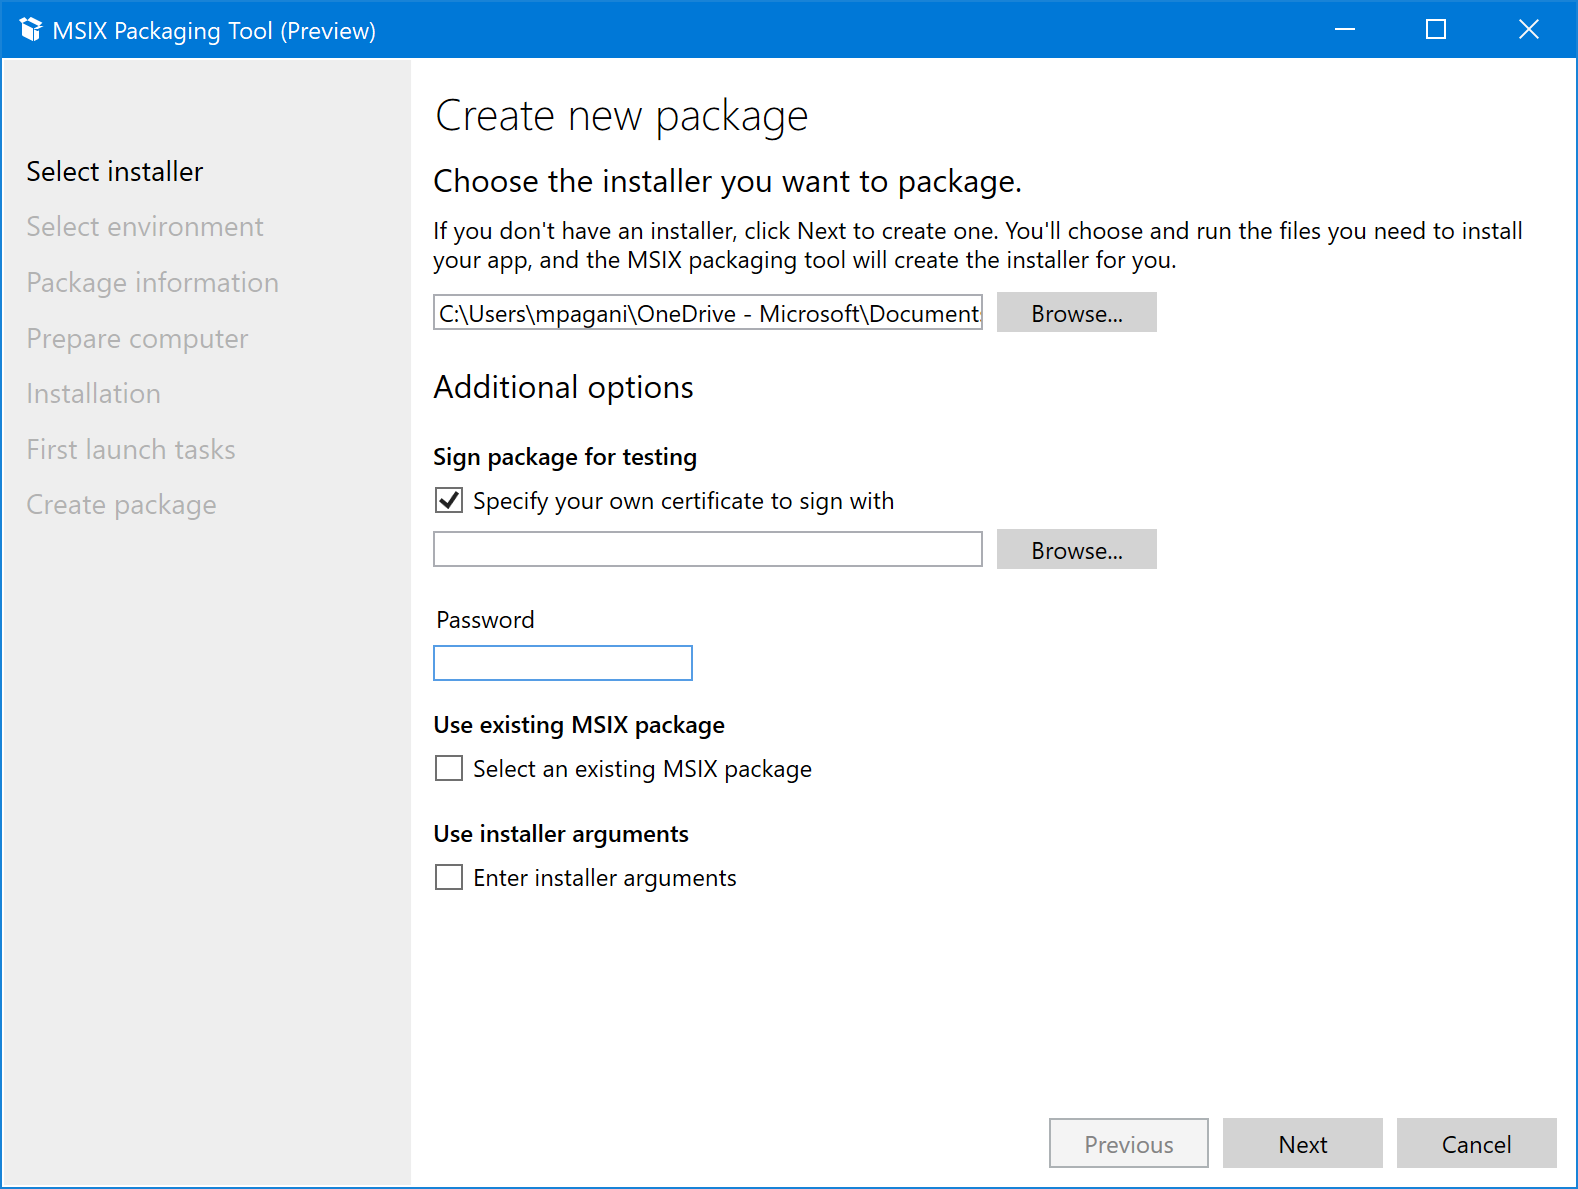
In the first step we're going to choose which is the installer you want to convert. Press the Browse button and locate the MSI file. The other options are optional, but there's an important one which will come useful later. Every package must be signed with a trusted certificate in order to be installed, so it's better to enable the option Specify your certificate to sign with and choose a PFX file you own. In case you don't have it, you can generate a self signed one using the following instructions. Once you enable this option, you will have also a field to specify the certificate's password, if any.
In the next step you can choose if you want to package the application on the current machine or by using a virtual machine. The best approach is to use a clean machine, since it will minimize the chance that other processes can interfere with the captruing process and generate false positives in your package. In my case, I'm using a dedicated RS5 virtual machine for packaging purposes.
The next step is to fill all the information about the package. Most of them will be automatically retrieved from the MSI. There are two key fields here to highlight:
- Publisher name will be already filled with the same subject of the certificate you have picked in the first step. The reason is that these two values must match, otherwise the certificate can't be used to sign the package.
- Package name is the identity of the application. Take note of it, because it must be specified in the MainPackageDependency capability of the modification package we're going to build later.
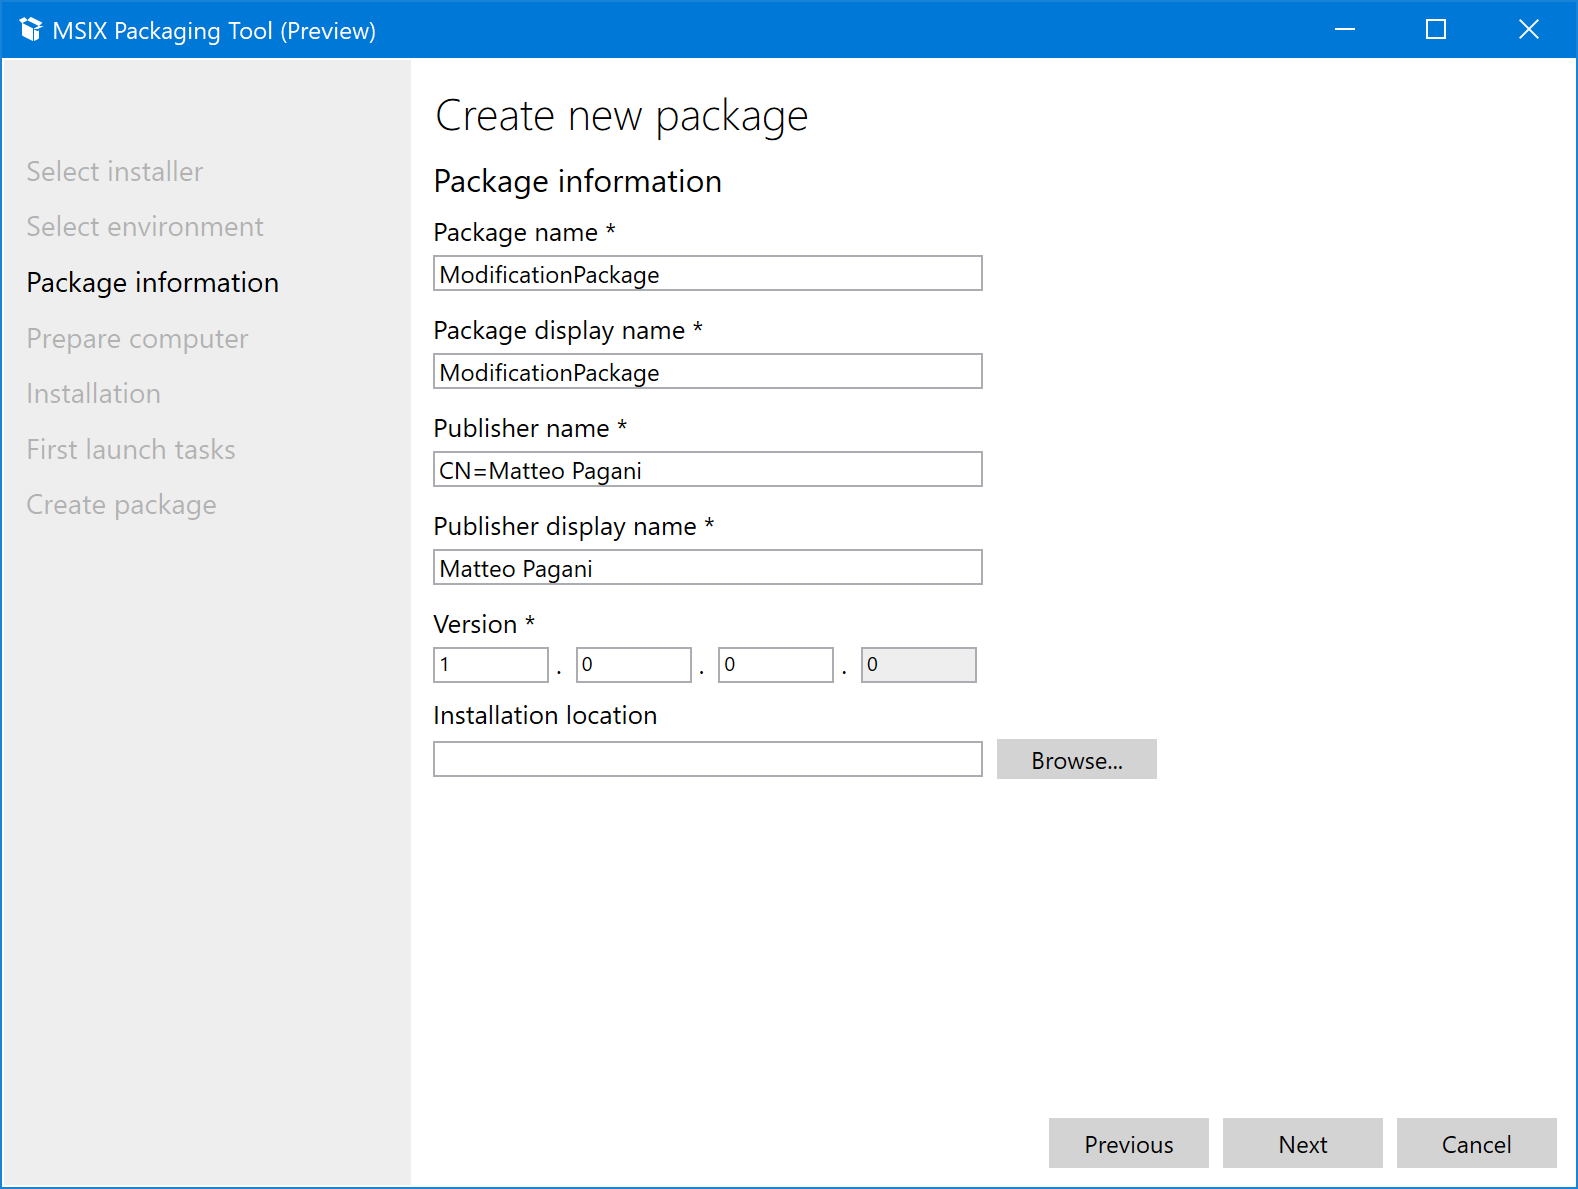
Feel free to ignore the Installation location field. It's required when you have some files which you want to include in your package that must be added manually. This isn't our case, so we can skip it.
In the next step the tool will check that the MSIX Packaging Tool Driver is properly installed; additionally, it will propose you a list of services which are suggested to be turned off, in order to minimize the generation of "noise" inside the package.
Once you press Next the tool will launch your installer and it will monitor the changes. Go on and install the application, like you would do on a regular computer. The tool will understand when the operation is finished and it will prompt you to go on and install other installers, in case you have any dependency. This isn't our case, so we can just press Next.
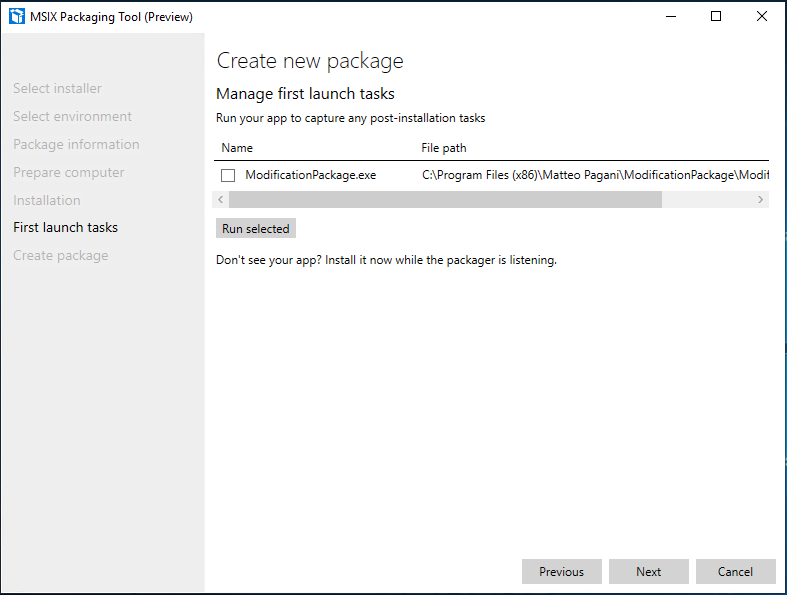
In the next step the tool will detect which is the main entry point of our application, based on the configuration of the MSI (eg: icon created on the Start menu or on the desktop). At this point we will have the option to launch the application, in case there are some additional operations that you must do and you need to capture. This option is especially useful for applications which download some dependencies or additional content the first time they start. Again, this isn't our case, so feel free to just press Next.
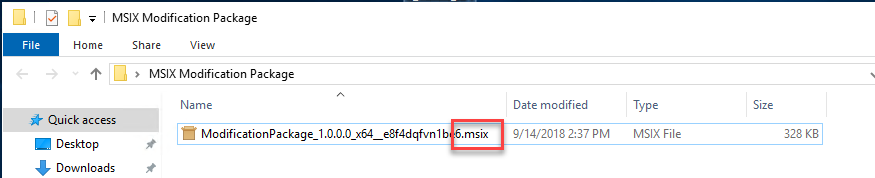
The tool will now stop the monitoring and, as such, it will ask you a confirm. From now on, it won't be able anymore to capture any change in the system. As last step, you will be asked to save the package in any location you want. As you can see, the package is using the new MSIX format instead of the old AppX one.
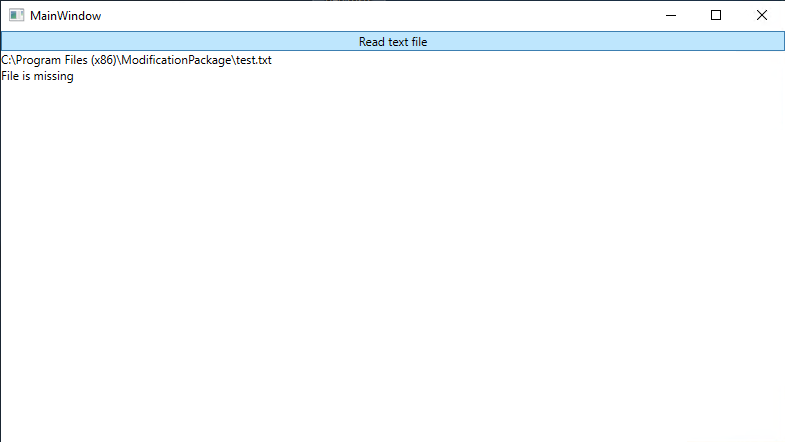
Now just double click on it and press Install. If you have already trusted the certificate used to sign the package, the application will be just installed and you'll be able to launch it. If you press the Read button, at this point, you will see the whole path of the requested file which, however, won't be found, as expected.
Generating the modification package
We're going now to use again the MSIX Packaging Tool but, this time, we will choose the option to create a modification package. We will use, as a starting point, a new MSI. It will be a sort of "fake installer". It won't install a full application, but it will just copy inside the C:\Program Files (x86\ModificationPackage folder a text file called test.txt with some random content.
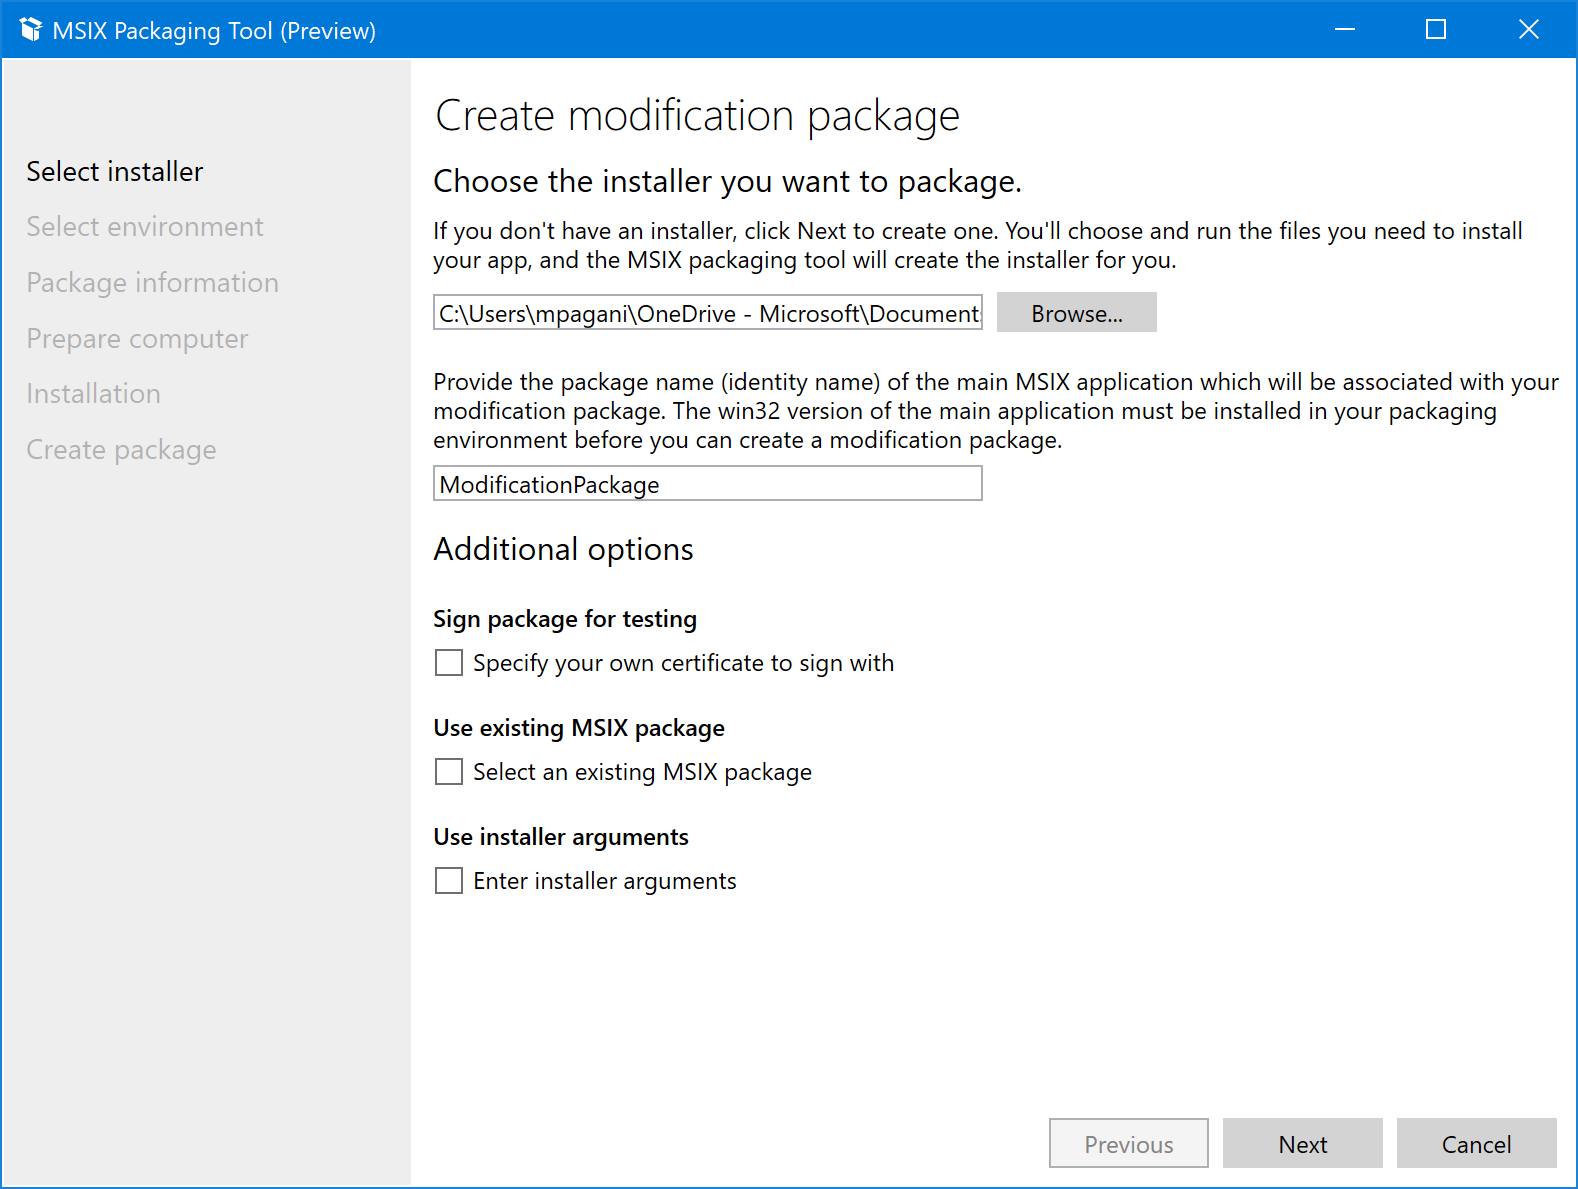
As you can see, the user interface is more or less the same we have seen when we have created the full application package. However, we have a new field to fill this time: the package name of the main application for which we're building the modification package. It's the same one we have set in the previous conversion and that you can find in the manifest file, under Identity -> Name.
<Identity Name="ModificationPackage" Publisher="CN=mpagani" Version="1.0.0.0" ProcessorArchitecture="x64" />
In our case, it's ModificationPackage. Now go on and follow the same process we have followed before, the steps are exactly the same. You're going to install the MSI and the tool, under the hood, will capture all the changes. At the end, you will get another MSIX package.
However, if you open it with a compression tool like 7-Zip, you will notice a couple of important things:
- Since the original MSI copied some files in a system folder (the test.txt file inside C:\Program Files (x86)\ModificationPackage), they have been included in the VFS folder and not in the root of the package or in a generic subfolder. As you can see in the screenshot below, the text file has been placed inside VFS/ProgramFilesX86/ModificationPackage. In the documentation you can find the full mapping of system folders with VFS folders.

- If you open the manifest file with a text editor, you will see that it has the same look & feel of the one we have seen in the beginning. It will include a special capability called MainPackageDependency with, as Name, ModificationPackage (the identity of the main application); plus, the Application node will be missing.
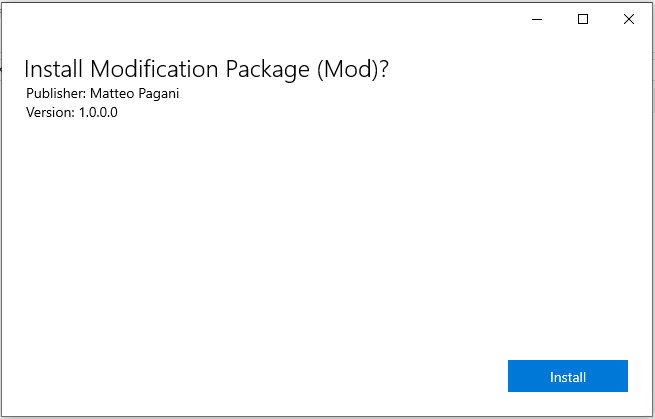
Now double click on the MSIX you have just generated. You will immediately notice a small difference compared to a traditional package: you will have the option to install it, but not to launch it at the end of the deployment.
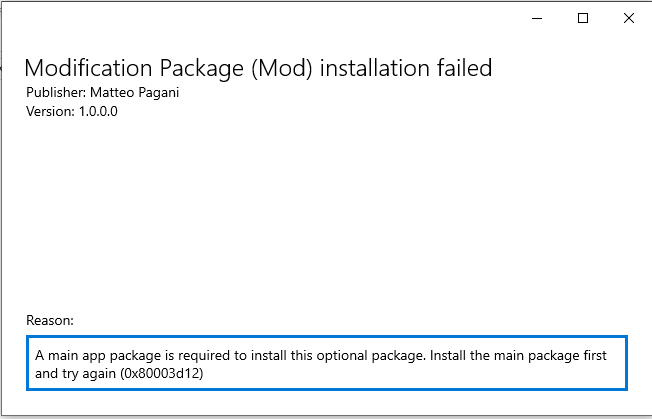
Go on and install it. The procedure will complete only if you already have the main application installed from the previous step, otherwise you will get the following error:
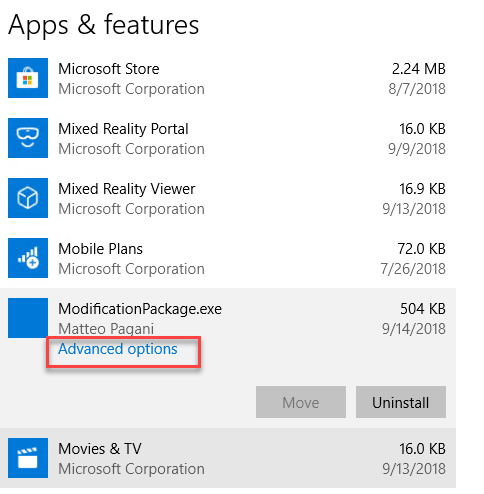
Once the deployment is completed, you will see another big difference: you won't find any new application in the Start menu. And if you right click on the Start menu and you choose Apps & Features, you won't find the package in the list. To find it, you will need to identify the main application and click on Advanced options:
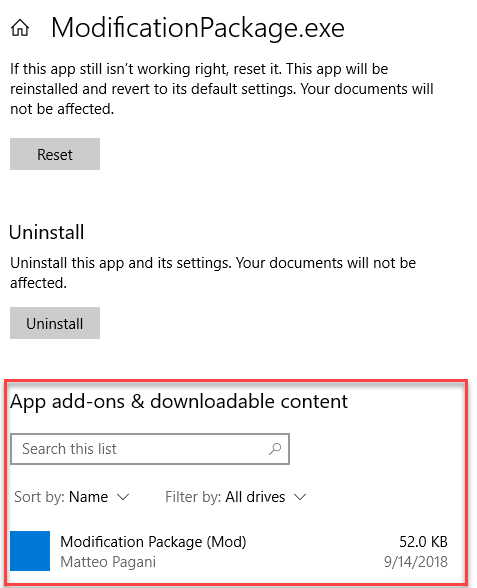
Click on it and scroll down until you see section called App add-ons and downloadable content. You'll find your modification package listed there:
In this section you can click on the package and you can install it, if you want. Otherwise, when you're going to remove the main application, also all the related modification packages will be removed.
We can also verify that the two packages are indeed indepedent. The easiest way is to open a PowerShell prompt and type the command Get-AppxPackage. It will list all the packages on your machine and, since they are ordered from the oldest to the most recent, the last one you see should be application you have just installed:
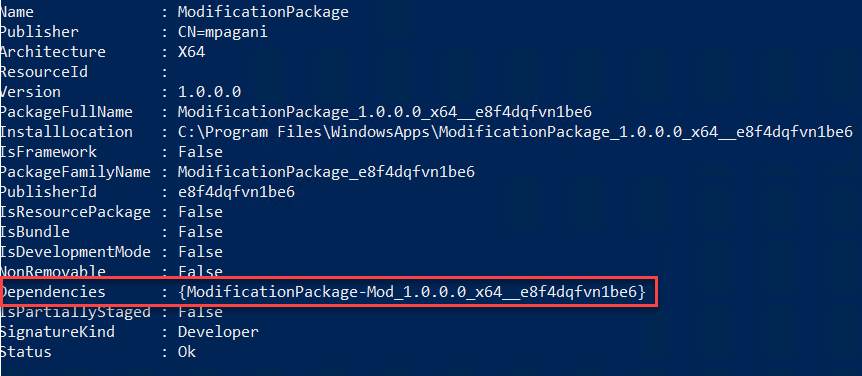
As you can see, the Dependencies section contains the list of package family names of all the modification packages you have installed. Take a look at the InstallLocation property: it's the path where the application has been deployed. Copy and paste it in File Explorer: you will notice how there's no trace of the path VFS/ProgramFilesX86/ModificationPackage.
However, try now to open the path C:\Program Files\WindowsApps followed by the identifier of the modification package you see in the Dependencies section:

This time we have indeed a test.txt file inside the VFS/ProgramFilesX86/ModificationPackage. However, as you can see, it isn't in the same folder of the main application. From a file system point of view, the modification package is indeed a different package, with a different identity.
However, what happens now when we open the application and we press the button to read the text file we've just seen?
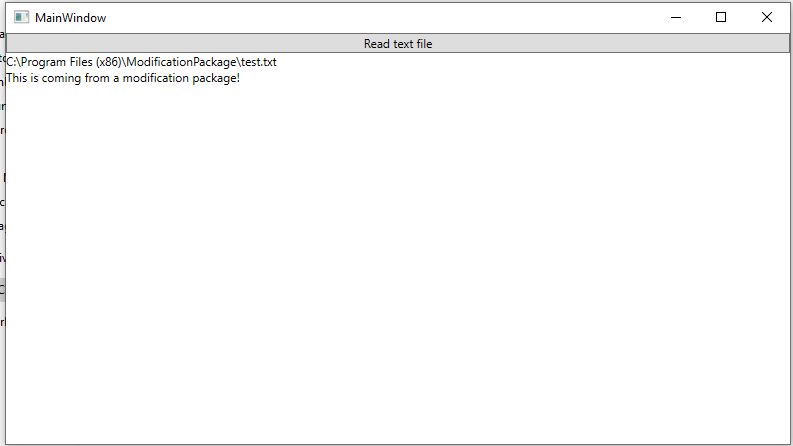
It works! The file is there! This is happening because Windows is merging the VFS folder of the main package with the VFS folder of the modification package. As such, when the WPF application looks for the file in the path C:\Program Files (x86)\ModificationPackage\test.txt, Windows redirects it to the VFS folder (being Program Files (x86) a system folder). However, since our application has also a modification package, Windows doesn't look only in the VFS folder of the main app, but also inside every modification package.
If you now try to generate a new package for the main application with a higher version number (let's say, 1.0.1.0) and you deploy it, the application will continue to read the text file without problems. This happens because the modification package is independent from the main application, so it survives every application's upgrade.
Creating a modification package with Advanced Installer
The example we have seen isn't fully realistic. We have built a modification package starting from a MSI, but this is rarely the case. Customizations are usually registry keys, configuration files, assets, etc. It isn't another application with binaries, DLLs, etc. As such, it's unlikely that a traditional installer tecnology would be used for this scenario.
The alternative would have been building the modification package manually. We can create a folder, copy all the required files inside the right VFS directories and then, using the makeappx tool included in the Windows SDK, generate the MSIX package. The process works perfectly, but it's really tedious: you need to use command line tools; you must manually write the manifest, which may easily lead to errors; you must sign the package manually; etc.
Luckily, Advanced Installer comes to the rescue! The last version (15.3) of the popular installer authoring tools has added support for creating modification packages. You will find the option under the Windows Store & Mobile section:
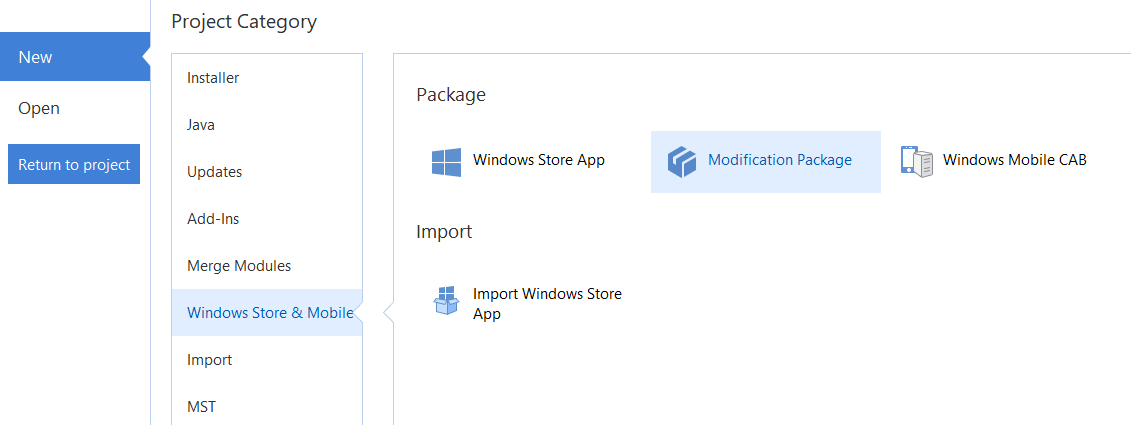
Once you select the option, the first section you will see of the project is the one called Package Information. Here you will have the option to fill all the required information for the manifest:
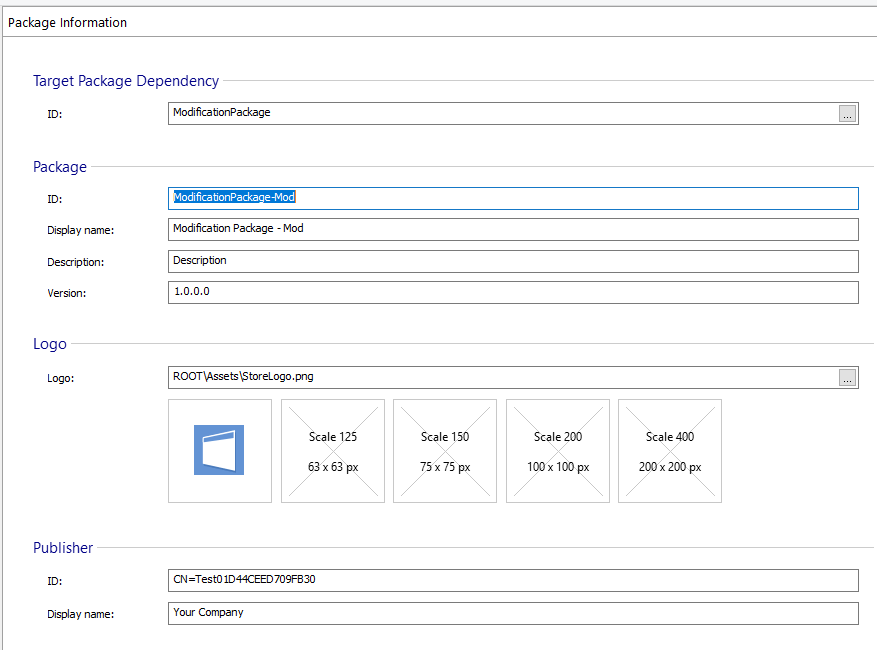
As you can see, other than the standard info (id, display name, publisher name, etc.), you have also a field called Target Package Dependency where you must specify the id of the main application. If you don't remember it, you can just browse to the MSIX package of the main application and Advanced Installer will retrieve it for you.
Then you can move to the Files and Folders section, if you need to add any file to the package, or to the Registry one, if you need to add any registry keys. For example, here is how the modification package I've previously built with the MSI looks like:
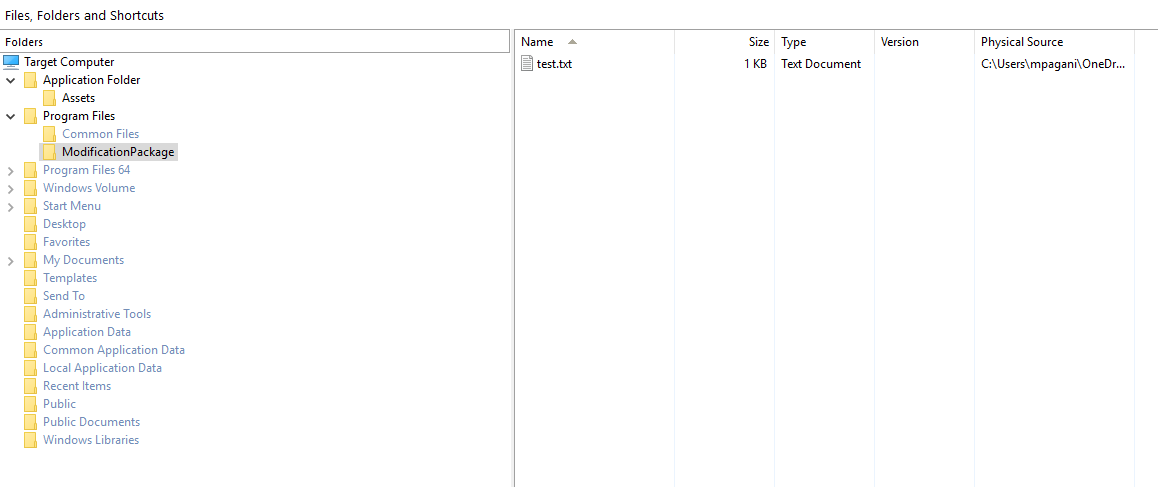
I've added the test.txt file under Program Files/ModificationPackage, which will generate the corresponding mapping under the VFS folder inside the package.
That's it. Now you can just move to the Build tab, set an output folder and the file name, and press the Build button in the ribbon to generate the MSIX package.

You can also customize the target platforms, but right now the choice doesn't offer many options. Modification packages are supported only on Windows 10 desktop devices and they require, as minimum version, Windows 10 1809 (RS5).
Wrapping up
In this post we have seen how, thanks to MSIX Modification Packages, you can decouple the main application from its customizations. This is a key feature for enterprise which, otherwise, they need to repackage internal applications every time there's a new version to deploy in the company. This process, currenly, is very expensive and requires lot of time. As a consequence, the update process is very slow and it can take months before users gets access to the last version of an application they maybe use everyday.
Modification packages are indepedent, but their content can be leveraged transparently by the main application since the VFS and the registry keys are merged together at runtime.
We have seen how we can create a modification package with the new MSIX Packaging Tool or with Advanced Installer. The first one is a good option when you have a dedicated installer for customizations, while the second one is great when you have instead just some files or registry keys which you want to be leveraged by the main application.
You can find the sample instalelrs and projects I've used in this post on GitHub, as usual.
Happy packaging!